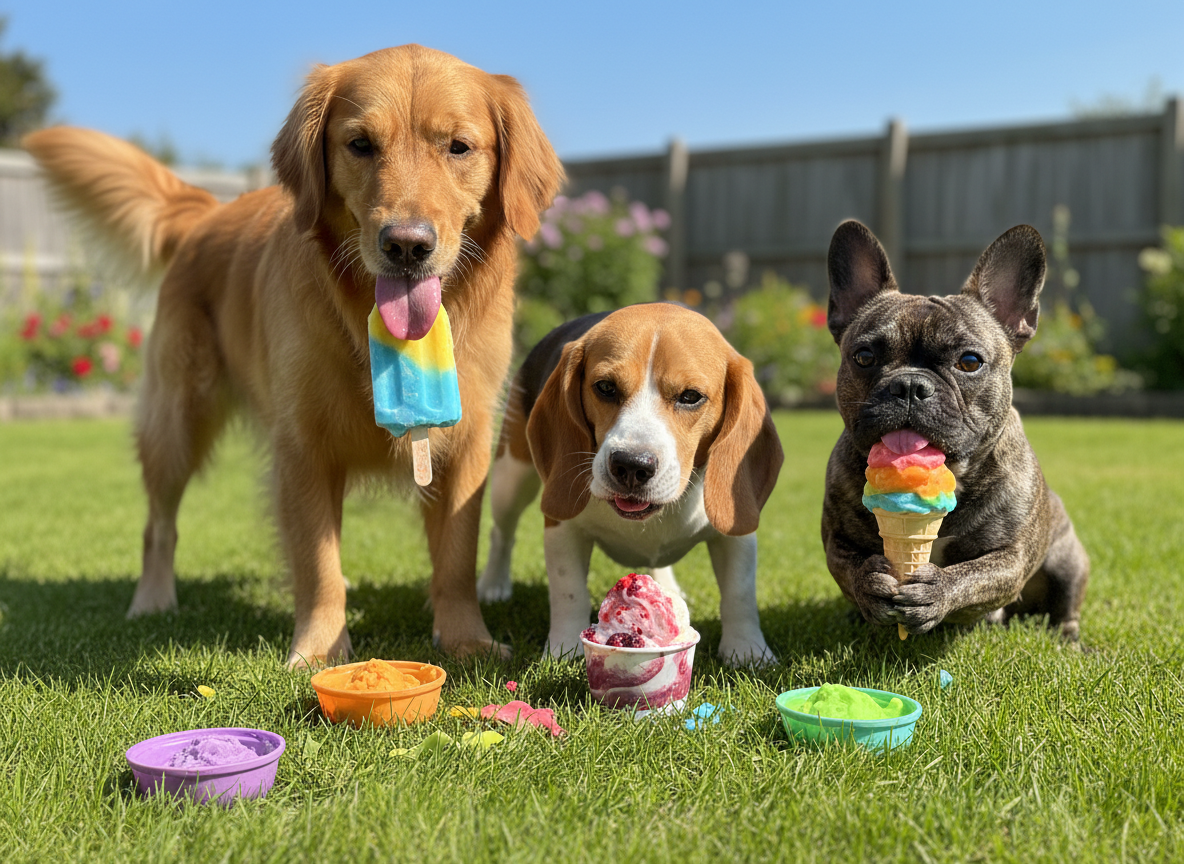
7 Savory Frozen Dog Treat Recipes for Hot Summer Days
When the temperature skyrockets, there’s nothing better than a refreshing frozen treat to cool you down. We have our ice cream and popsicles, but what about our four-legged companions panting by our feet? Those puppy-dog eyes are hard to resist, and luckily, you don’t have to! Store-bought frozen treats can be great, but they can also be packed with sugars, preservatives, and ingredients that might not agree with your pup’s tummy. The solution? Whip up a batch of homemade frozen goodies right in your own kitchen!
Making your own frozen dog treats is not only incredibly easy and cost-effective, but it also gives you complete control over what your best friend is eating. You can tailor each recipe to your dog’s specific tastes and dietary needs. From savory brothsicles to fruity delights, the possibilities are endless. In this guide, we’ll walk you through seven savory and delicious recipes that will have your dog’s tail wagging with delight. Let’s get ready to chill out!
Quick Comparison of Our Favorite Chilly Recipes
| Recipe Name | Primary Flavors | Approx. Prep Time | Best For |
|---|---|---|---|
| Classic Peanut Butter & Banana Pupsicles | Peanut Butter, Banana | 10 mins | Picky Eaters |
| Refreshing Watermelon & Mint Sorbet | Watermelon, Mint | 15 mins | Hydration Boost |
| Savory Chicken Broth & Veggie Ice Cubes | Chicken, Carrots, Peas | 5 mins | Savory Cravers |
| Greek Yogurt & Berry Swirl Bark | Yogurt, Berries | 10 mins | Gut Health |
| Pumpkin & Ginger Tummy Soothers | Pumpkin, Ginger | 5 mins | Sensitive Stomachs |
| Omega-Rich Sardine & Parsley ‘Fish-sicles’ | Sardines, Parsley | 5 mins | Skin & Coat Health |
| Apple & Carrot Crunch Bites | Apple, Carrot | 10 mins | Low-Calorie Snacking |
1. Classic Peanut Butter & Banana Pupsicles
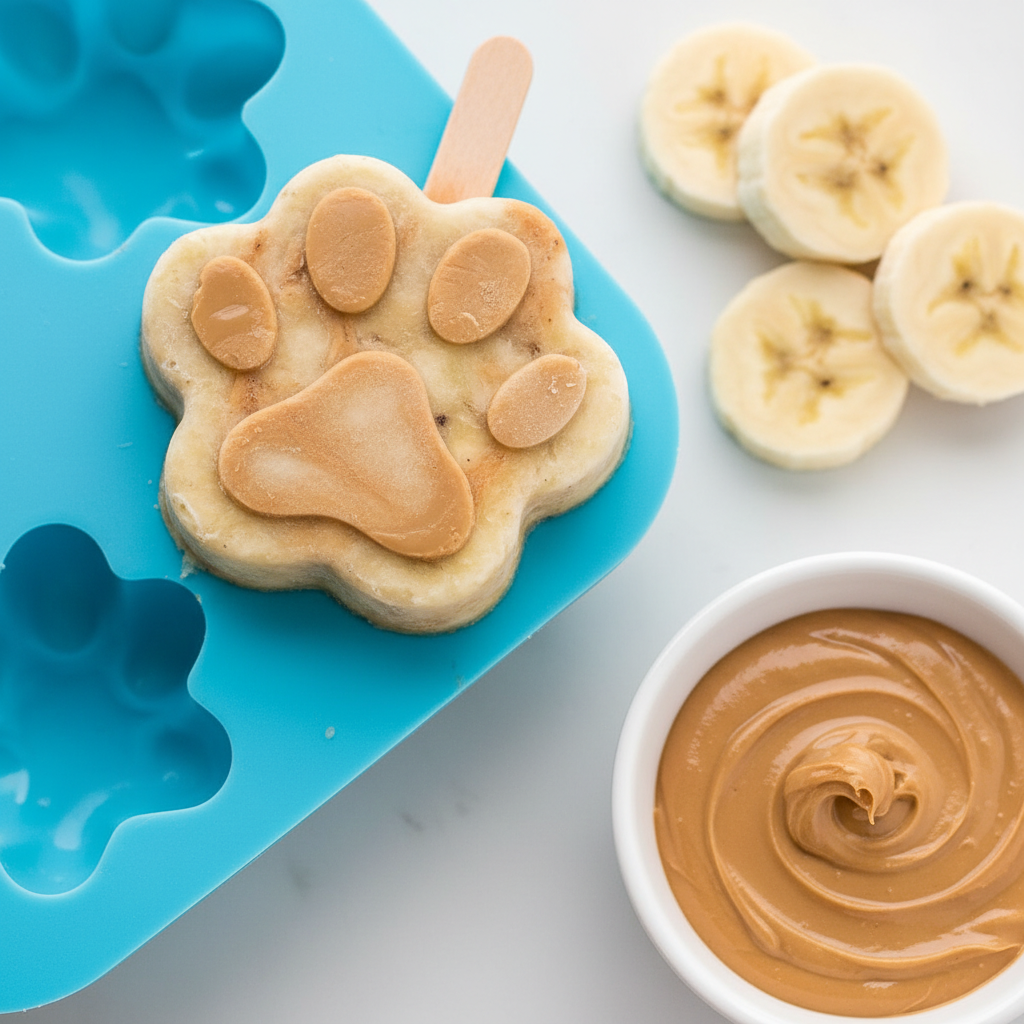
Let’s kick things off with a timeless combination that few dogs can resist: peanut butter and banana. This recipe is the canine equivalent of a classic vanilla cone—it’s simple, beloved, and incredibly easy to make. It’s the perfect starting point if you’re new to the world of homemade dog treats.
Ingredients & Sourcing
The beauty of this recipe lies in its simplicity. You only need a few things, most of which you probably already have.
- 1 large ripe banana: The riper, the sweeter and easier to mash.
- 1/2 cup of creamy peanut butter: CRITICAL: Ensure the peanut butter is all-natural, unsalted, and does not contain Xylitol (which is highly toxic to dogs). Always check the label!
- 1/2 cup of plain yogurt or water: Plain, unsweetened Greek yogurt is a great choice for a creamier texture and a dose of probiotics. If your dog is sensitive to dairy, water works just fine.
Step-by-Step Instructions
- In a medium-sized bowl, mash the ripe banana until it’s a smooth, lump-free paste.
- Add the peanut butter and your choice of yogurt or water to the bowl.
- Mix everything together with a spoon or a whisk until the mixture is well-combined and has a consistent, creamy texture.
- Carefully spoon the mixture into an ice cube tray or silicone molds. Paw print or bone-shaped molds add a touch of fun!
- Freeze for at least 4 hours, or until solid. Once frozen, pop them out of the molds and let your pup enjoy!
Pros & Cons
Pros
|
Cons
|
Verdict
The Peanut Butter & Banana Pupsicle is a guaranteed crowd-pleaser. It’s the perfect recipe for first-time frozen treat makers and owners of picky pups. Its high-value flavor makes it a fantastic reward on a hot day.
2. Refreshing Watermelon & Mint Sorbet
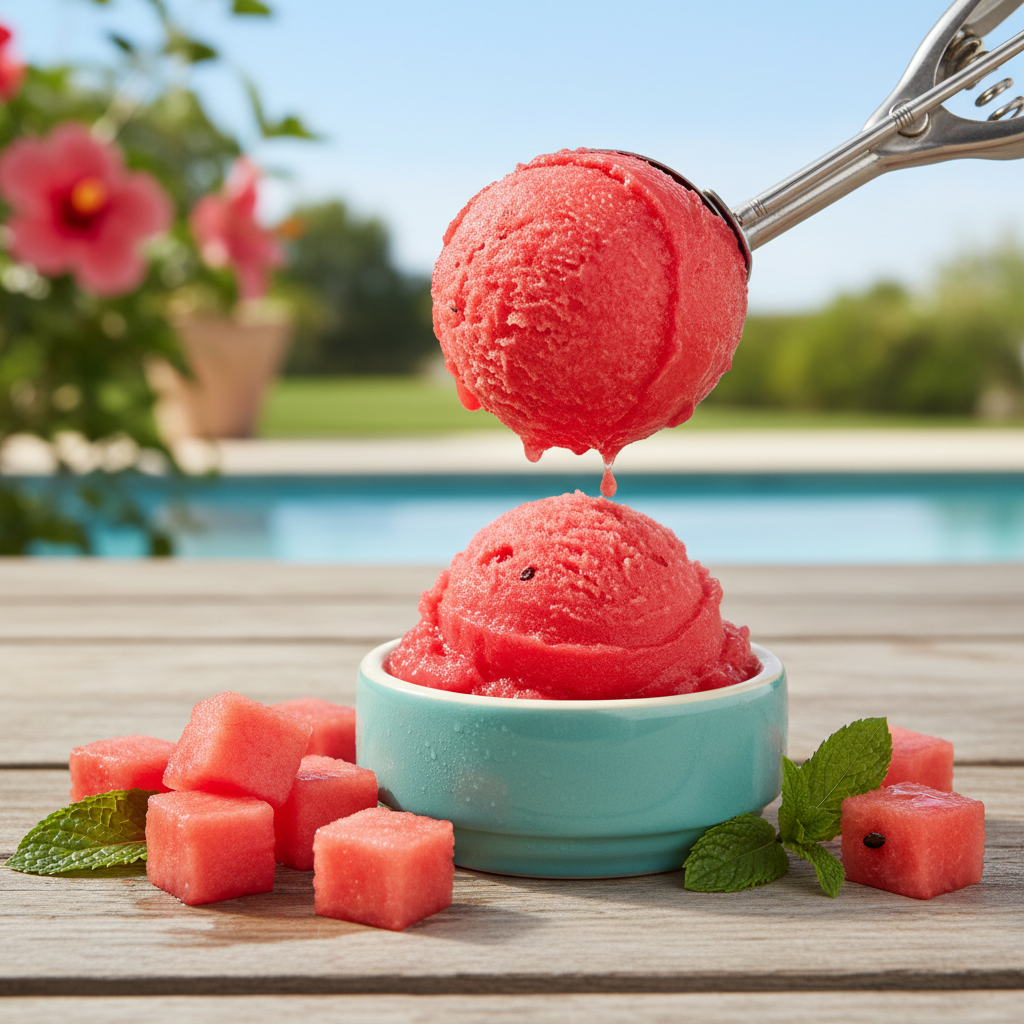
Nothing says summer quite like a juicy slice of watermelon. This fruit is not only delicious but also incredibly hydrating, making it a perfect base for a cooling dog treat. A touch of mint adds a burst of freshness that helps with doggy breath!
Ingredients & Sourcing
This recipe is all about fresh, light flavors that will help your dog stay cool and hydrated.
- 2 cups of seedless watermelon: Make sure to remove all seeds and the rind, as they can be harmful to dogs.
- A few fresh mint leaves (approx. 4-5): Mint is safe for dogs in small quantities and can aid in digestion and freshen breath.
- Optional: 1/4 cup coconut water: For an extra hydration and electrolyte boost. Ensure it’s 100% pure coconut water with no added sugars.
Step-by-Step Instructions
- Cut the seedless watermelon into chunks.
- Place the watermelon chunks, fresh mint leaves, and optional coconut water into a blender.
- Blend until the mixture is completely smooth, like a smoothie.
- Pour the liquid into your molds or an ice cube tray.
- Freeze for at least 4 hours. The result is a light, icy sorbet that’s perfect for a hot afternoon.
Pros & Cons
Pros
|
Cons
|
Verdict
This Watermelon & Mint Sorbet is the ultimate thirst-quencher. It’s an excellent choice for active dogs after a long walk or playtime in the sun, or for any pup that needs a little encouragement to stay hydrated.
3. Savory Chicken Broth & Veggie Ice Cubes
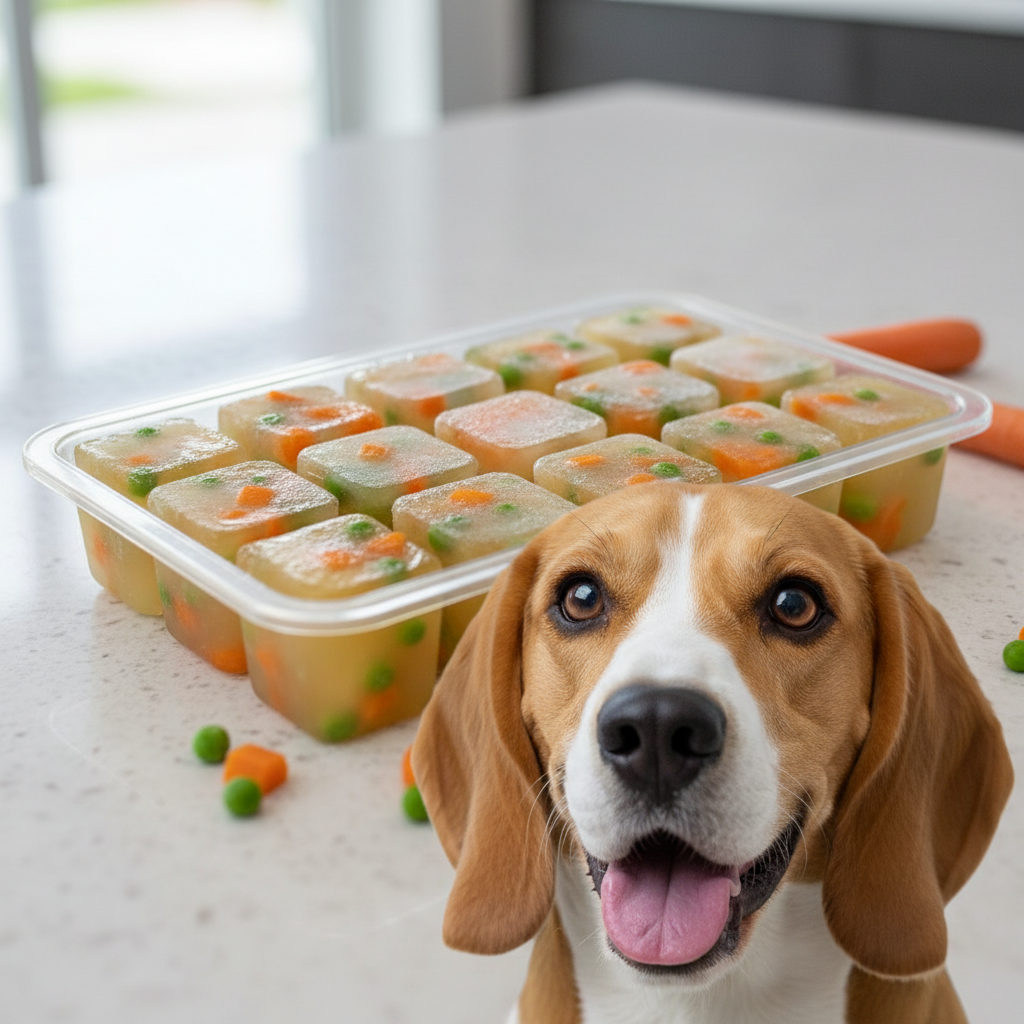
Not all dogs have a sweet tooth! For the pup who prefers savory flavors, these chicken broth and veggie cubes are a home run. They’re a fantastic way to give your dog a satisfying, flavorful treat without any of the sugar.
Ingredients & Sourcing
This recipe is all about that savory, meaty flavor your dog craves.
- 2 cups of low-sodium chicken broth: It’s very important to use a broth that is low in sodium and free of onions and garlic, which are toxic to dogs. You can buy pet-specific broth or a human-grade organic version.
- 1/4 cup of finely diced, dog-safe vegetables: Carrots, peas, or green beans are excellent choices. You can use fresh or frozen (and thawed).
- Optional: 1 tablespoon of chopped parsley: For an extra dash of flavor and breath-freshening power.
Step-by-Step Instructions
- If using fresh vegetables, wash and dice them into very small pieces. You want them to be small enough to fit into your molds and easy for your dog to eat.
- Sprinkle the diced vegetables and optional parsley evenly into the compartments of your ice cube tray or silicone molds.
- Slowly pour the low-sodium chicken broth over the vegetables, filling each compartment.
- Place the tray carefully into the freezer and freeze for 3-4 hours or until completely solid.
Pros & Cons
Pros
|
Cons
|
Verdict
For the discerning canine palate that prefers a main course over dessert, these Savory Chicken Broth & Veggie Ice Cubes are the perfect choice. They are also a fantastic option for senior dogs or those on a low-sugar diet.
4. Greek Yogurt & Berry Swirl Bark

This recipe is as beautiful as it is delicious! Frozen yogurt bark is a fun and versatile treat that allows for a lot of creativity. The combination of creamy yogurt and antioxidant-rich berries is a fantastic boost for your dog’s health.
Ingredients & Sourcing
A simple, healthy, and visually appealing treat.
- 1 cup of plain, unsweetened Greek yogurt: Greek yogurt is packed with protein and probiotics, which are great for your dog’s digestive system.
- 1/2 cup of mixed berries: Blueberries, strawberries, or raspberries are all great, dog-safe options. You can use fresh or frozen.
Step-by-Step Instructions
- Line a small baking sheet or tray with parchment paper. This is crucial to prevent sticking.
- In a blender, puree half of your mixed berries to create a liquid ‘sauce’. Leave the other half whole or roughly chopped.
- Pour the Greek yogurt onto the parchment paper and use a spatula to spread it into a thin, even layer (about 1/4 inch thick).
- Drizzle the berry puree over the yogurt and scatter the whole/chopped berries on top.
- Use a toothpick or knife to gently swirl the puree into the yogurt for a beautiful marbled effect.
- Place the baking sheet flat in the freezer for at least 3-4 hours, or until completely solid.
- Once frozen, take it out and break it into bite-sized pieces for your pup.
Pros & Cons
Pros
|
Cons
|
Verdict
The Greek Yogurt & Berry Swirl Bark is a fantastic choice for health-conscious pet owners. It’s a treat that tastes good and does good, supporting your dog’s digestive health while providing a delicious way to cool down.
5. Pumpkin & Ginger Tummy Soothers
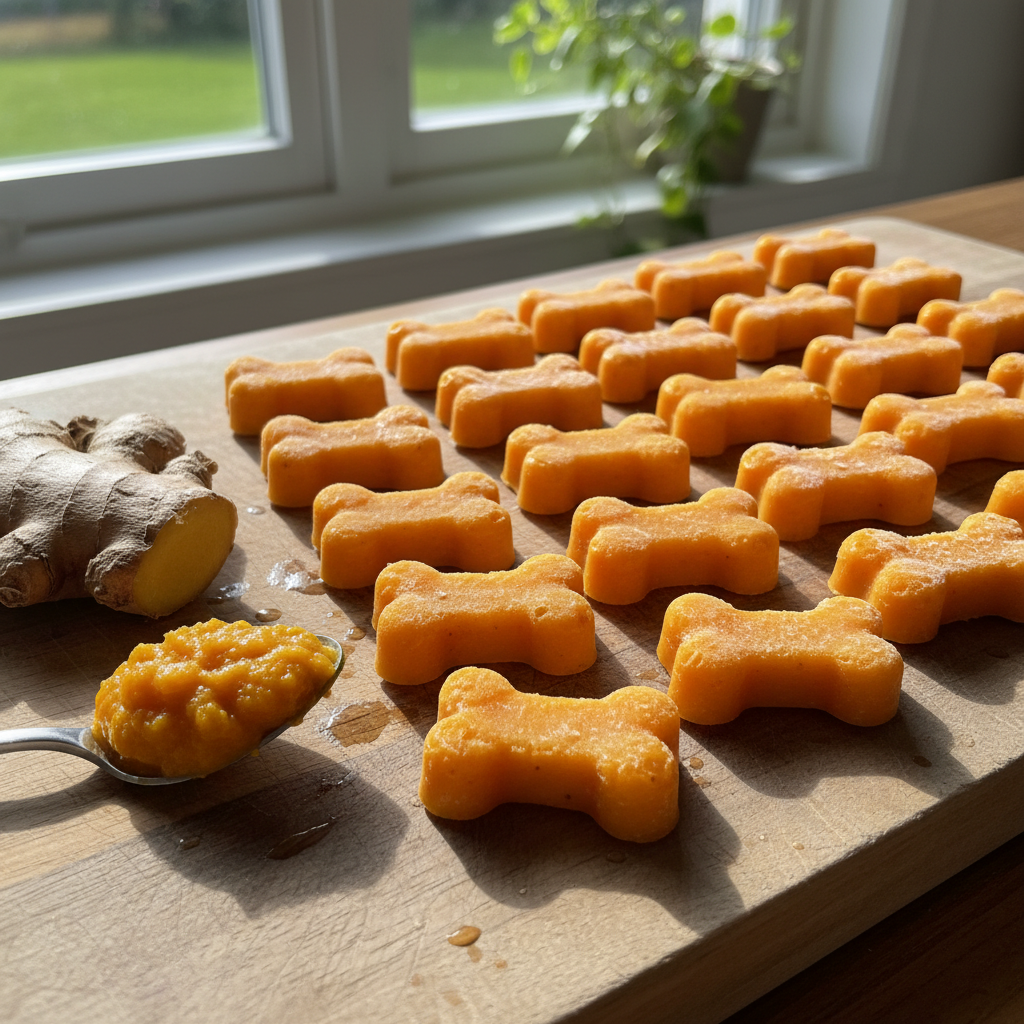
If your dog has a sensitive stomach, you know how tricky it can be to find treats that don’t cause an upset. This recipe is specifically designed to be gentle and soothing. Pumpkin is a well-known digestive aid for dogs, and ginger can help settle an uneasy tummy.
Ingredients & Sourcing
Simple, effective, and tummy-friendly ingredients are key here.
- 1 cup of 100% pure pumpkin puree: Do NOT use pumpkin pie filling, which is loaded with sugar and spices. It must be pure pumpkin.
- 1 teaspoon of freshly grated ginger: A little goes a long way. Ginger has anti-inflammatory properties and can help with nausea.
- 1/2 cup of water or bone broth: To help with the consistency for freezing.
Step-by-Step Instructions
- In a bowl, combine the pumpkin puree, freshly grated ginger, and water or bone broth.
- Stir until all the ingredients are thoroughly mixed and you have a smooth, consistent mixture.
- Spoon the pumpkin mixture into your ice cube trays or silicone molds. Smaller molds are great for this recipe, creating perfect little tummy-soothing bites.
- Freeze for 3-4 hours until solid.
Pros & Cons
Pros
|
Cons
|
Verdict
These Pumpkin & Ginger Tummy Soothers are less of a ‘party’ treat and more of a ‘functional’ one. They are the absolute best choice for dogs prone to digestive issues or for when your pup’s stomach just seems a little ‘off’. They provide a cooling treat that also helps them feel better.
6. Omega-Rich Sardine & Parsley ‘Fish-sicles’
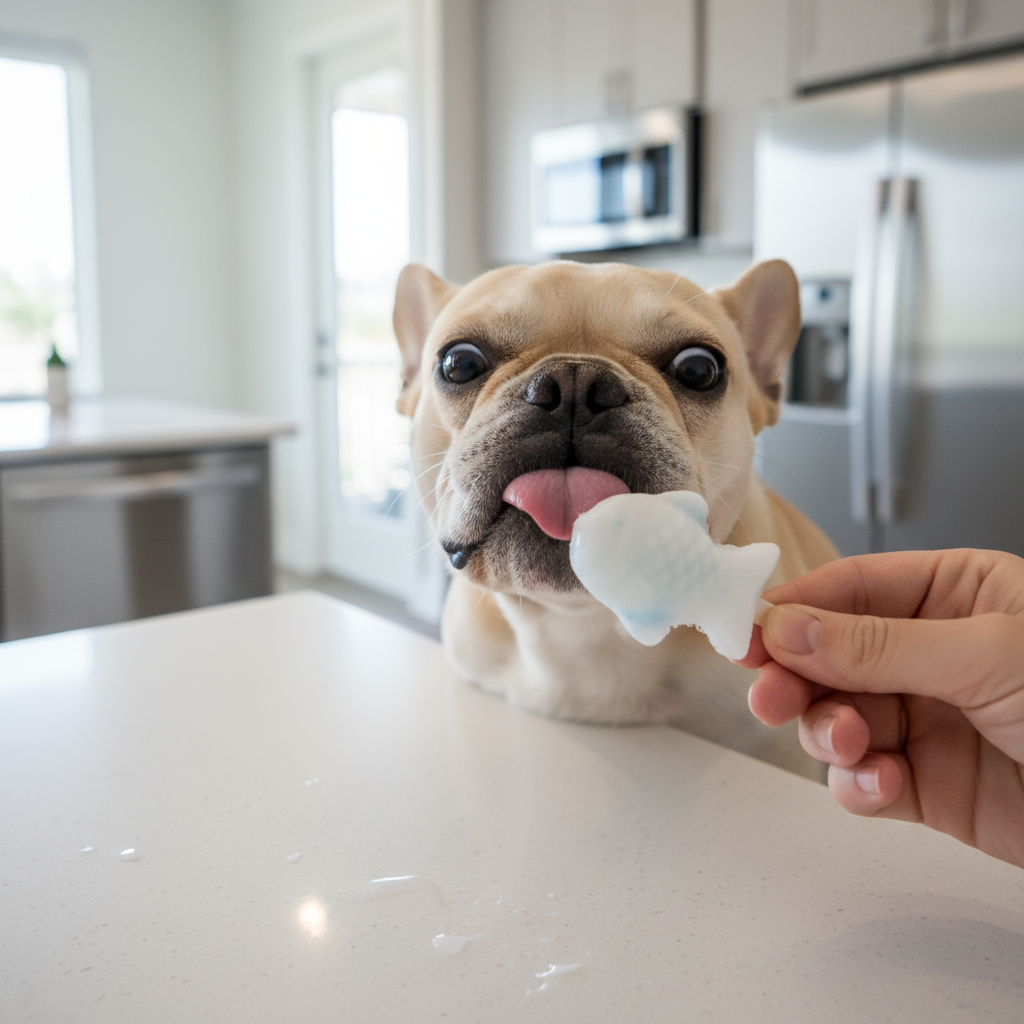
Okay, this one might not smell the best to you, but your dog will likely go absolutely wild for it! Sardines are a nutritional powerhouse, packed with Omega-3 fatty acids that are fantastic for promoting a healthy, shiny coat and reducing inflammation. This is the ultimate savory treat for the fish-loving canine.
Ingredients & Sourcing
Get ready for a fishy, fantastic treat that’s amazing for your dog’s health.
- 1 can of sardines packed in water, no salt added: It’s crucial to choose sardines in water, not oil, and with no added salt.
- 1/4 cup of fresh parsley, chopped: Not just for garnish! Parsley is a great breath freshener to combat that fishy smell.
- 1/2 cup of water: To blend everything together.
Step-by-Step Instructions
- Open the can of sardines and pour the entire contents—fish and water—into a blender.
- Add the chopped fresh parsley and the additional 1/2 cup of water.
- Blend until the mixture is relatively smooth. It might be a little chunky, and that’s okay.
- Pour the fishy mixture into small molds or an ice cube tray. Paper cups also work well for creating individual ‘fish-sicle’ push-pops.
- Freeze for at least 4 hours until solid. Be prepared for a bit of a fishy smell in your kitchen!
Pros & Cons
Pros
|
Cons
|
Verdict
If you can get past the smell, the Sardine & Parsley ‘Fish-sicles’ are one of the healthiest treats you can give your dog. They are an outstanding choice for dogs with dry skin, dull coats, or joint issues, and for any pup that loves a uniquely savory, fishy delight.
7. Apple & Carrot Crunch Bites

Looking for a low-calorie option that still delivers on flavor and a satisfying crunch? Look no further. This recipe combines the natural sweetness of apples with the healthy crunch of carrots for a light, refreshing, and vitamin-packed treat.
Ingredients & Sourcing
A simple, healthy, and crunchy treat that’s great for weight management.
- 1 cup of unsweetened applesauce: Just like with other ingredients, check the label to ensure there are no added sugars or artificial sweeteners.
- 1/2 cup of finely grated raw carrot: Grating the carrot ensures it freezes well and distributes evenly throughout the treats.
- 1/2 cup of water: To create the right consistency for freezing.
Step-by-Step Instructions
- In a bowl, mix the unsweetened applesauce, grated carrot, and water.
- Stir until everything is well combined. You’ll have a slightly chunky, colorful mixture.
- Spoon the mix into your ice cube trays or molds. Because this treat is lower in fat, silicone molds work best as they make it easier to pop the frozen bites out.
- Freeze for 3-4 hours until the bites are completely solid.
Pros & Cons
Pros
|
Cons
|
Verdict
The Apple & Carrot Crunch Bites are the perfect guilt-free summer indulgence. They are an excellent choice for dogs who are watching their weight, or as a frequent, low-calorie reward for training on hot days. It’s a healthy way to let your pup enjoy a cooling snack without overdoing it on calories.
A Guide to Making the Perfect Frozen Treats
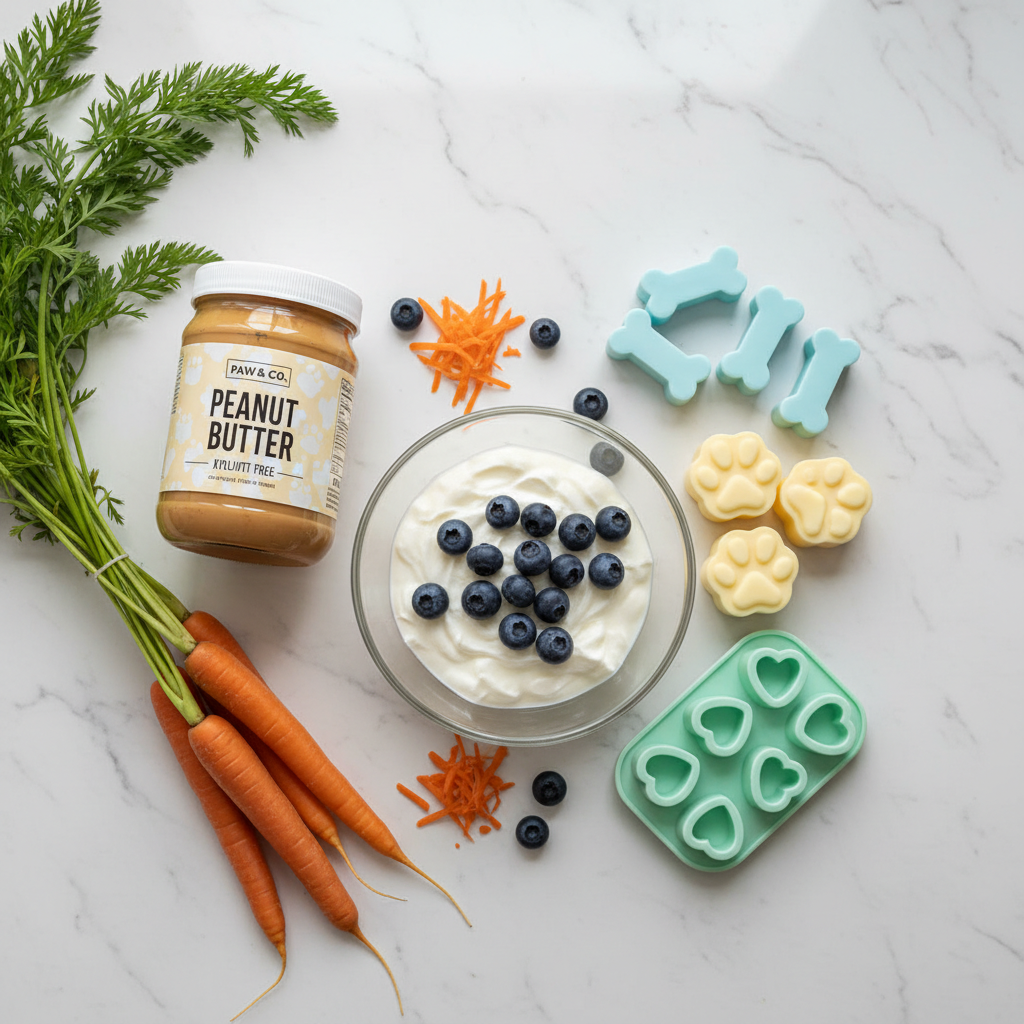
Feeling inspired? Before you raid your fridge, let’s go over a few key things to keep in mind to ensure your frozen treat adventures are safe and successful.
Choosing the Right Ingredients
The most important rule is to only use ingredients that are safe for dogs. When in doubt, a quick search or a call to your vet is always the best course of action.
- Safe Fruits: Blueberries, strawberries, watermelon, bananas, apples (no seeds or core), pumpkin.
- Safe Veggies: Carrots, peas, green beans, sweet potatoes (cooked).
- Great Bases: Plain yogurt, water, low-sodium and onion/garlic-free bone or meat broth, pureed pumpkin.
- Healthy Fats: Xylitol-free peanut butter, sardines in water.
Ingredients to ALWAYS Avoid
Some human foods are toxic to dogs. Never include these in your recipes:
- Xylitol: An artificial sweetener found in some peanut butters, yogurts, and other products. It is extremely toxic.
- Grapes and Raisins: Can cause kidney failure.
- Chocolate, Coffee, and Caffeine: All are toxic.
- Onions, Garlic, and Chives: Can cause damage to red blood cells.
- Macadamia Nuts: Highly toxic to dogs.
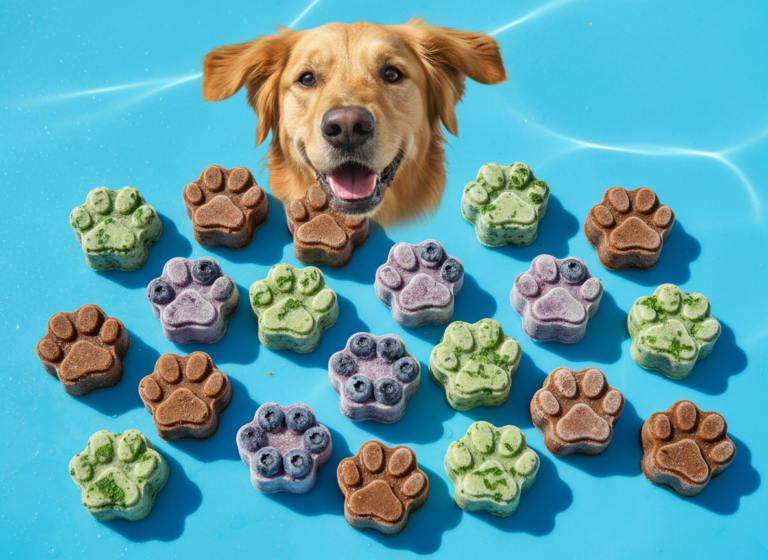
Molds and Storage
You don’t need fancy equipment to get started. A simple plastic ice cube tray works perfectly! However, silicone molds are a great investment. They are flexible, making it much easier to pop the treats out, and they come in fun shapes like paws and bones. To store your treats, pop them all out of the molds once they are fully frozen and keep them in a labeled freezer-safe bag or container. They will typically last for 2-3 months in the freezer.
Frequently Asked Questions About Frozen Dog Treats

How many frozen treats can my dog have in a day?
This is a great question! Remember that treats, even healthy homemade ones, should follow the 10% rule. This means they should only make up about 10% of your dog’s daily caloric intake. For most of these recipes, one or two small cubes or one larger treat per day is a good guideline for a medium-sized dog. Adjust accordingly for smaller or larger breeds and consider your dog’s overall activity level and diet.
Can I use cow’s milk instead of yogurt or water?
It’s best to avoid cow’s milk. Many dogs are lactose intolerant, and milk can cause digestive upset like gas, bloating, and diarrhea. Plain, unsweetened yogurt or kefir are better options as the fermentation process breaks down much of the lactose. For a guaranteed safe and dairy-free option, water or a dog-safe broth is always your best bet.
How long do these homemade treats last in the freezer?
When stored properly in an airtight, freezer-safe container or bag, these treats will stay fresh for about 2 to 3 months. It’s a good idea to label the bag with the date you made them and the ingredients used. This helps you keep track and ensures you’re always giving your pup the freshest treats.
My dog is a super chewer. Can I make these treats last longer?
Absolutely! For a longer-lasting treat, you can use a Kong or other stuffable rubber toy instead of a mold. Simply fill the toy with any of these blended mixtures and freeze it. This not only makes the treat last much longer but also provides fantastic mental stimulation and enrichment for your dog as they work to get all the yummy goodness out.
Conclusion
There you have it—seven simple, healthy, and delicious ways to help your furry friend stay cool and happy when the weather gets hot. Making homemade frozen treats is more than just a way to beat the heat; it’s a fun activity and a wonderful way to show your love and care. You get to provide your pup with a nutritious snack, and they get a delightful reward that will have them licking their chops for more.
Don’t be afraid to get creative! Mix and match safe ingredients based on your dog’s preferences. Whether your pup is a fan of savory fish-sicles or sweet berry bark, there’s a perfect chilly recipe waiting for them. So, grab your blender, pick a recipe, and get ready to become your dog’s personal frozen treat chef. Happy chilling!