7 Ways to Make Dried Anchovies for Dogs at Home
Hey there, fellow dog lovers! Are you always on the hunt for healthy, single-ingredient treats that make your pup go wild? Well, look no further than the humble anchovy. These tiny fish are absolute powerhouses of nutrition, packed with Omega-3 fatty acids that are fantastic for your dog’s skin, coat, joints, and brain health. Store-bought versions can be pricey and sometimes contain unwanted salt or preservatives. But what if I told you that making your own is incredibly easy, safe, and way more affordable?
That’s right! We’re about to dive into seven different methods for making crispy, crunchy, tail-waggingly good dried anchovies at home. Whether you’re a kitchen pro or a complete beginner, there’s a method here for you. To help you pick the perfect one, here’s a quick look at what each entails:
Quick Comparison of Methods
| Method | Time Required | Equipment Needed | Difficulty |
|---|---|---|---|
| 1. Oven-Drying | 4-6 hours | Oven, Baking Sheet | Easy |
| 2. Food Dehydrator | 6-10 hours | Food Dehydrator | Very Easy |
| 3. Air Fryer | 30-45 minutes | Air Fryer | Easy |
| 4. Sun-Drying | 1-3 days | Screen, Cheesecloth | Medium |
| 5. Microwave-Drying | 10-15 minutes | Microwave, Plate | Tricky |
| 6. Smoker/Grill | 2-3 hours | Smoker or Grill | Medium |
| 7. Refrigerator Air-Drying | 3-5 days | Baking Rack, Tray | Very Easy |
1. The Classic Oven-Drying Method
This is the go-to method for most people because it requires no special equipment—just your trusty oven! It’s straightforward, reliable, and a great starting point for any aspiring dog treat chef. The key here is ‘low and slow’ to gently remove the moisture without cooking the fish.
What You’ll Need:
- Fresh or frozen unsalted anchovies
- Baking sheets
- Parchment paper or a wire rack
Step-by-Step Instructions:
- Prep the Fish: If using frozen anchovies, thaw them completely. Rinse them under cool water. If you could only find salted anchovies, it’s crucial to soak them in fresh water for at least 30-60 minutes, changing the water a few times to remove as much salt as possible. Pat them thoroughly dry with paper towels.
- Preheat Your Oven: Set your oven to its lowest possible temperature, usually around 170-200°F (75-95°C).
- Arrange the Anchovies: Line a baking sheet with parchment paper. For extra air circulation, place a wire rack on top of the sheet. Arrange the anchovies in a single layer on the parchment or rack, making sure they aren’t touching. This ensures they dry evenly.
- The Drying Process: Place the baking sheets in the oven. To help moisture escape, you can prop the oven door open just a crack with a wooden spoon.
- Wait and Check: Let them dry for 4-6 hours. The exact time will depend on the size of your anchovies and your oven’s temperature. They’re done when they are completely dry, brittle, and snap easily. They should not be soft or bendy.
- Cool Down: Turn off the oven and let the anchovies cool completely inside before storing.
Pros and Cons
Pros:
|
Cons:
|
The Verdict:
This method is perfect for beginners and anyone who wants to make a sizable batch of treats without buying new gadgets. If you can handle a bit of a fishy aroma for a few hours, the oven method is a fantastic and reliable choice.
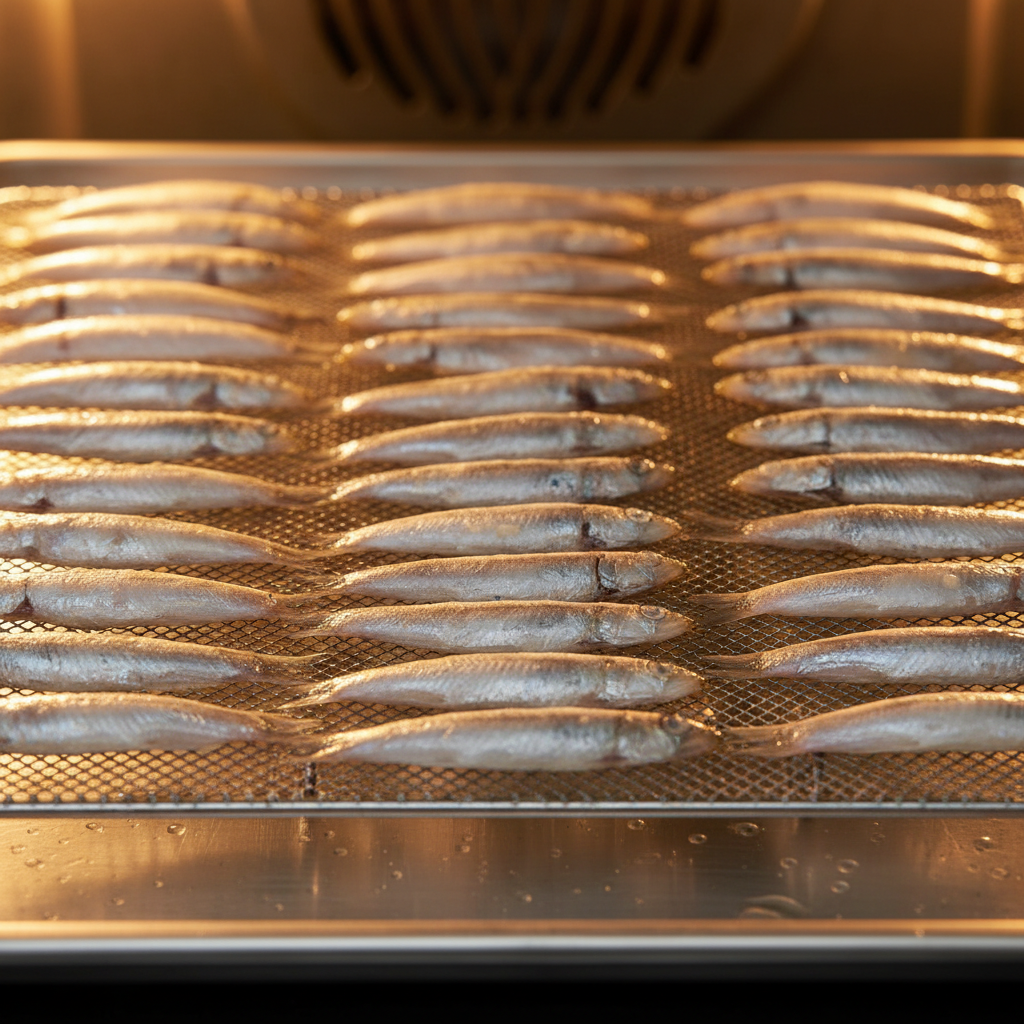
2. The Food Dehydrator Method
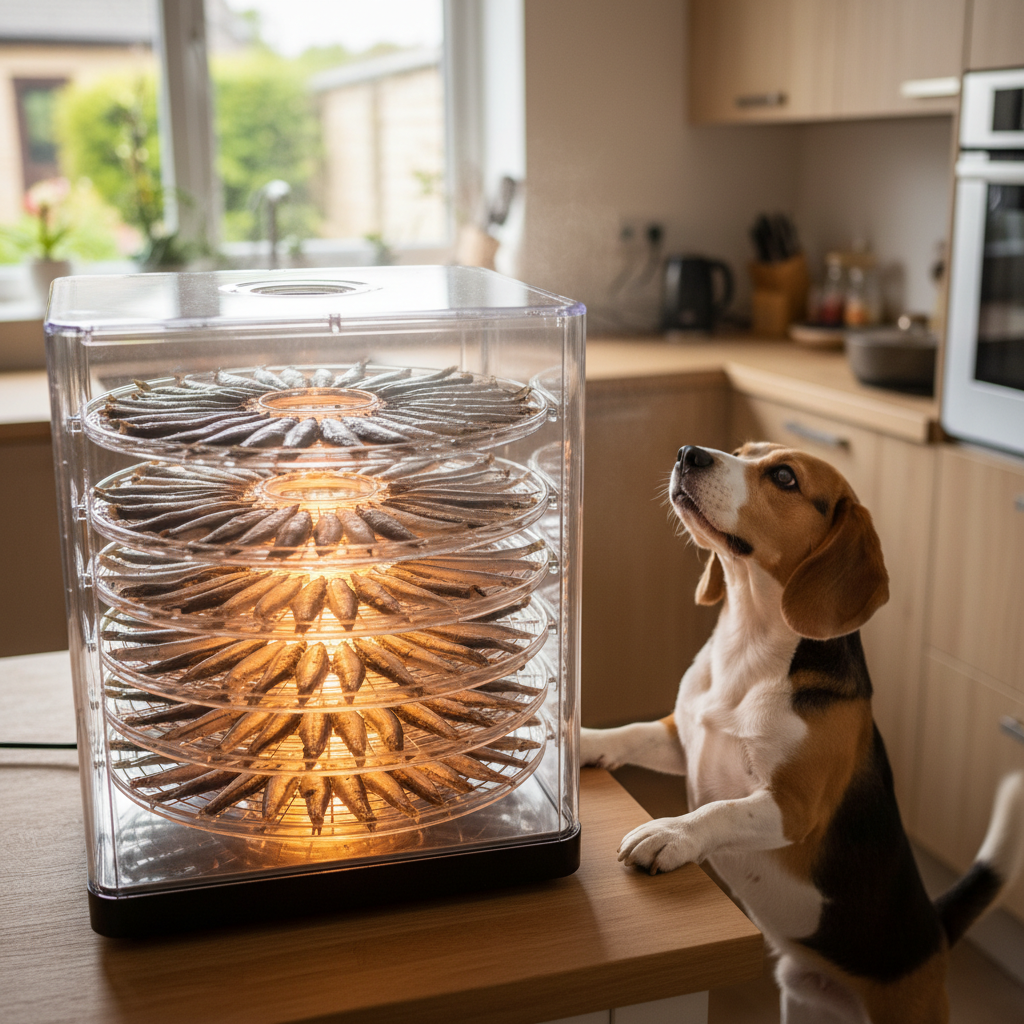
If you’re serious about making dried treats for your pup, a food dehydrator is a game-changer. It’s designed for exactly this purpose: low, consistent heat with constant air circulation. This gives you perfectly dried, shelf-stable treats every single time with minimal effort.
What You’ll Need:
- A food dehydrator
- Fresh or frozen unsalted anchovies
Step-by-Step Instructions:
- Prep the Fish: Just like the oven method, start by thawing, rinsing, and de-salting (if necessary) your anchovies. Pat them completely dry. The drier they are to start, the faster they’ll dehydrate.
- Load the Trays: Arrange the anchovies in a single layer on the dehydrator trays. Ensure there’s a little space between each fish for optimal airflow. Don’t overcrowd the trays!
- Set It and Forget It: Set your dehydrator to a medium temperature, around 160°F (70°C). If your dehydrator doesn’t have a temperature setting, just turn it on.
- Dehydrate: The process will take anywhere from 6 to 10 hours, depending on your machine and the humidity in your home. It’s a longer process, but it’s almost entirely hands-off.
- Check for Doneness: After about 6 hours, start checking a few fish. They should be hard and snap cleanly in two. If there’s any moisture or softness, they need more time.
- Cool and Store: Once done, let them cool to room temperature before moving them to an airtight container.
Pros and Cons
Pros:
|
Cons:
|
The Verdict:
This is the gold standard for dedicated DIY-ers. If you already own a dehydrator or plan on making dried treats (like jerky or sweet potato chews) regularly for your dog, this method is unbeatable for its consistency and ease of use.
3. The Air Fryer Method
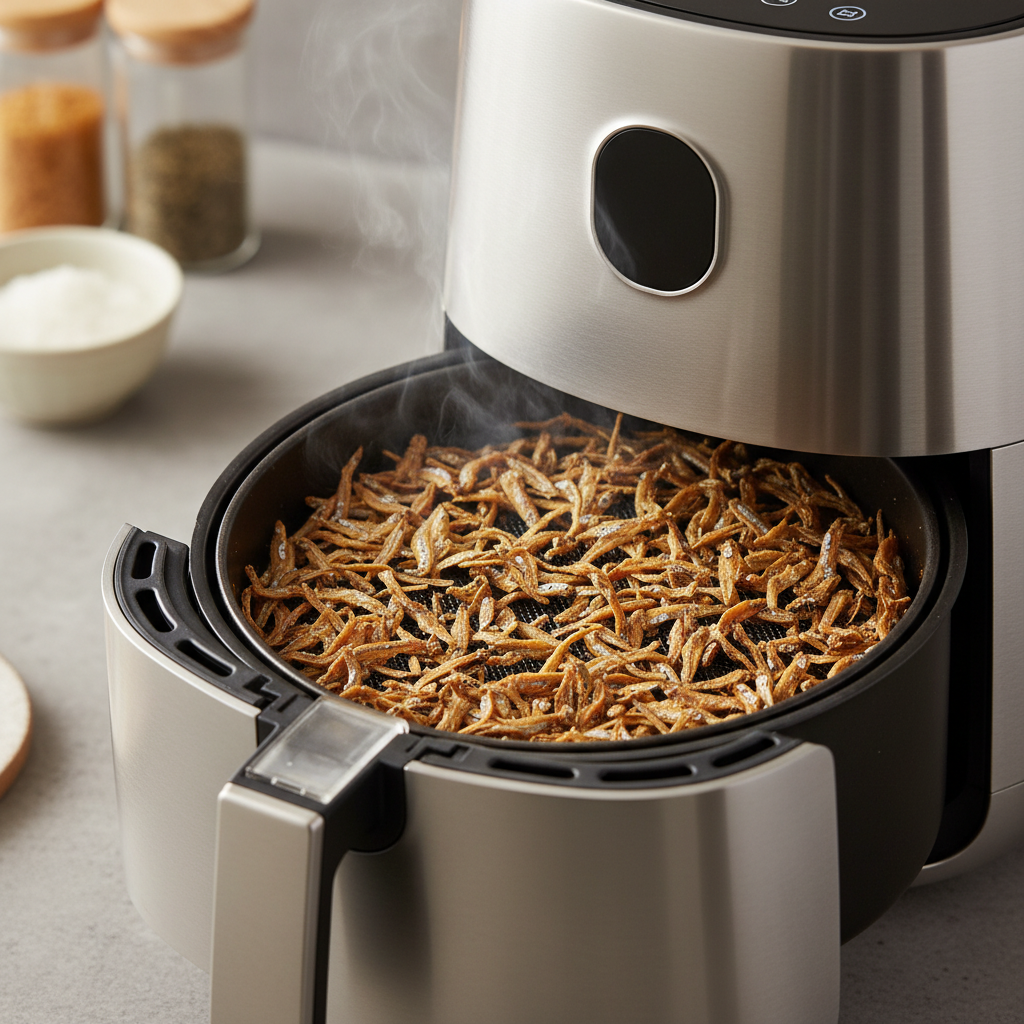
Don’t have hours to spare? Your air fryer is here to save the day! This popular countertop appliance uses circulating hot air to cook and crisp food quickly. With a few tweaks, it can also act as a mini-dehydrator, getting the job done in a fraction of the time.
What You’ll Need:
- An air fryer
- Fresh or frozen unsalted anchovies
Step-by-Step Instructions:
- Prep and Dry: You know the drill! Thaw, rinse, de-salt if needed, and pat those little fishies as dry as you possibly can. This step is extra important for the air fryer to prevent them from steaming instead of drying.
- Preheat (Maybe): Some air fryers require preheating, some don’t. Set it to its lowest temperature, typically around 180-200°F (80-95°C).
- Arrange in the Basket: Place the anchovies in a single layer in the air fryer basket. It’s crucial not to overcrowd it, so you’ll likely need to work in batches.
- Fry ‘Em Up: Air fry for about 30-45 minutes. Because air fryers are powerful, you’ll want to check on them frequently. Shake the basket every 10-15 minutes to ensure they dry evenly and don’t stick.
- Check for Crispiness: They’re ready when they are visibly shrunken, hard, and crispy. Test one by letting it cool for a minute—it should snap easily.
- Cool Down: Spread the dried anchovies on a plate or paper towel to cool completely before storing.
Pros and Cons
Pros:
|
Cons:
|
The Verdict:
This method is perfect for the impatient pet parent! If you want a small handful of fresh treats for your pup right now and don’t want to wait all day, the air fryer is your best friend. Just be prepared to stay nearby and keep a close eye on them.
4. The Traditional Sun-Drying Method
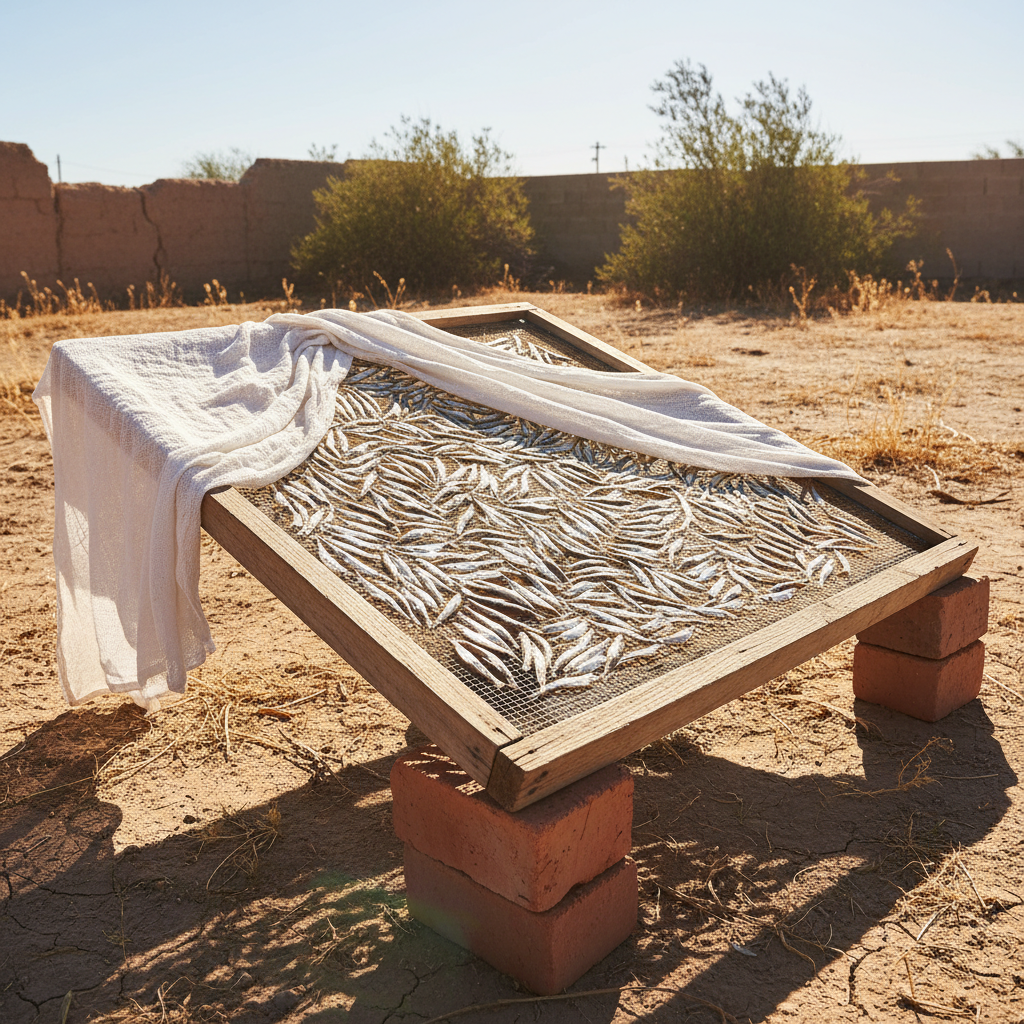
Want to go old school? Sun-drying is the original, all-natural way to preserve food. This method harnesses the power of the sun and wind, requiring no electricity at all. However, it’s highly dependent on your climate and requires some specific conditions to be successful and safe.
What You’ll Need:
- Fresh unsalted anchovies
- A drying screen or rack
- Cheesecloth or fine mesh netting
- Lots of sunshine and low humidity!
Step-by-Step Instructions:
- Check the Forecast: This method only works if you have several consecutive days of hot, dry, sunny, and slightly breezy weather. High humidity or rain will ruin your batch.
- Prep the Fish: Rinse and pat the anchovies dry. Since this is a slow, low-heat method, ensuring they are unsalted is paramount to prevent spoilage.
- Set Up Your Station: Place the anchovies in a single layer on a clean screen or rack. This allows air to circulate all around them. Elevate the screen on bricks or blocks to keep it off the ground.
- Protect from Pests: Cover the entire rack with a layer of cheesecloth or fine mesh. This is non-negotiable! It keeps flies, birds, and other curious critters away from your dog’s future treats.
- Find the Sun: Place your setup in a location that gets direct sunlight for most of the day.
- Turn and Wait: Flip the anchovies once or twice a day to ensure even drying. The process can take anywhere from 1 to 3 days. Bring them indoors at night to protect them from dew and nocturnal animals.
- Check for Doneness: They’re ready when they are bone-dry and brittle, with no moisture left.
Pros and Cons
Pros:
|
Cons:
|
The Verdict:
This method is for the patient purist living in a hot, arid climate. If you love natural processes and have the right weather conditions, sun-drying can be a rewarding and eco-friendly way to make treats for your furry friend.
5. The Speedy Microwave-Drying Method
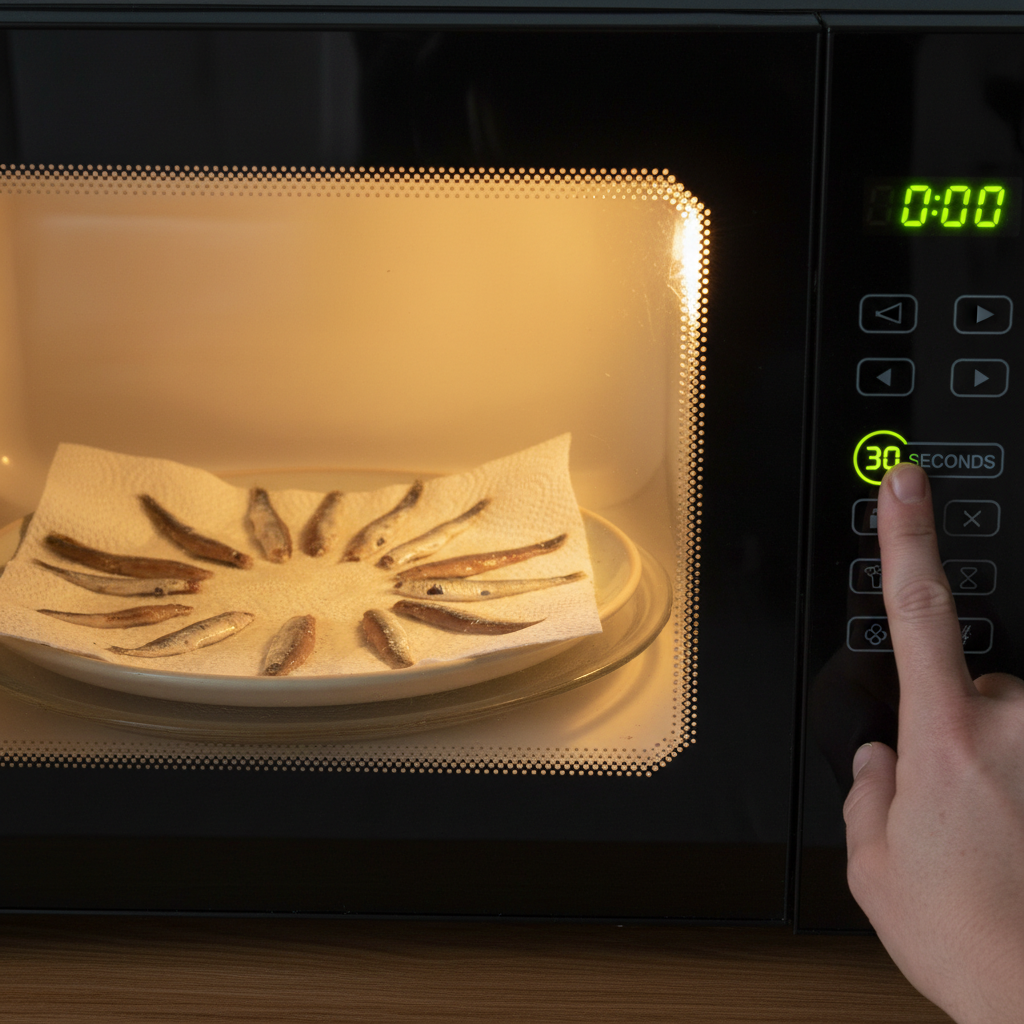
Yes, you can actually use your microwave! This is by far the fastest method, but it’s also the trickiest. Microwaves cook from the inside out using moisture, so you have to be very careful not to turn your anchovies into tiny, rubbery hockey pucks. This is best for a very small, ‘I need a treat right now’ emergency.
What You’ll Need:
- A microwave
- A microwave-safe plate
- Paper towels
- A very small amount of fresh, unsalted anchovies
Step-by-Step Instructions:
- Prep and Super-Dry: Rinse the anchovies and then pat them exceptionally dry with paper towels. Any excess moisture will cause them to steam.
- Set Up the Plate: Line a microwave-safe plate with a sheet of paper towel. Arrange a small number of anchovies (maybe 5-10) in a single layer on the towel, with space between them. Place another paper towel on top.
- Microwave in Bursts: This is the most important step. Microwave on a medium power setting (or use the defrost setting) for 30-second intervals. After each burst, open the door, check on them, and flip them over.
- Watch for Changes: You’ll see them release moisture into the paper towels. They will start to shrink and firm up. Keep going in 30-second bursts.
- The Final Bursts: As they get closer to being dry, reduce the time to 15-second intervals. You are watching for the moment they turn from soft to crisp. The total time might be 5-10 minutes.
- Cool to Test: Let them cool completely on the plate. They will continue to crisp up as they cool. If they are still chewy after cooling, you can give them another 15-30 seconds.
Pros and Cons
Pros:
|
Cons:
|
The Verdict:
This method is for the adventurous and attentive cook who needs just a couple of treats in a flash. It requires constant supervision and a bit of trial and error, but if you master it, you can go from fresh fish to a crunchy treat in under 15 minutes.
6. The Smoker or Grill Method
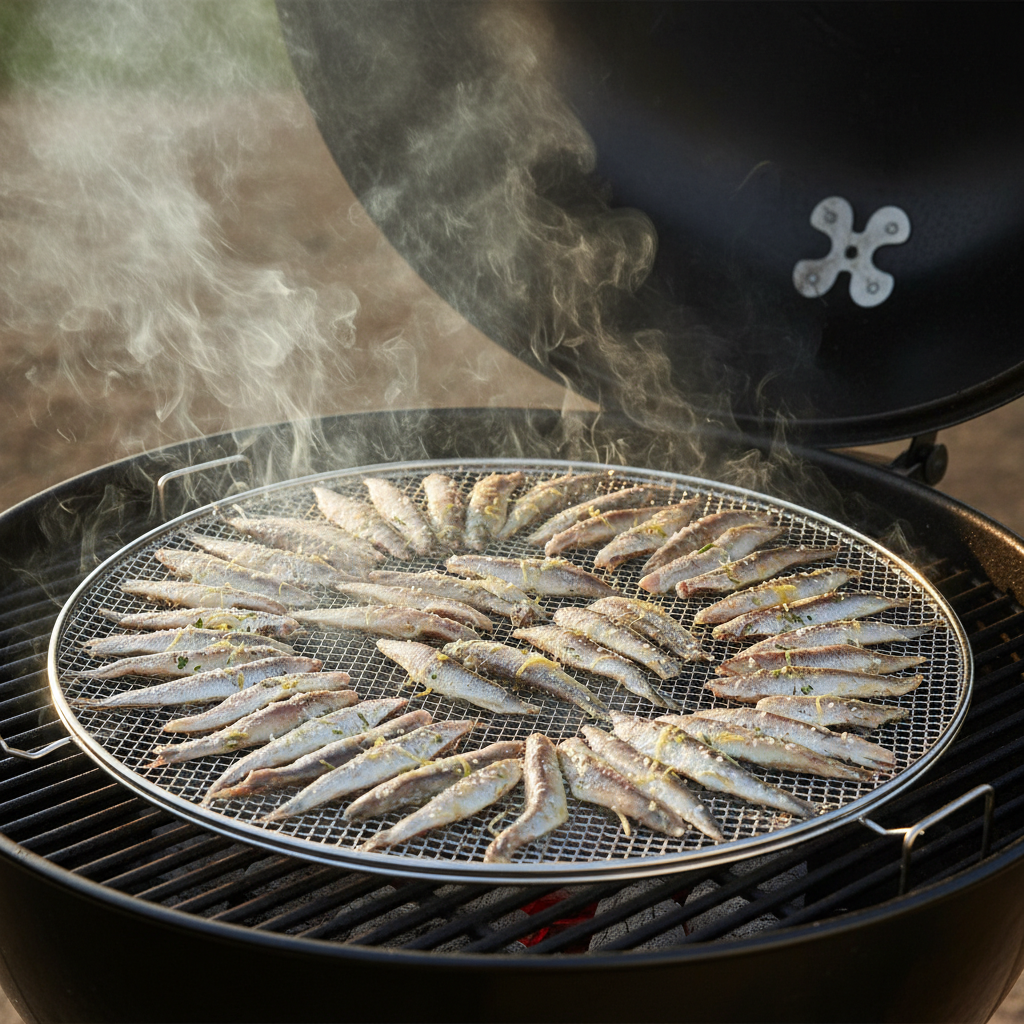
For the dog whose palate is a bit more… refined. Using a smoker or a grill with indirect heat can impart a delicious, smoky flavor that many dogs adore. This method gives you a unique treat that you definitely can’t buy in stores. The key is to use very low, indirect heat to dehydrate, not cook.
What You’ll Need:
- A smoker or a grill with a lid
- A grill-safe pan, foil tray, or fine mesh grill topper
- Fresh, unsalted anchovies
- (Optional) Dog-safe wood chips like apple or alder for a hint of smoke
Step-by-Step Instructions:
- Prep Your Equipment: Set up your grill for indirect cooking. If using charcoal, pile the coals on one side. If using a gas grill, only light the burners on one side. Your goal is to create a cool zone. For a smoker, preheat to its lowest setting, around 180-200°F (80-95°C).
- A Note on Smoke: If you want a smoky flavor, use only a tiny amount of wood chips. You want to gently flavor them, not overwhelm them. Ensure the wood you use is safe for dogs and not something like pine or fir. When in doubt, just use the heat without the smoke.
- Prep the Fish: Rinse and thoroughly pat the anchovies dry.
- Arrange on the Grill: Place the anchovies in a single layer on your grill pan or mesh topper. Place the pan on the cool, indirect heat side of the grill.
- Slow and Low: Close the lid and let them slowly dry out for 2-3 hours. Keep the temperature low and consistent. Check on them periodically to make sure they aren’t cooking too fast or burning.
- Check for Dryness: They are done when they are completely hard and brittle. They will have a slightly golden, smoky color.
- Cool Completely: Remove from the grill and let them cool down before treating your pup.
Pros and Cons
Pros:
|
Cons:
|
The Verdict:
This is for the backyard BBQ enthusiast who loves to include their four-legged family member in the fun. It’s a fantastic way to create a high-value, uniquely flavored treat while keeping all the smells outside your house.
7. The ‘Set and Forget’ Refrigerator Air-Drying Method
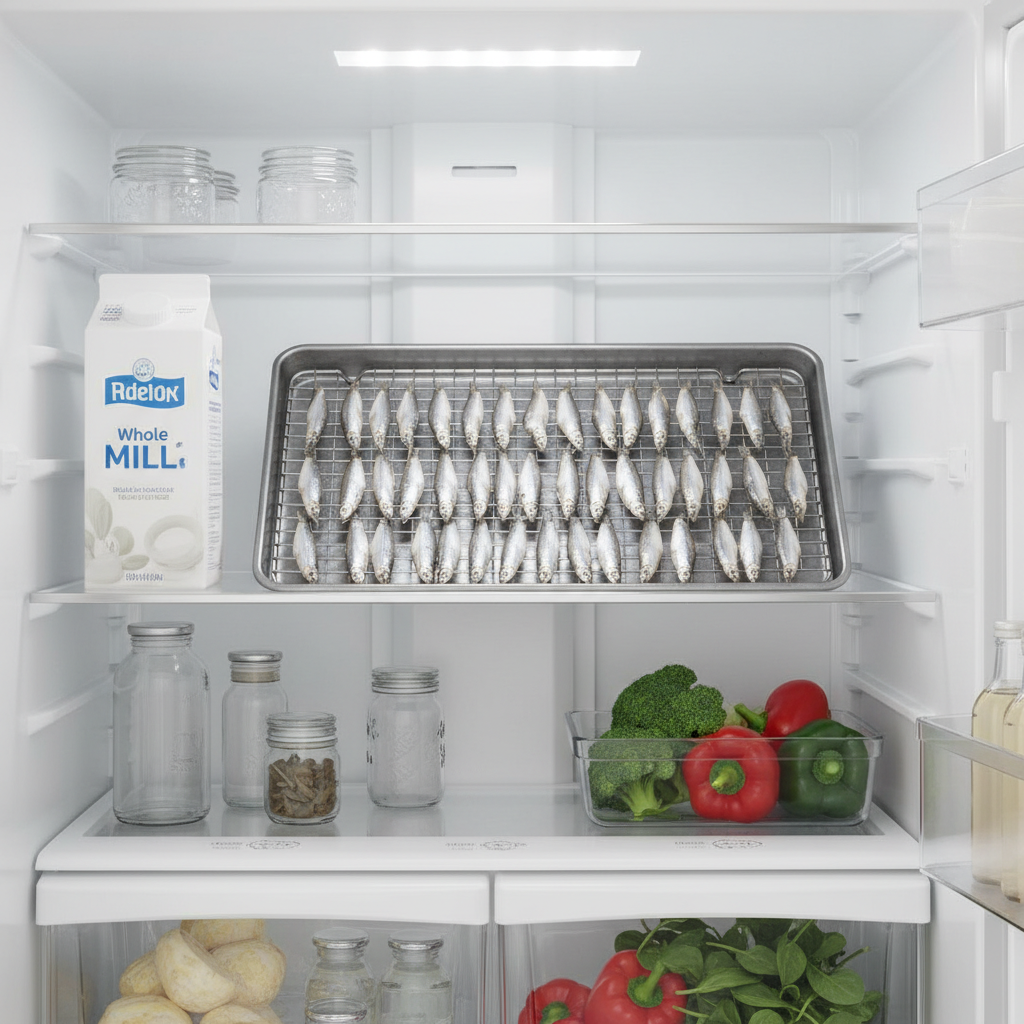
This is the ultimate low-effort method, perfect for busy pet parents. It uses the cold, dry environment of your modern frost-free refrigerator to slowly desiccate the fish over several days. There’s no heat, no noise, and virtually no smell. It’s science at its tastiest!
What You’ll Need:
- A refrigerator (frost-free is best)
- A wire baking rack
- A tray or baking sheet to catch drips
- Fresh, unsalted anchovies
Step-by-Step Instructions:
- Prep the Fish: Rinse the anchovies well and pat them very, very dry with paper towels.
- Set Up Your Rack: Place the wire rack over a tray or baking sheet. This is important to allow air to circulate underneath and to catch any potential drips, keeping your fridge clean.
- Arrange the Anchovies: Place the anchovies in a single layer on the wire rack, making sure none are touching.
- Chill Out: Carefully place the entire setup (tray and rack) uncovered in your refrigerator. Find a spot where they won’t be disturbed. The circulating cold, dry air in the fridge will do all the work.
- The Waiting Game: Now you just wait. This is a slow process that takes about 3 to 5 days. You don’t need to flip them or do anything at all.
- Check for Doneness: After 3 days, check one. It should be hard, stiff, and dry to the touch. If it feels at all pliable, give it another day or two. They will be lighter in color than heat-dried anchovies.
- Store: Once they are fully dried, you can transfer them to an airtight container and store them in the fridge or freezer.
Pros and Cons
Pros:
|
Cons:
|
The Verdict:
This method is perfect for the busy, hands-off pet parent who values simplicity over speed. If you can sacrifice a little fridge space for a few days, you’ll be rewarded with perfectly preserved, nutrient-rich treats with almost no active work involved.
A Pet Parent’s Guide to Perfect Homemade Anchovy Treats
Making the treats is the fun part, but a little prep and knowledge go a long way in ensuring they are safe, healthy, and last as long as possible. Here are a few key things to keep in mind.
Choosing the Right Anchovies
The foundation of a great treat is a great ingredient. When you’re at the store, you have a few options:
- Fresh: If you’re lucky enough to live near a coast or have a great fishmonger, fresh is fantastic. Look for bright, shiny fish with clear eyes.
- Frozen: This is the most common and convenient option. Look for bags of frozen, whole, unsalted anchovies or similar small fish like smelts. They are usually flash-frozen, preserving their nutrients.
- What to Avoid: Steer clear of canned, jarred, or brined anchovies. These are almost always packed in massive amounts of salt and/or oil, neither of which is good for your dog. Always read the ingredients—the only one should be ‘anchovies’.
The Importance of Preparation
Don’t skip the prep! Even if you buy ‘unsalted’ anchovies, a good rinse under cool water is always a good idea. If you can only find anchovies that have been salted for preservation, the de-salting soak is not optional. A 30-60 minute soak in a bowl of fresh water, changed a couple of times, will help draw out the excess sodium, making them safe for your pup. After rinsing or soaking, patting them completely dry is key for all methods. Water is the enemy of dehydration; the less you start with, the faster and more effective the process will be.
Proper Storage for Your Homemade Goodies
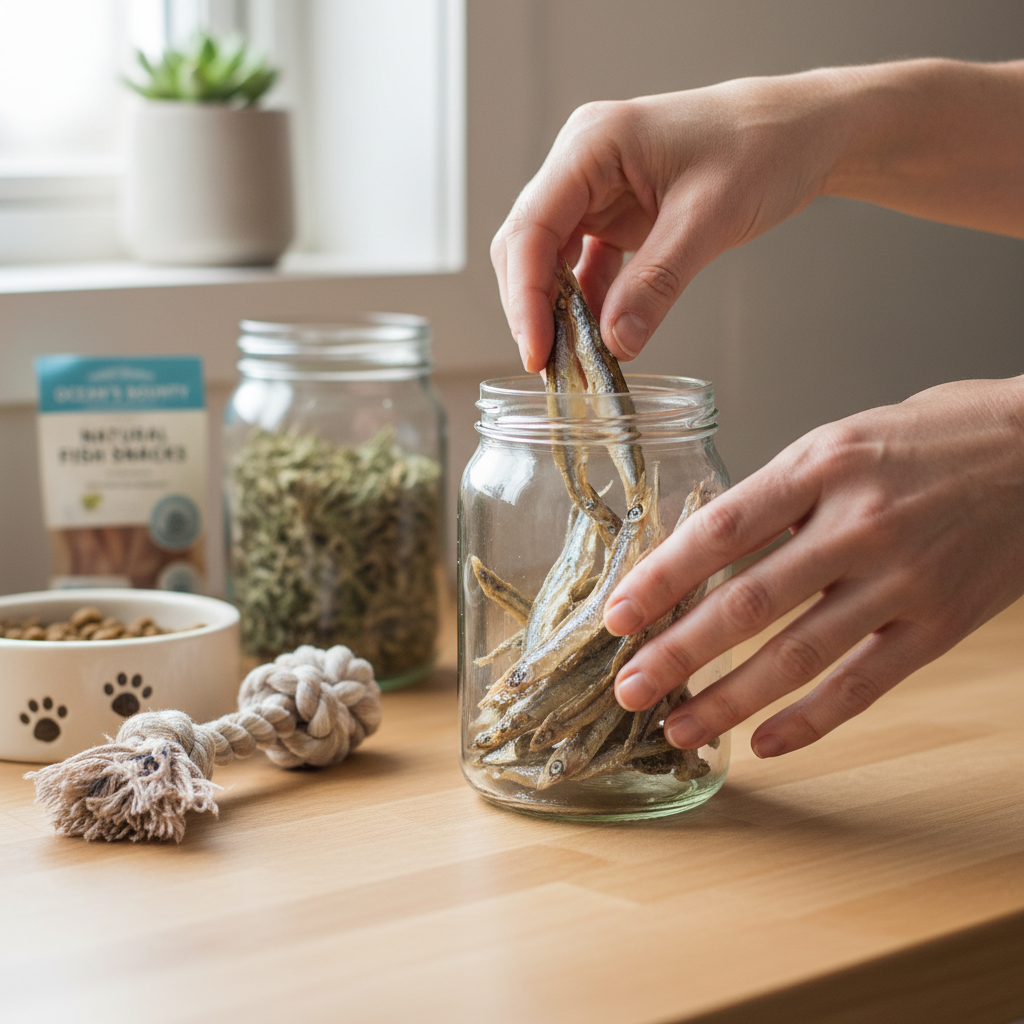
You’ve spent all this time making beautiful, crispy treats, so let’s make sure they last! The enemy of your dried anchovies is moisture. Once they are completely cool (and I mean 100% room temperature), store them in an airtight container.
- For short-term storage (1-2 weeks): A glass jar or sealed container on your counter is perfectly fine.
- For medium-term storage (1-3 months): Keep them in an airtight container in the refrigerator.
- For long-term storage (3+ months): Pop them in a freezer-safe bag or container and freeze them. They’ll last for ages, and you can pull out a few at a time.
If you notice any signs of mold or a strange ‘off’ smell, discard the batch immediately.
Feeding Guidelines: How Many is Too Many?
Anchovies are a healthy treat, but they are still treats! They should be given in moderation and make up no more than 10% of your dog’s daily caloric intake. For a small dog, one or two little fish a day is plenty. A larger dog might enjoy three or four. They are great as a high-value training reward or a special meal topper to boost that Omega-3 intake.
Frequently Asked Questions
- 1. Can I use canned anchovies meant for humans?
- It’s best to avoid them. Canned anchovies are typically packed in a lot of salt and oil. Even the ones packed in water are often high in sodium, which isn’t healthy for dogs. Stick to plain, frozen, or fresh anchovies to control the ingredients and keep your pup safe.
- 2. My house smells so fishy! How can I manage the smell?
- The fishy smell is the biggest downside for many people! To manage it, try to ventilate your kitchen well by opening windows or using the stovetop fan. Methods like the dehydrator (which is mostly enclosed), the grill (which is outside), or the refrigerator (which contains the smell) are great options if you’re sensitive to the aroma. A bowl of vinegar or coffee grounds left on the counter can also help absorb odors.
- 3. Are the tiny bones in anchovies safe for my dog to eat?
- Yes, they are! When anchovies are properly dehydrated, their tiny bones become very brittle and crumbly. They are easily crushed and digested by dogs and are a great source of calcium. This is very different from cooked bones (like chicken bones), which can splinter and be dangerous.
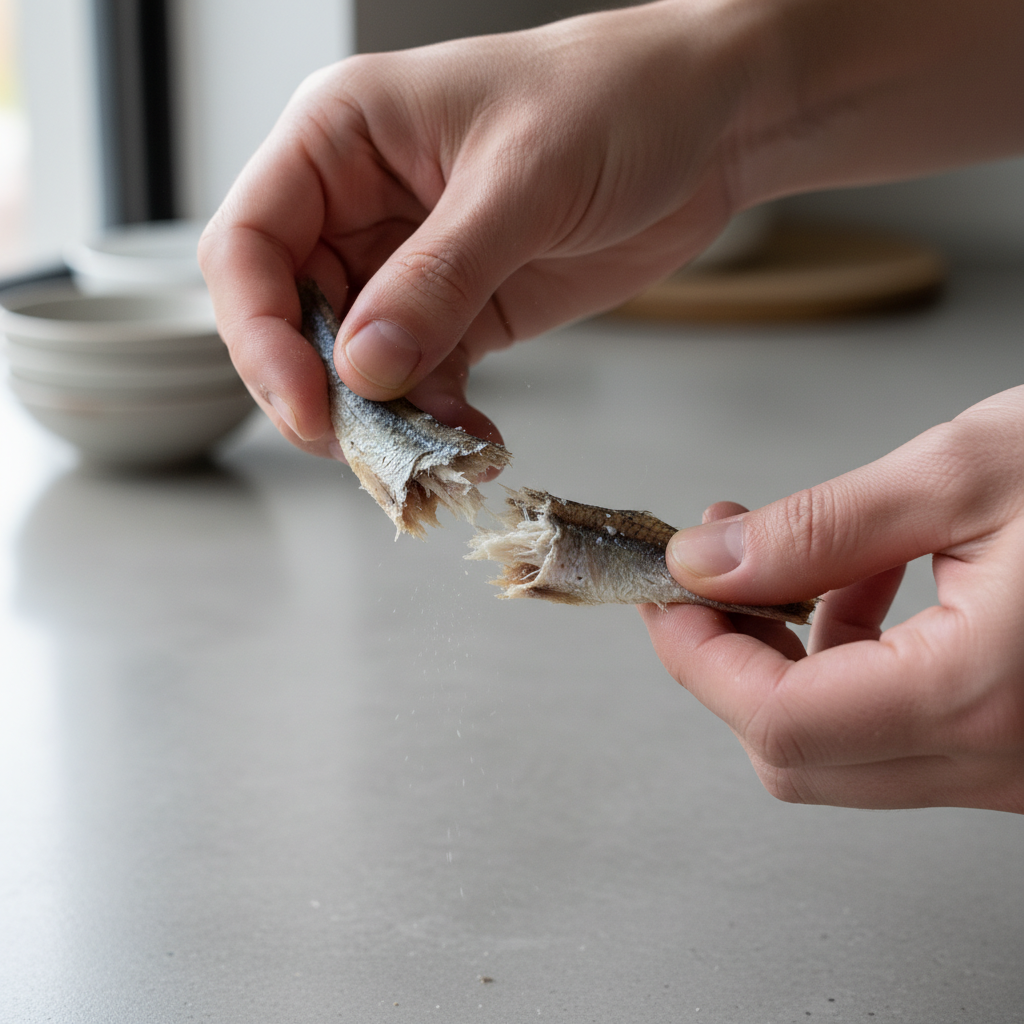
- 4. How do I know when the anchovies are truly done drying?
- The key is the ‘snap test.’ Take one of the thicker anchovies from the batch and let it cool for a few minutes. Try to bend it. If it bends or feels leathery, it needs more time. If it snaps cleanly and easily in half, it’s perfectly dried and ready for storage.
Conclusion
Wow, who knew there were so many ways to make one of your dog’s favorite treats? From the classic oven method to the super-speedy air fryer, there’s a technique to fit every lifestyle, kitchen, and level of patience. Making your own dried anchovies is not only a fantastic way to save money, but it also gives you complete control over what your best friend is eating—no salt, no additives, just pure fishy goodness.
It’s a simple act of love that provides your dog with a powerhouse of nutrients that will help them shine from the inside out. So pick a method that sounds fun, grab some fish, and get ready to see the happiest tail wags you’ve ever seen. Happy treat-making!