11 Homemade Green Dental Chew Recipes to Fight Bad Breath
Let’s be honest, we adore our furry friends, but sometimes their breath can be… well, a force of nature. That less-than-pleasant doggy breath can be a sign that their dental hygiene needs a little boost. While regular brushing and vet check-ups are non-negotiable, what you put in their treat jar can make a huge difference. Store-bought dental chews can be effective, but they often come with a high price tag and a long list of ingredients you can’t pronounce.
What if you could fight plaque and freshen your pup’s breath with wholesome, simple ingredients from your own kitchen? You can! Welcome to the world of homemade green dental chews. These recipes are packed with natural breath-freshening powerhouses like parsley, mint, and other leafy greens. They’re fun to make, easy on your wallet, and you have complete control over what goes into your dog’s body. Get ready to transform your dog’s dental routine from a chore into a treat!
Quick Comparison of Our Green Chew Recipes
| Recipe Name | Main Green Ingredient | Approx. Prep/Bake Time | Best For |
|---|---|---|---|
| Minty Parsley Power Bones | Parsley & Mint | 45 Minutes | Classic bad breath |
| Green Tea & Spirulina Strips | Spirulina | 30 Minutes + Dehydrating | Antioxidant boost |
| Kale & Apple Frozen Pupsicles | Kale | 15 Minutes + Freezing | Hot weather & gentle chewers |
| Cucumber & Dill Delight Chews | Cucumber & Dill | 40 Minutes | Hydration & sensitive tummies |
| Spinach & Coconut Oil Bites | Spinach | 10 Minutes + Freezing | Quick, no-bake treats |
| Broccoli & Oat Bars | Broccoli | 50 Minutes | Fiber & a satisfying crunch |
| Celery & Peanut Butter Sticks | Celery | 5 Minutes | The ultimate quick fix |
| Basil & Blueberry Frozen Treats | Basil | 10 Minutes + Freezing | Pups who love fruity flavors |
| Wheatgrass & Ginger Gels | Wheatgrass | 20 Minutes + Chilling | Soothing gums & tummies |
| Cilantro & Kefir Paws | Cilantro | 15 Minutes + Freezing | Gut health & breath support |
| Rosemary & ACV Biscuits | Rosemary | 55 Minutes | Extra antibacterial power |
1. Minty Parsley Power Bones

This is the classic, go-to recipe for a reason! Parsley is rich in chlorophyll, a natural deodorizer that fights bad breath from the inside out. Mint provides that instantly recognizable fresh scent. Combined in a crunchy, satisfying biscuit, these are a true crowd-pleaser for pups and their owners.
Ingredients:
- 2 1/2 cups whole wheat flour (or oat flour for a gluten-free option)
- 1/2 cup old-fashioned oats
- 1 cup finely chopped fresh parsley
- 1/2 cup finely chopped fresh mint
- 1 large egg
- 1/4 cup coconut oil, melted
- 1/2 cup water, plus more if needed
Instructions:
- Preheat your oven to 350°F (175°C) and line a baking sheet with parchment paper.
- In a large bowl, whisk together the flour and oats. Stir in the chopped parsley and mint until evenly distributed.
- In a separate bowl, whisk the egg, melted coconut oil, and 1/2 cup of water.
- Pour the wet ingredients into the dry ingredients and mix until a stiff dough forms. If it’s too crumbly, add more water, one tablespoon at a time.
- Turn the dough out onto a lightly floured surface and roll it to about 1/4-inch thickness.
- Use a cookie cutter (bone shapes are always fun!) to cut out the treats and place them on the prepared baking sheet.
- Bake for 25-30 minutes, or until the edges are golden brown. For a crunchier treat, turn off the oven and let the biscuits cool inside with the door cracked open.
- Let them cool completely before sharing with your eager pup.
Pros & Cons
| Pros | Cons |
|---|---|
| Classic, effective ingredients | Requires baking and some prep time |
| Makes a large, long-lasting batch | Some dogs may not like the strong minty flavor |
| Very crunchy, which helps scrape plaque | Not suitable for dogs with wheat allergies (unless modified) |
Verdict:
This is the perfect all-rounder recipe for any dog owner looking to tackle standard doggy breath. It’s ideal for dogs who enjoy a good, crunchy biscuit and aren’t overly picky about flavors.
2. Green Tea & Spirulina Strips

Ready to level up your dog’s dental health? This recipe brings in some serious superfoods. Decaffeinated green tea contains antioxidants that can help reduce oral bacteria. Spirulina, a type of blue-green algae, is packed with nutrients and chlorophyll. These chewy strips are a fantastic way to deliver a concentrated dose of green goodness.
Ingredients:
- 1 lb lean ground chicken or turkey
- 1/4 cup rice flour
- 1 tablespoon of spirulina powder
- 1/4 cup strongly brewed, cooled decaffeinated green tea
- 1 egg
Instructions:
- Preheat your oven to its lowest setting, usually around 170-200°F (75-95°C). If you have a dehydrator, even better!
- In a bowl, combine the ground meat, rice flour, spirulina powder, green tea, and egg. Mix thoroughly with your hands until it’s well combined.
- Line a baking sheet with parchment paper. Spread the meat mixture thinly and evenly across the sheet, about 1/8-inch thick. You can use a spatula or another piece of parchment on top to press it down.
- Use a pizza cutter or a knife to score the mixture into long strips. This will make them easy to break apart after baking.
- Bake for 2-4 hours (or use your dehydrator according to its instructions) until the strips are dry and leathery. The time will vary based on your oven and the thickness of the strips.
- Let them cool completely. Break them apart along the scored lines.
Pros & Cons
| Pros | Cons |
|---|---|
| Packed with antioxidants and superfoods | Requires a long, slow cooking time (or a dehydrator) |
| High-protein and grain-free friendly | Spirulina can be expensive and has a strong smell |
| Chewy texture dogs love | The green color can be intense and might stain surfaces |
Verdict:
This recipe is for the health-conscious pet parent who wants to give their dog an extra nutritional boost. It’s excellent for active dogs who need more protein and for pups who prefer a chewy, jerky-like treat over a hard biscuit.
3. Kale & Apple Frozen Pupsicles
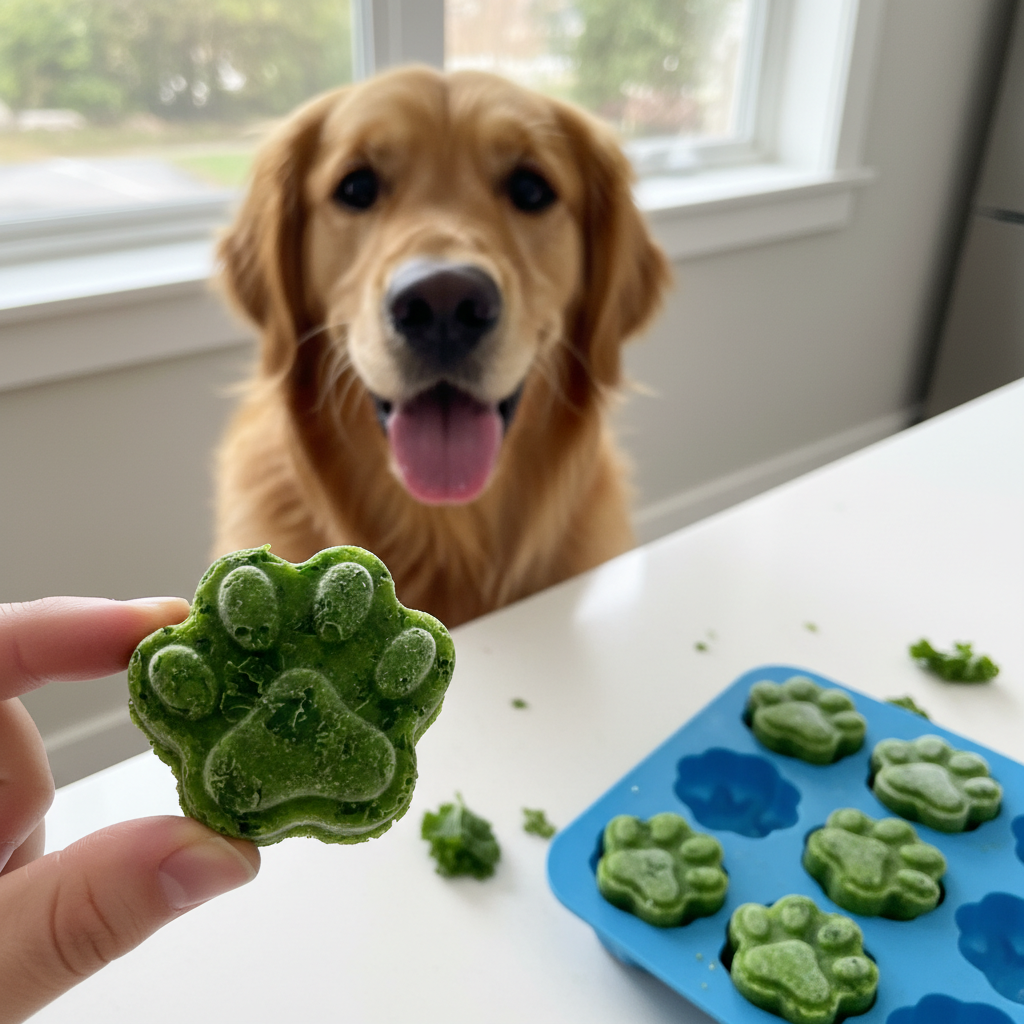
On a hot day, nothing beats a cool treat. These frozen pupsicles are incredibly simple to make and serve double duty as a dental chew and a way to cool down your pup. Kale provides vitamins and fiber, while apple adds a touch of sweetness and helps scrub teeth. The frozen texture is also great for soothing the gums of teething puppies.
Ingredients:
- 1 large handful of fresh kale (stems removed)
- 1/2 apple, cored and chopped (no seeds!)
- 1 cup plain, unsweetened yogurt or kefir
- 1/2 cup water
Instructions:
- Combine the kale, apple, yogurt (or kefir), and water in a blender.
- Blend on high until the mixture is completely smooth. You don’t want any large chunks of kale left.
- Pour the green smoothie mixture into ice cube trays or fun silicone molds (paw or bone shapes are great).
- For larger dogs, you can use small paper cups and insert a sturdy dog biscuit or a carrot stick as an ‘edible handle’ before freezing.
- Freeze for at least 4 hours, or until solid.
- Pop one out and let your dog enjoy a refreshing, teeth-cleaning treat!
Pros & Cons
| Pros | Cons |
|---|---|
| Incredibly easy and fast to prepare | They melt! Best served outdoors or on a washable surface |
| Soothing for teething puppies’ gums | Not as abrasive as a hard biscuit for plaque removal |
| Hydrating and refreshing in warm weather | Requires freezer space |
Verdict:
Perfect for the summer months, for teething puppies, or for older dogs who have trouble with hard treats. This is the go-to recipe for pet owners who are short on time but still want to provide a healthy, homemade option.
4. Cucumber & Dill Delight Chews

This recipe is all about cool, gentle freshness. Cucumber is over 95% water, making it incredibly hydrating, and it also contains compounds that can help freshen breath. Dill has been used for centuries for its soothing properties and has antibacterial qualities. These light, airy biscuits are great for dogs with sensitive stomachs.
Ingredients:
- 1 cup oat flour
- 1 cup brown rice flour
- 1/2 cup pureed cucumber (about half a large cucumber)
- 1/4 cup chopped fresh dill
- 1 egg
- 2 tablespoons olive oil
Instructions:
- Preheat your oven to 350°F (175°C) and line a baking sheet with parchment paper.
- In a large bowl, mix the oat flour and brown rice flour. Stir in the fresh dill.
- In another bowl, whisk together the pureed cucumber, egg, and olive oil.
- Combine the wet and dry ingredients and mix until a soft dough forms. The cucumber adds a lot of moisture, so you shouldn’t need extra water.
- Roll the dough out on a floured surface to about 1/4-inch thickness.
- Cut into your desired shapes and place on the baking sheet.
- Bake for 20-25 minutes until firm and lightly browned on the bottom.
- Cool completely before serving. These will be a softer biscuit.
Pros & Cons
| Pros | Cons |
|---|---|
| Very gentle on the digestive system | Softer texture is less effective at scraping heavy plaque |
| Hydrating ingredients | Dill has a unique flavor not all dogs will enjoy |
| Low in calories | Shorter shelf life due to high moisture content; store in fridge |
Verdict:
An excellent choice for senior dogs, dogs with sensitive stomachs, or those on a weight management plan. These chews offer a mild breath-freshening effect without being too rich or hard.
5. Spinach & Coconut Oil Bites

No oven? No problem! These no-bake bites are a powerhouse of nutrition. Spinach is loaded with vitamins, while coconut oil contains lauric acid, which has natural antibacterial properties that can help combat the bacteria that cause bad breath. They firm up in the fridge or freezer and provide a satisfying, chewy texture.
Ingredients:
- 1 cup rolled oats
- 1 cup fresh spinach, packed
- 1/2 cup xylitol-free peanut butter
- 1/3 cup coconut oil, melted
- 1/4 cup shredded, unsweetened coconut (optional, for rolling)
Instructions:
- In a food processor, pulse the rolled oats until they have a coarse, flour-like consistency.
- Add the fresh spinach and pulse until it’s finely chopped and mixed into the oats.
- Add the peanut butter and melted coconut oil. Process until the mixture comes together and forms a sticky ‘dough’.
- If using, spread the shredded coconut on a plate.
- Roll the mixture into small, 1-inch balls. Roll each ball in the shredded coconut to coat.
- Place the balls on a parchment-lined plate or tray and refrigerate for at least 30 minutes to firm up.
- Store in an airtight container in the refrigerator.
Pros & Cons
| Pros | Cons |
|---|---|
| No baking required, incredibly quick to make | Must be stored in the refrigerator or freezer |
| Coconut oil offers great antibacterial benefits | Higher in fat and calories, so portion control is key |
| Soft texture is good for all ages of dogs | Not crunchy, so less mechanical cleaning of teeth |
Verdict:
This is the ultimate recipe for busy pet parents. It’s perfect for those who want a quick, nutrient-dense treat that directly targets oral bacteria. A fantastic option for dogs who prefer softer treats.
6. Broccoli & Oat Bars
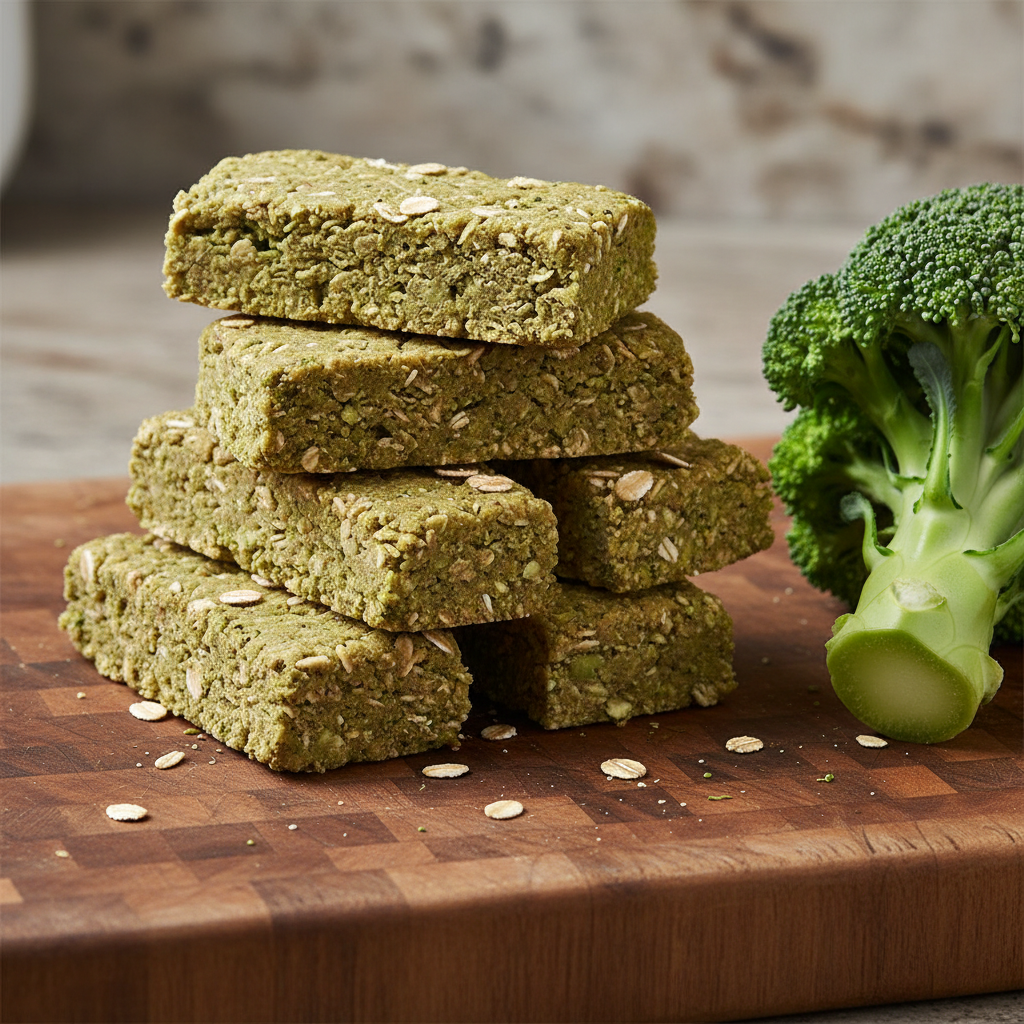
Don’t let your dog miss out on the benefits of broccoli! These ‘little trees’ are full of fiber and Vitamin C. When baked into a crunchy oat bar, they create a treat that’s both nutritious and great for scraping away plaque. The oats provide a hearty, satisfying base that dogs love.
Ingredients:
- 1 cup broccoli florets, finely chopped or pulsed in a food processor
- 1 1/2 cups oat flour (just blend rolled oats)
- 1 egg
- 3 tablespoons of water
- 1 tablespoon of olive oil
Instructions:
- Preheat your oven to 375°F (190°C). Line a baking sheet with parchment paper.
- In a bowl, combine the finely chopped broccoli and oat flour.
- In a separate small bowl, whisk the egg, water, and olive oil.
- Pour the wet mixture into the dry ingredients and mix until you have a thick, slightly sticky dough.
- Press the dough onto the prepared baking sheet, forming a rectangle about 1/2-inch thick.
- Score the dough into small, bar-like shapes with a knife.
- Bake for 30-35 minutes, until the edges are brown and the bars are firm to the touch.
- Let them cool completely on the baking sheet, then break them apart along the score lines.
Pros & Cons
| Pros | Cons |
|---|---|
| High in fiber, which is great for digestion | Broccoli can cause gas in some sensitive dogs; start with small amounts |
| Very hard and crunchy for maximum plaque scraping | The dough can be a bit sticky and tricky to work with |
| Simple, limited-ingredient recipe | Plain flavor might not appeal to very picky eaters |
Verdict:
These bars are ideal for dogs who need a seriously crunchy treat to help with plaque buildup. They are a great, simple option for owners who want to incorporate more fibrous vegetables into their dog’s diet.
7. Celery & Peanut Butter Sticks

This isn’t so much a recipe as it is a brilliant, instant dental-cleaning hack. Celery is nature’s dental floss for dogs! Its fibrous, stringy texture is fantastic at cleaning between teeth as your dog chews. Topping it with a little dog-safe peanut butter makes it an irresistible treat they’ll spend time working on.
Ingredients:
- 1 fresh celery stalk
- 1 tablespoon of xylitol-free, all-natural peanut butter
Instructions:
- Wash the celery stalk thoroughly.
- Cut the stalk into manageable pieces for your dog’s size (e.g., a 3-4 inch stick for a medium dog).
- Use a knife to spread a thin layer of peanut butter into the groove of the celery stick.
- Serve immediately for a crunchy, fun, and teeth-cleaning snack!
Pros & Cons
| Pros | Cons |
|---|---|
| Literally takes seconds to prepare | Can be messy as the dog chews it |
| Excellent mechanical cleaning action from the celery fibers | Not a ‘chew’ in the traditional sense; it gets eaten quickly |
| Low-calorie and hydrating | Some dogs dislike the texture or taste of celery |
Verdict:
This is the ultimate solution for when you need a dental treat in a pinch. It’s perfect for any dog who loves peanut butter and provides a satisfying crunch that’s great for their teeth. An amazing, simple addition to any dog’s snack rotation.
8. Basil & Blueberry Frozen Treats
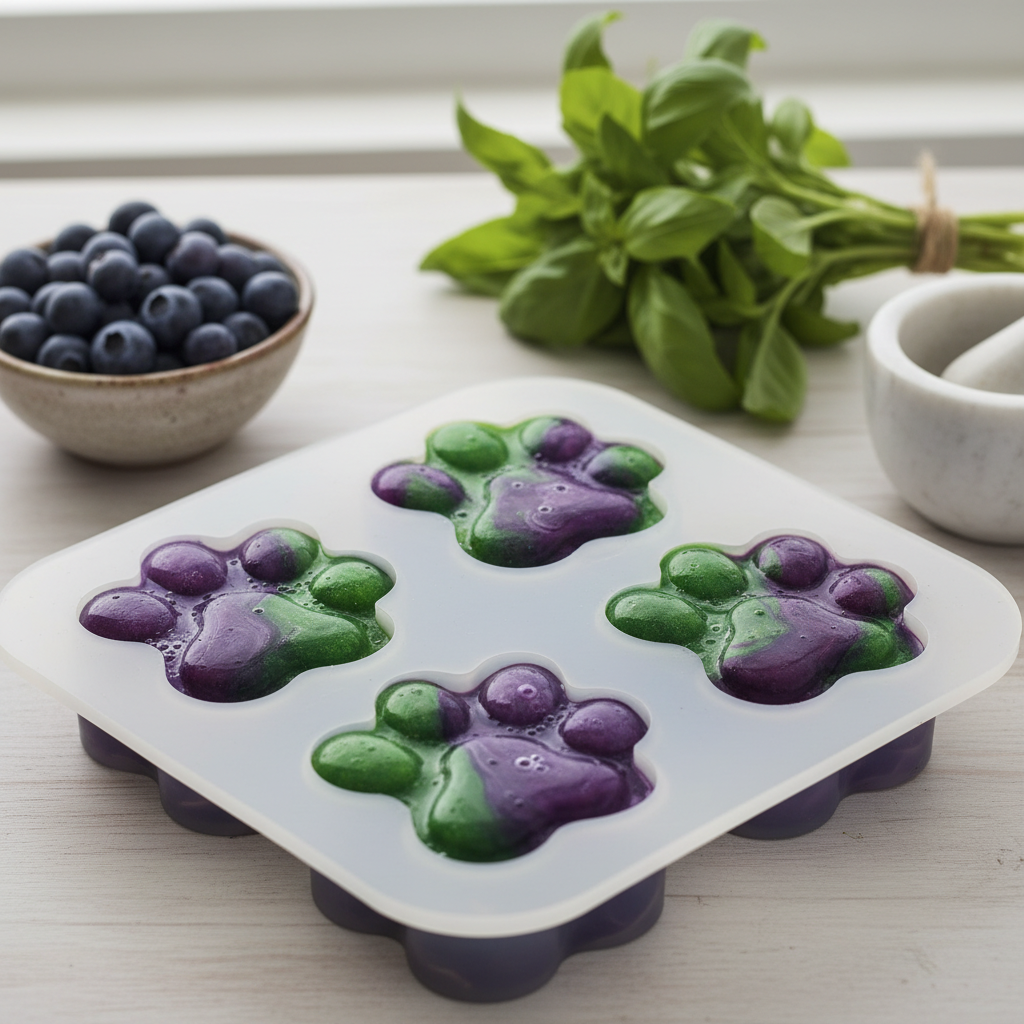
Who says breath fresheners can’t be fruity and delicious? This recipe combines the antioxidant power of blueberries with the aromatic, antibacterial properties of fresh basil. Blended with creamy coconut milk, these frozen delights are a gourmet treat that also happens to be great for your dog’s oral hygiene.
Ingredients:
- 1/2 cup fresh basil leaves
- 1/2 cup blueberries (fresh or frozen)
- 1 cup full-fat canned coconut milk (unsweetened)
- 1 tablespoon raw honey (optional, for dogs over 1 year old)
Instructions:
- Place the basil, blueberries, and coconut milk in a blender. If using, add the honey.
- Blend until completely smooth and the mixture has a lovely purple-green hue.
- Pour the mixture into silicone molds or an ice cube tray.
- Freeze for at least 4 hours, or until solid.
- Store the frozen treats in a freezer-safe bag or container.
Pros & Cons
| Pros | Cons |
|---|---|
| Unique, delicious flavor combination | Basil has a strong, aromatic scent that might not be for every dog |
| Packed with antioxidants from blueberries | Melts quickly, making it a treat for outdoors or easy-to-clean floors |
| Coconut milk adds healthy fats | Not a hard chew for mechanical plaque removal |
Verdict:
A fantastic choice for the foodie pup who appreciates a more complex flavor profile. These treats are perfect for a special occasion or as a refreshing summer snack that packs a healthy punch.
9. Wheatgrass & Ginger Gelatin Gels

Here’s a recipe that’s as good for the joints and tummy as it is for the breath. Gelatin is fantastic for supporting healthy joints and a healthy gut lining. Wheatgrass is a chlorophyll superstar, and a small amount of ginger can aid digestion (which can sometimes be a root cause of bad breath). These jiggly, chewy gels are a fun and unique treat.
Ingredients:
- 1 cup bone broth or water
- 1/4 cup cold water
- 3 tablespoons unflavored beef gelatin
- 2 tablespoons wheatgrass powder (or 1/4 cup fresh wheatgrass juice)
- 1/2 teaspoon freshly grated ginger
Instructions:
- Pour the 1/4 cup of cold water into a small bowl and sprinkle the gelatin over the top. Let it sit for 5-10 minutes to ‘bloom’ (it will absorb the water and become wrinkly).
- Gently heat the bone broth in a small saucepan until it’s warm but not boiling.
- Remove the broth from the heat and whisk in the bloomed gelatin until it is completely dissolved.
- Whisk in the wheatgrass powder and grated ginger.
- Pour the mixture into silicone molds or a small glass dish.
- Refrigerate for at least 3 hours, or until the gels are completely firm.
- If you used a glass dish, cut the gel into small, bite-sized cubes. Otherwise, pop them out of the molds.
Pros & Cons
| Pros | Cons |
|---|---|
| Supports joint and gut health | Texture can be strange for some dogs initially |
| Very soothing for the mouth and throat | Requires refrigeration and has a shorter shelf life |
| Easy to digest | No abrasive quality for cleaning teeth |
Verdict:
This is an outstanding choice for senior dogs who need joint support or for any dog with a sensitive digestive system. The gels are a novel way to deliver breath-freshening ingredients in a gentle, easy-to-eat format.
10. Cilantro & Kefir Paws
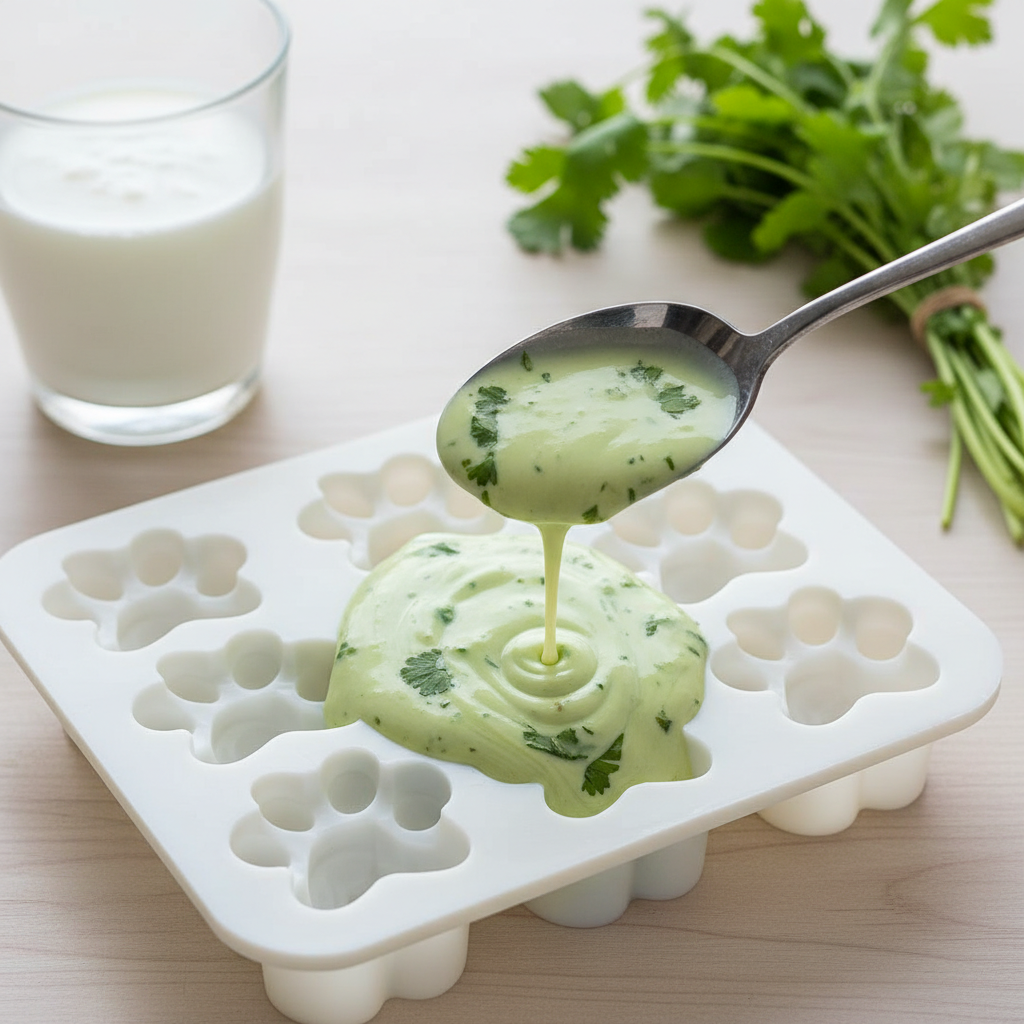
Did you know that gut health is directly linked to bad breath? This recipe tackles the problem from the inside out. Kefir is a fermented drink packed with probiotics, which help balance the good bacteria in your dog’s gut. Cilantro is another excellent green deodorizer, similar to parsley. Together, they make a tangy, gut-healthy frozen treat.
Ingredients:
- 1 cup plain, unsweetened kefir
- 1/2 cup chopped fresh cilantro
- 1 tablespoon of chia seeds (optional, for added texture and fiber)
Instructions:
- In a small bowl, stir the chopped cilantro and chia seeds (if using) into the kefir.
- Mix well until everything is evenly distributed.
- Carefully spoon the mixture into silicone molds (paw or bone shapes work well).
- Freeze for 3-4 hours, or until completely solid.
- Pop the frozen treats out of the molds and store them in a freezer bag.
Pros & Cons
| Pros | Cons |
|---|---|
| Excellent for digestive and gut health | Kefir has a tangy, sour taste that some dogs may need to get used to |
| Tackles bad breath at a potential root cause | Frozen treat, so it can be messy and lacks crunch |
| Extremely simple with only 2-3 ingredients | Requires freezer space for storage |
Verdict:
This recipe is perfect for dogs whose bad breath might be linked to digestive issues. If you’ve noticed tummy troubles alongside stinky breath, give these probiotic-packed paws a try. It’s a fantastic, health-forward approach to dental care.
11. Rosemary & Apple Cider Vinegar Biscuits

This recipe offers a powerful antibacterial and antimicrobial kick. Rosemary contains natural compounds that can inhibit the growth of oral bacteria. A small amount of apple cider vinegar (ACV) can also help balance pH levels in the mouth, making it a less friendly environment for plaque-forming bacteria. These savory, herbaceous biscuits are a great addition to your dental treat rotation.
Ingredients:
- 2 cups whole wheat flour
- 1/2 cup cornmeal (for crunch)
- 1 tablespoon finely chopped fresh rosemary
- 1 egg
- 1/4 cup olive oil
- 1 tablespoon apple cider vinegar
- 1/3 cup water or chicken broth
Instructions:
- Preheat your oven to 350°F (175°C) and line a baking sheet with parchment paper.
- In a large bowl, whisk together the whole wheat flour, cornmeal, and chopped rosemary.
- In a separate bowl, beat the egg, then whisk in the olive oil, apple cider vinegar, and water/broth.
- Pour the wet ingredients into the dry and mix to form a firm dough.
- Roll the dough to 1/4-inch thickness on a floured surface. Cut into shapes.
- Place the biscuits on the prepared baking sheet and bake for 30-40 minutes, until hard and golden. The longer they bake, the crunchier they’ll be.
- Let cool completely before storing in an airtight container.
Pros & Cons
| Pros | Cons |
|---|---|
| Strong antibacterial and antimicrobial properties | Rosemary and ACV have very strong flavors that might deter picky dogs |
| Very crunchy texture for effective teeth cleaning | The smell during baking is quite potent and herbaceous |
| Stores well at room temperature for a long time | Not suitable for dogs with wheat sensitivities |
Verdict:
This is a great ‘heavy-duty’ dental biscuit for dogs with persistent bad breath. The powerful ingredients offer more than just masking the smell; they actively work against oral bacteria. It’s best for dogs with adventurous palates who aren’t afraid of strong, savory flavors.
Your Guide to Crafting the Perfect Homemade Dental Chew

Making your own dog treats is a rewarding experience, but it’s important to do it safely and effectively. Here are a few things to keep in mind as you become your dog’s personal dental chef.
Choosing the Right Green Ingredients
The ‘green’ in these recipes isn’t just for color! Chlorophyll-rich ingredients are key. Great choices include:
- Parsley: The king of natural breath fresheners.
- Mint: Provides a fresh scent (use spearmint or peppermint, not English pennyroyal, which is toxic).
- Spinach & Kale: Packed with vitamins and fiber.
- Broccoli & Celery: Offer a great fibrous crunch.
- Spirulina & Wheatgrass: Superfood boosters for an extra health kick.
Important: Always research ingredients before giving them to your dog. Avoid onions, garlic, chives, and leeks, as they are toxic to dogs.
Getting the Texture Right
The effectiveness of a dental chew depends heavily on its texture. Consider what your dog needs:
- Crunchy & Hard: Biscuits and bars that are baked for a long time are fantastic for scraping away plaque and tartar through mechanical abrasion. They provide the most ‘brushing’ action.
- Chewy: Jerky-style treats or gelatin-based chews encourage longer chewing times, which stimulates saliva production. Saliva is your dog’s natural mouthwash.
- Frozen: These are less about scraping and more about soothing. They are wonderful for teething puppies or dogs with sensitive gums, and they can help reduce inflammation.
Proper Storage to Keep Chews Fresh
Homemade treats don’t have the preservatives of commercial ones, so storage is key.
- Crunchy Biscuits: Once completely cool, store them in an airtight container at room temperature for up to two weeks. For longer storage, you can freeze them.
- Soft-Baked or High-Moisture Treats: These must be stored in an airtight container in the refrigerator and should be used within 5-7 days.
- Frozen Treats: Keep them in a freezer-safe bag or container for up to 3 months.
Safety First: Always Supervise Your Pup
No matter how healthy the treat, always supervise your dog while they’re enjoying it. This ensures they don’t choke or try to swallow a large piece whole. Always provide access to fresh water, as chewing can be thirsty work!
Frequently Asked Questions About Homemade Dental Chews

How often can I give my dog these chews?
Think of these as treats, not meal replacements. One chew per day is generally a good rule of thumb for a medium-sized dog. Adjust based on your dog’s size, activity level, and the calorie content of the recipe. When in doubt, consider them part of your dog’s daily treat allowance and make sure treats don’t make up more than 10% of their daily caloric intake.
Are there any green ingredients I should absolutely avoid?
Yes! While many greens are healthy, some are not. The most important to avoid are those in the allium family: onions, garlic, leeks, and chives are all toxic to dogs. Also, be mindful of things like avocado pits and skins. Always stick to dog-safe ingredients and introduce any new food slowly to watch for any allergic reactions or digestive upset.
My dog is a picky eater. Any tips to get them to try these?
Absolutely! For picky pups, start with a recipe that includes an ingredient they already love, like the Celery & Peanut Butter Sticks or the Green Tea & Spirulina Strips (if they love meaty flavors). You can also crumble a small piece of a new biscuit over their regular food to get them accustomed to the taste. Sometimes, baking the treats a little longer to make them extra crunchy can also entice a skeptical dog.
How long do these homemade chews last?
It varies by recipe. Hard, dry biscuits can last for a couple of weeks in an airtight container. Softer treats with higher moisture content (like the Cucumber & Dill Chews) should be refrigerated and used within a week. Frozen and no-bake treats must be kept in the fridge or freezer and will last for several weeks to a few months in the freezer. If you ever see signs of mold or they smell ‘off’, it’s time to toss them.
Conclusion
There you have it – 11 fantastic and easy ways to take your dog’s dental health into your own hands! Making homemade green dental chews is more than just a way to save money; it’s a fun and loving act that shows your pup you care about their well-being from the inside out. By choosing the right recipe for your dog’s needs and preferences, you can help fight plaque, freshen that stinky breath, and provide them with a delicious, wholesome snack.
Remember, these treats are a wonderful supplement to, not a replacement for, regular dental care like teeth brushing and professional cleanings. So, pick a recipe that caught your eye, head to the kitchen, and get ready to be greeted with happy tail wags and much, much fresher kisses. Happy baking!