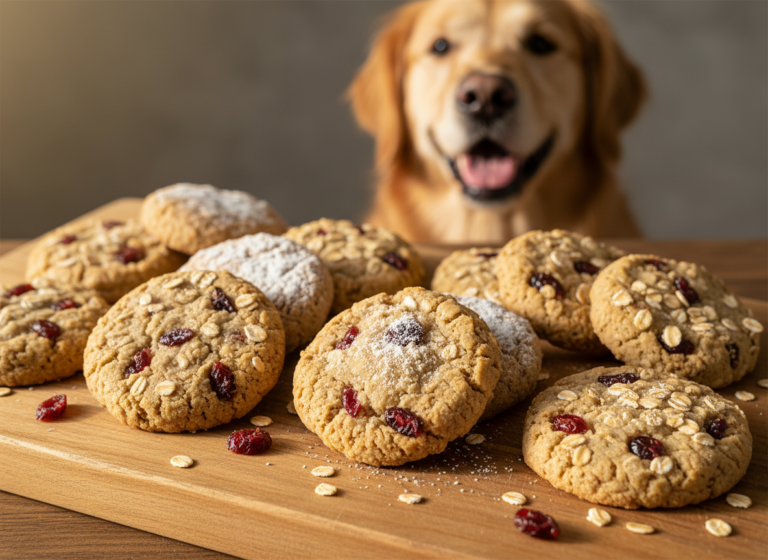
13 Simple 3-Ingredient Dog Biscuit Recipes to Bake Today
There’s a special kind of joy that comes from seeing your dog’s tail wag with uncontrollable excitement, especially when it’s because of a treat you made just for them. Store-bought biscuits can be great, but they often come with long, confusing ingredient lists and hidden preservatives. What if you could give your furry best friend a delicious, wholesome snack made with just three simple ingredients? Well, you’re in luck!
Baking for your pup is easier than you think. It’s a fantastic way to control what goes into their diet, cater to their specific tastes (and allergies), and shower them with love. Plus, your kitchen will smell amazing! We’ve gathered 13 of the simplest, most delicious 3-ingredient dog biscuit recipes that will have your dog begging for more. Let’s get baking!
Quick Recipe Comparison
| Recipe | Key Ingredients | Best For |
|---|---|---|
| Classic Peanut Butter & Oat | Oats, Peanut Butter, Egg | A protein-packed classic |
| Soothing Pumpkin Spice | Pumpkin, Whole Wheat Flour, Cinnamon | Sensitive tummies |
| Sweet Potato Power Bites | Sweet Potato, Coconut Flour, Egg | Grain-free energy boost |
| Fruity Banana Bites | Banana, Oats, Egg | A softer treat for all ages |
| Apple Cheddar Crunchers | Apple, Cheddar Cheese, Whole Wheat Flour | Pups who love savory snacks |
1. Classic Peanut Butter & Oat Biscuits
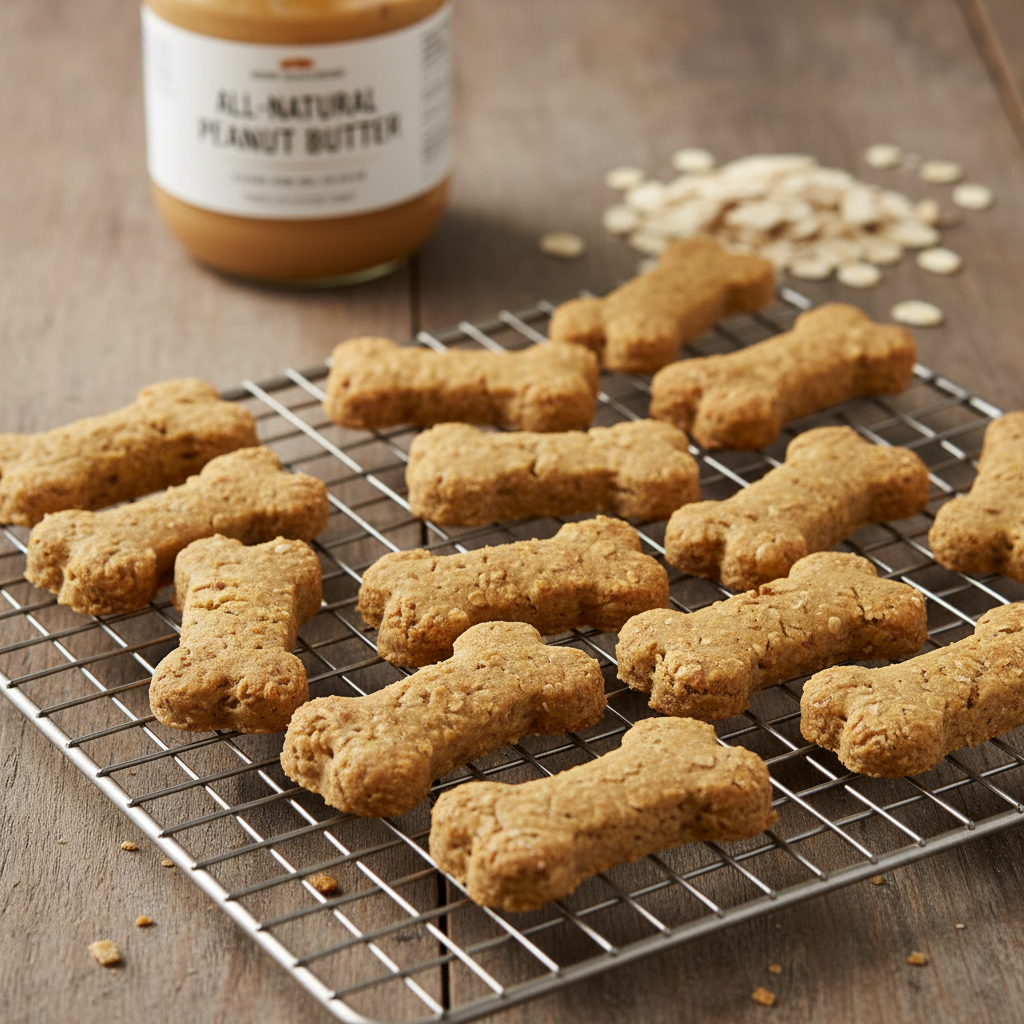
You can’t go wrong with this timeless combination. Peanut butter is a flavor most dogs go absolutely wild for, and oats provide a wonderful source of fiber. This recipe is the perfect starting point for any aspiring dog treat baker.
Ingredients:
- 1 cup old-fashioned or rolled oats (ground into a flour)
- 1/2 cup natural, xylitol-free peanut butter
- 1 large egg
Instructions:
- Preheat your oven to 350°F (175°C) and line a baking sheet with parchment paper.
- If you don’t have oat flour, simply blend 1 cup of rolled oats in a blender or food processor until it reaches a flour-like consistency.
- In a medium bowl, combine the oat flour, peanut butter, and egg. Mix until a thick, workable dough forms. If it’s too sticky, add a little more oat flour; if it’s too crumbly, add a teaspoon of water.
- Roll the dough out on a lightly floured surface to about 1/4-inch thickness.
- Use your favorite cookie cutters to cut out shapes and place them on the prepared baking sheet.
- Bake for 15-20 minutes, or until the edges are golden brown. Let cool completely on a wire rack before serving.
Pros & Cons
Pros:
|
Cons:
|
Verdict:
This is the quintessential dog biscuit. It’s perfect for a reliable, crowd-pleasing treat that provides a good boost of protein and fiber for active dogs.
2. Soothing Pumpkin Spice Treats

Pumpkin is a superfood for dogs, known for aiding in digestive health. Paired with a dash of cinnamon (which has anti-inflammatory properties), these treats are as healthy as they are delicious. They’re perfect for the autumn season or any time your pup’s tummy needs a little extra love.
Ingredients:
- 1 cup whole wheat flour
- 1/2 cup pure pumpkin puree (not pie filling)
- 1/2 teaspoon ground cinnamon
Instructions:
- Preheat oven to 350°F (175°C) and line a baking sheet with parchment paper.
- In a bowl, mix the whole wheat flour, pumpkin puree, and cinnamon together. The dough will be thick and a bit sticky.
- Knead the dough on a floured surface for a minute or two until it comes together.
- Roll the dough to about 1/4-inch thickness and cut into shapes.
- Place the biscuits on the baking sheet and bake for 20-25 minutes, until firm and dry to the touch. For a crunchier treat, turn off the oven and let them sit inside as it cools.
- Allow to cool completely before treating your pup.
Pros & Cons
Pros:
|
Cons:
|
Verdict:
An ideal choice for dogs with sensitive stomachs or those who need more fiber in their diet. These soothing treats are both gentle and tasty.
3. Sweet Potato Power Bites
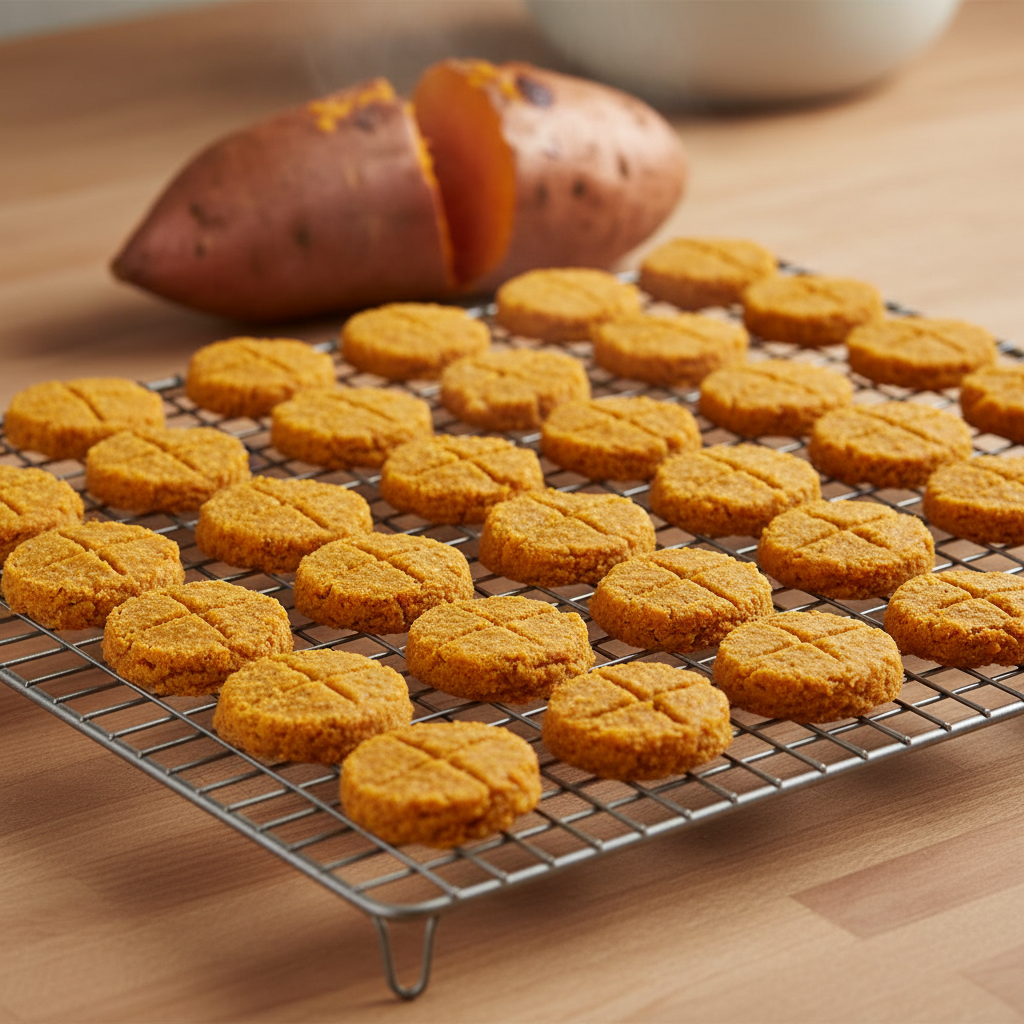
Sweet potatoes are packed with vitamins and antioxidants, making them a fantastic, nutrient-dense base for a dog treat. This grain-free recipe uses coconut flour, which is a great alternative for dogs with wheat allergies and adds a subtle sweetness.
Ingredients:
- 1 cup cooked and mashed sweet potato
- 1/2 cup coconut flour
- 1 large egg
Instructions:
- Preheat your oven to 350°F (175°C). Line a baking sheet with parchment paper.
- To prepare the sweet potato, you can bake or boil it until tender, then remove the skin and mash it thoroughly. Let it cool.
- In a mixing bowl, combine the mashed sweet potato, coconut flour, and egg. Mix well until a dough forms. Coconut flour is very absorbent, so the dough should come together nicely.
- Roll the dough into small, 1-inch balls and place them on the baking sheet. Gently press them down with a fork to flatten slightly.
- Bake for 20-25 minutes until firm and lightly browned on the bottom.
- Let cool completely before storing.
Pros & Cons
Pros:
|
Cons:
|
Verdict:
Perfect for the health-conscious pet owner and for dogs on a grain-free diet. These Power Bites are a fantastic way to deliver essential nutrients in a tasty package.
4. Fruity Banana & Oat Bites
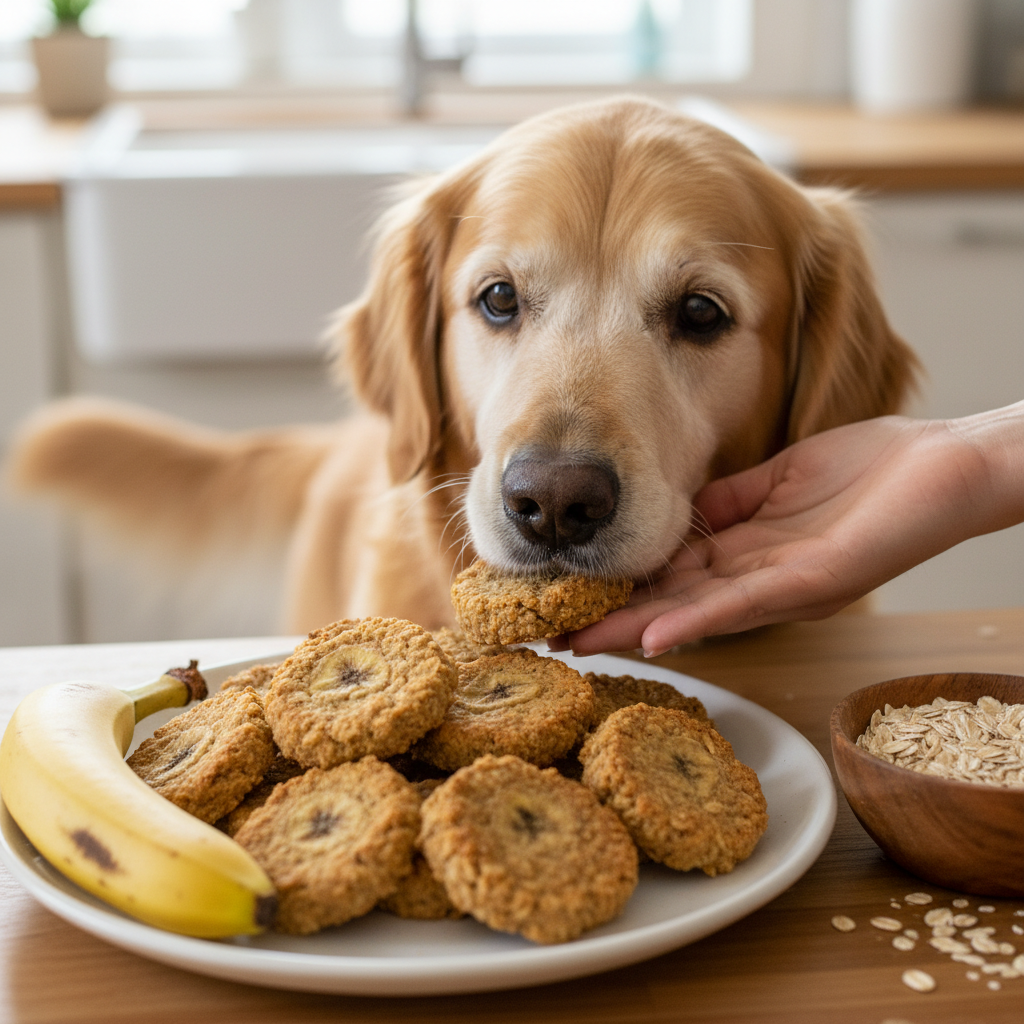
If your dog has a bit of a sweet tooth, these banana and oat treats are a healthy way to indulge them. Bananas are a good source of potassium and vitamin C. This recipe creates a slightly softer biscuit, which is great for puppies or senior dogs with sensitive teeth.
Ingredients:
- 1 ripe banana, mashed
- 1 cup oat flour (or rolled oats, blended)
- 1 large egg
Instructions:
- Preheat oven to 350°F (175°C). Prepare a baking sheet with parchment paper.
- In a bowl, mash the ripe banana until it’s mostly smooth.
- Add the oat flour and the egg to the mashed banana. Stir until everything is well combined into a soft dough.
- Drop teaspoon-sized spoonfuls of the dough onto the baking sheet, or roll it out (it will be sticky, so flour your surface well) and use cookie cutters.
- Bake for 15-20 minutes, until the bottoms are golden.
- These treats will be softer than others. Let them cool completely.
Pros & Cons
Pros:
|
Cons:
|
Verdict:
An excellent choice for older dogs, puppies, or any pup who prefers a chewier, softer treat. The natural sweetness makes it a healthy dessert alternative.
5. Apple & Cheddar Crunchers
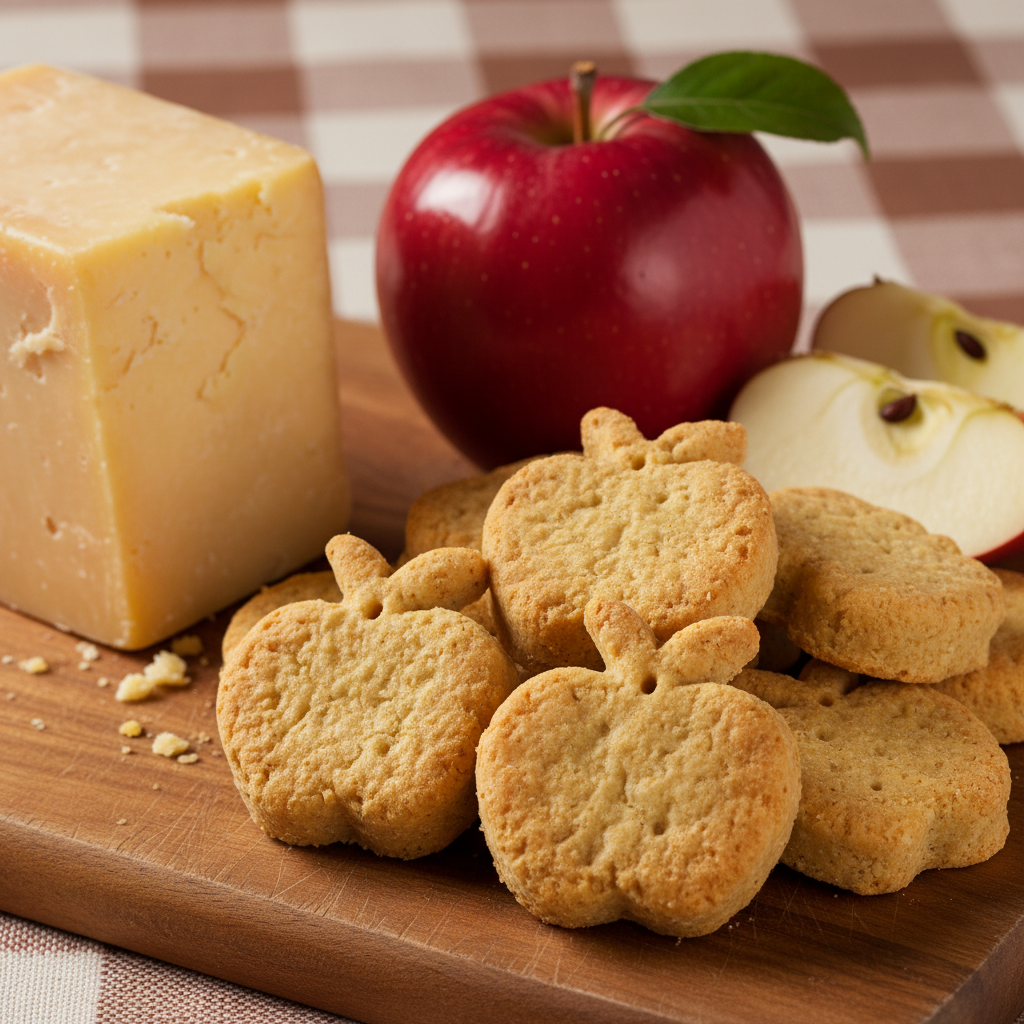
Ready for a savory snack that will make your dog drool? The combination of sweet apple and sharp cheddar is a winner. Apples provide fiber and vitamins, while cheese adds a punch of flavor and protein. Just be sure your dog tolerates dairy well.
Ingredients:
- 1/2 cup unsweetened applesauce
- 1/2 cup shredded sharp cheddar cheese
- 1 cup whole wheat flour
Instructions:
- Preheat your oven to 350°F (175°C) and line a baking sheet.
- In a large bowl, combine the applesauce, shredded cheddar, and whole wheat flour.
- Mix until a stiff dough forms. You may need to use your hands to bring it all together.
- On a floured surface, roll the dough to 1/4-inch thickness.
- Cut out your desired shapes and place them on the baking sheet.
- Bake for 20-25 minutes, or until golden and crunchy.
- Cool completely before sharing with your eager pup.
Pros & Cons
Pros:
|
Cons:
|
Verdict:
For the dog with a sophisticated palate who enjoys savory over sweet. These are fantastic high-value rewards for training sessions.
6. Fresh Breath Carrot & Parsley Treats
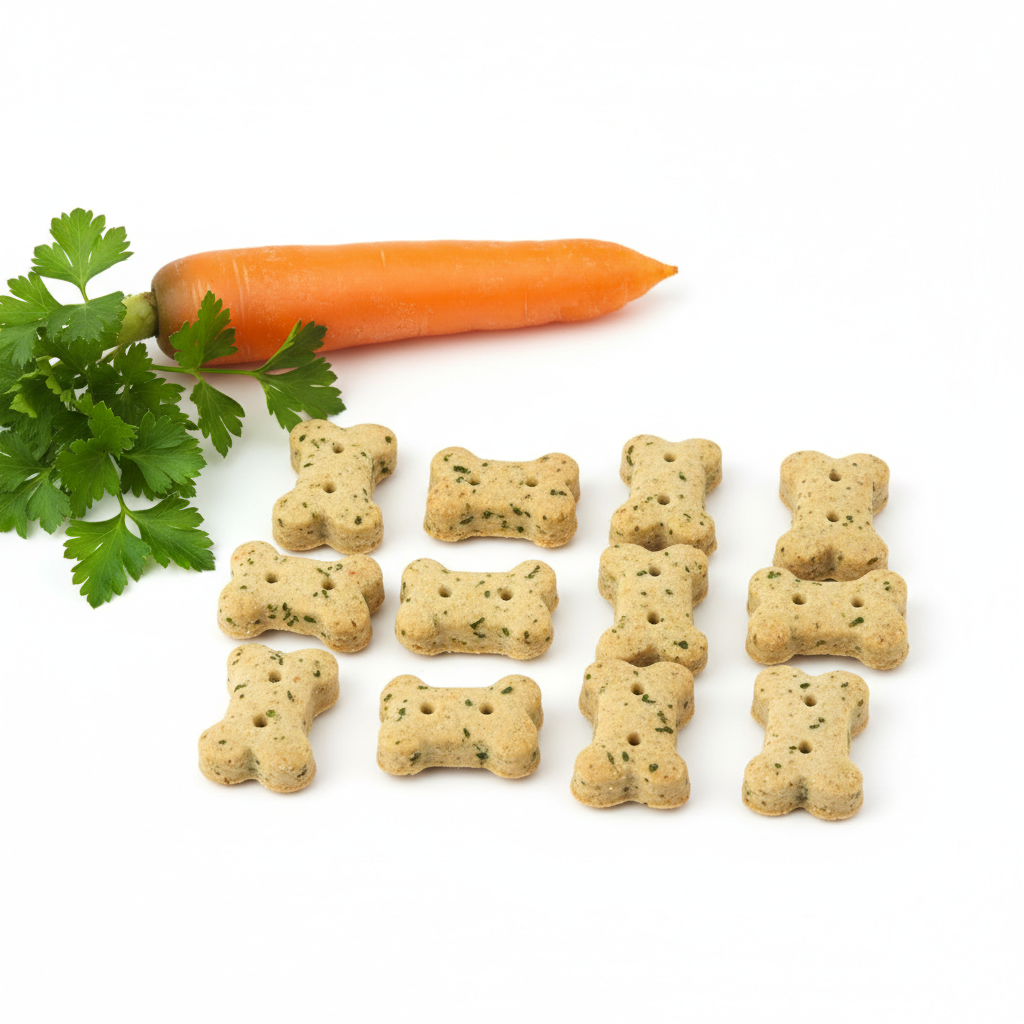
Doggy breath is a real thing. While these treats aren’t a substitute for dental care, the parsley can certainly help freshen things up! Carrots add a touch of sweetness and a healthy dose of beta-carotene, making this a treat you can feel great about.
Ingredients:
- 1 cup whole wheat flour
- 1/2 cup finely grated carrot
- 1/4 cup finely chopped fresh parsley
Instructions:
- Preheat oven to 350°F (175°C).
- In a bowl, combine the flour, grated carrot, and chopped parsley.
- Slowly add 1/4 to 1/3 cup of water, mixing as you go, until a firm dough forms.
- Roll out the dough on a floured surface to your desired thickness.
- Cut into small shapes—smaller treats are great for breath freshening!
- Bake for 25-30 minutes until hard and dry.
- Let them cool completely.
Pros & Cons
Pros:
|
Cons:
|
Verdict:
The perfect little treat to give your dog after a meal. They’re a healthy, low-calorie option with the added benefit of tackling that pesky doggy breath.
7. Salmon & Sweet Potato Swirls
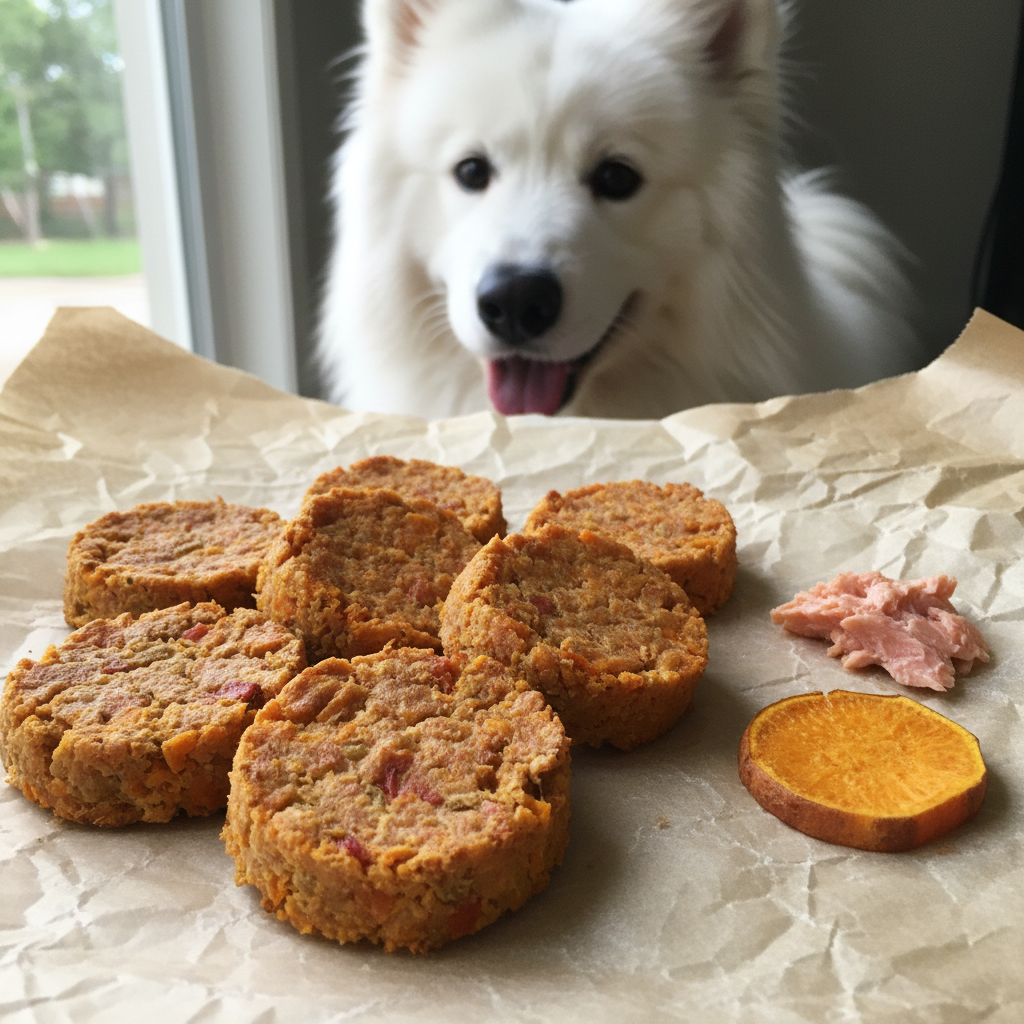
Boost your dog’s skin and coat health with this omega-3-packed recipe. Canned salmon is an easy and affordable way to add healthy fats to your dog’s diet, and sweet potato acts as a nutritious binder. These are a savory, high-value reward.
Ingredients:
- 1 (5 oz) can of salmon, drained
- 1/2 cup cooked and mashed sweet potato
- 1/2 cup oat flour
Instructions:
- Preheat oven to 350°F (175°C) and line a baking sheet with parchment.
- In a bowl, flake the drained salmon with a fork.
- Add the mashed sweet potato and oat flour. Mix thoroughly until a sticky dough is formed.
- Drop small spoonfuls onto the baking sheet and flatten them slightly.
- Bake for 20-25 minutes, until they are firm and dry on the outside.
- Cool completely. Be warned: your pets will find the smell irresistible!
Pros & Cons
Pros:
|
Cons:
|
Verdict:
Ideal for dogs with dry skin or dull coats. The potent aroma makes them a fantastic training treat that will hold any dog’s attention.
8. Blueberry & Yogurt Frozen Pupsicles
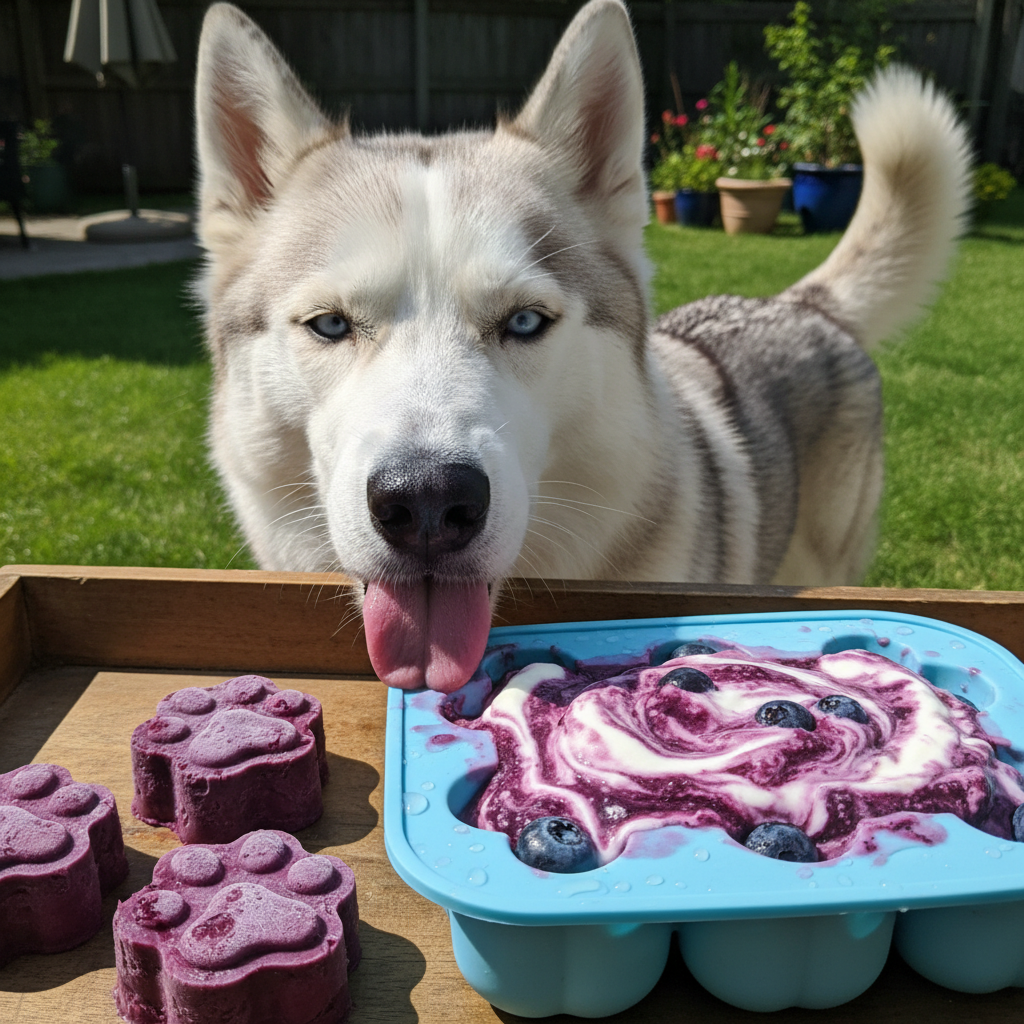
Who says treats have to be baked? On a hot day, nothing beats a cool, refreshing snack. These frozen pupsicles are incredibly simple and packed with antioxidants from blueberries and probiotics from yogurt. They’re a guilt-free way to help your dog cool down.
Ingredients:
- 1 cup plain, unsweetened yogurt (ensure it contains no xylitol)
- 1/2 cup fresh or frozen blueberries
- A splash of water (optional, for blending)
Instructions:
- In a blender, combine the plain yogurt and blueberries.
- Blend until smooth. If the mixture is too thick, add a tablespoon of water to help it blend.
- Pour the mixture into silicone molds or an ice cube tray. Fun shapes like paws or bones are a great touch!
- Freeze for at least 4 hours, or until solid.
- Pop them out of the molds and serve them to your very happy (and cool) pup.
Pros & Cons
Pros:
|
Cons:
|
Verdict:
The ultimate summer treat for any dog. They’re particularly good for keeping dogs occupied and cool. Just be sure to serve them outside or on a surface that’s easy to clean!
9. Savory Bacon & Oat Flour Snaps
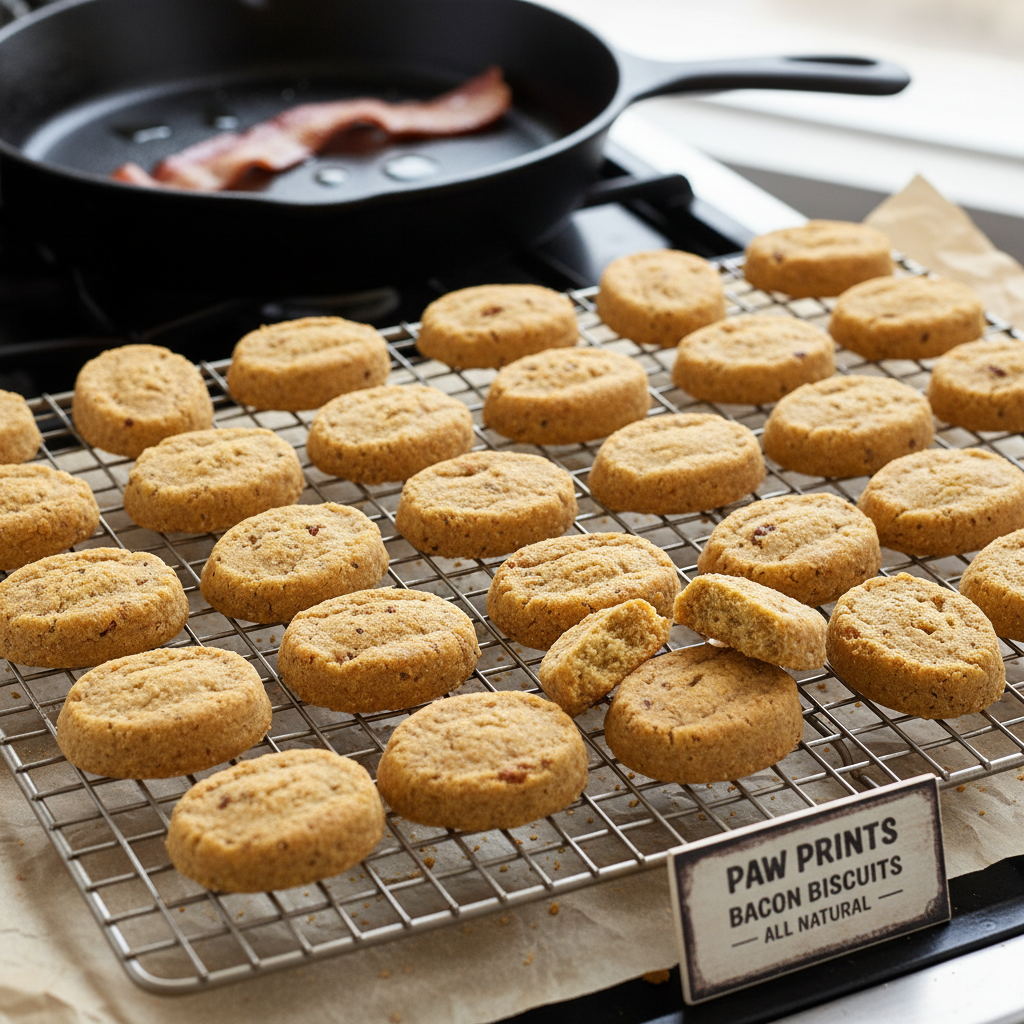
Let’s be honest: bacon is a magic word for most dogs. This recipe uses real bacon grease for that irresistible flavor without being too rich. It’s a special occasion treat that will earn you major brownie points with your canine companion.
Ingredients:
- 1 cup oat flour
- 1 large egg
- 2 tablespoons of cooled bacon grease
Instructions:
- Preheat your oven to 350°F (175°C).
- In a bowl, whisk the egg and the cooled bacon grease together.
- Stir in the oat flour until a dough forms. It might be a bit crumbly, so use your hands to press it together.
- Roll the dough out between two sheets of parchment paper to about 1/4-inch thickness.
- Cut into shapes and place on a baking sheet.
- Bake for 15-20 minutes until golden. They will crisp up as they cool.
- Let cool completely before serving.
Pros & Cons
Pros:
|
Cons:
|
Verdict:
This is the ultimate high-value reward. Perfect for picky dogs or for when you want to give an extra-special, indulgent treat. Use sparingly!
10. Gentle Chicken Broth & Rice Flour Chews
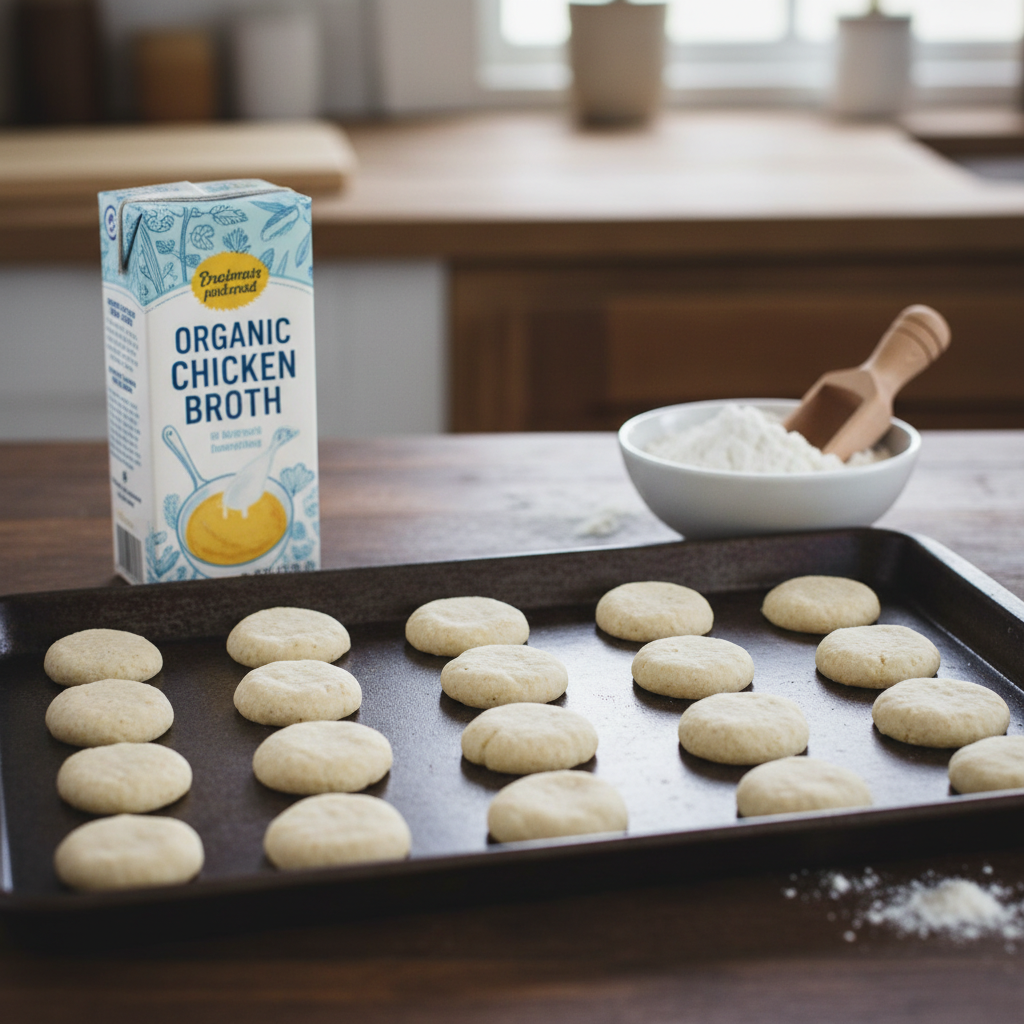
When your dog needs something simple and easy on the system, this is the recipe to turn to. Using just rice flour and chicken broth, it’s a gentle treat that’s perfect for dogs recovering from an upset stomach or those with multiple food sensitivities.
Ingredients:
- 1 cup brown or white rice flour
- 1/2 cup low-sodium, onion-free chicken broth
- 1 tablespoon coconut oil (melted)
Instructions:
- Preheat oven to 350°F (175°C).
- In a bowl, combine the rice flour, chicken broth, and melted coconut oil.
- Stir until a smooth, slightly wet dough forms.
- Drop by the teaspoonful onto a parchment-lined baking sheet.
- Bake for 15-18 minutes. They will not brown much, but will be firm to the touch.
- Cool completely. The texture will be slightly chewy rather than crunchy.
Pros & Cons
Pros:
|
Cons:
|
Verdict:
The perfect ‘get well soon’ treat or a safe bet for dogs with lots of allergies. It’s a simple, comforting snack that won’t cause digestive upset.
11. Tuna & Coconut Flour Puffs
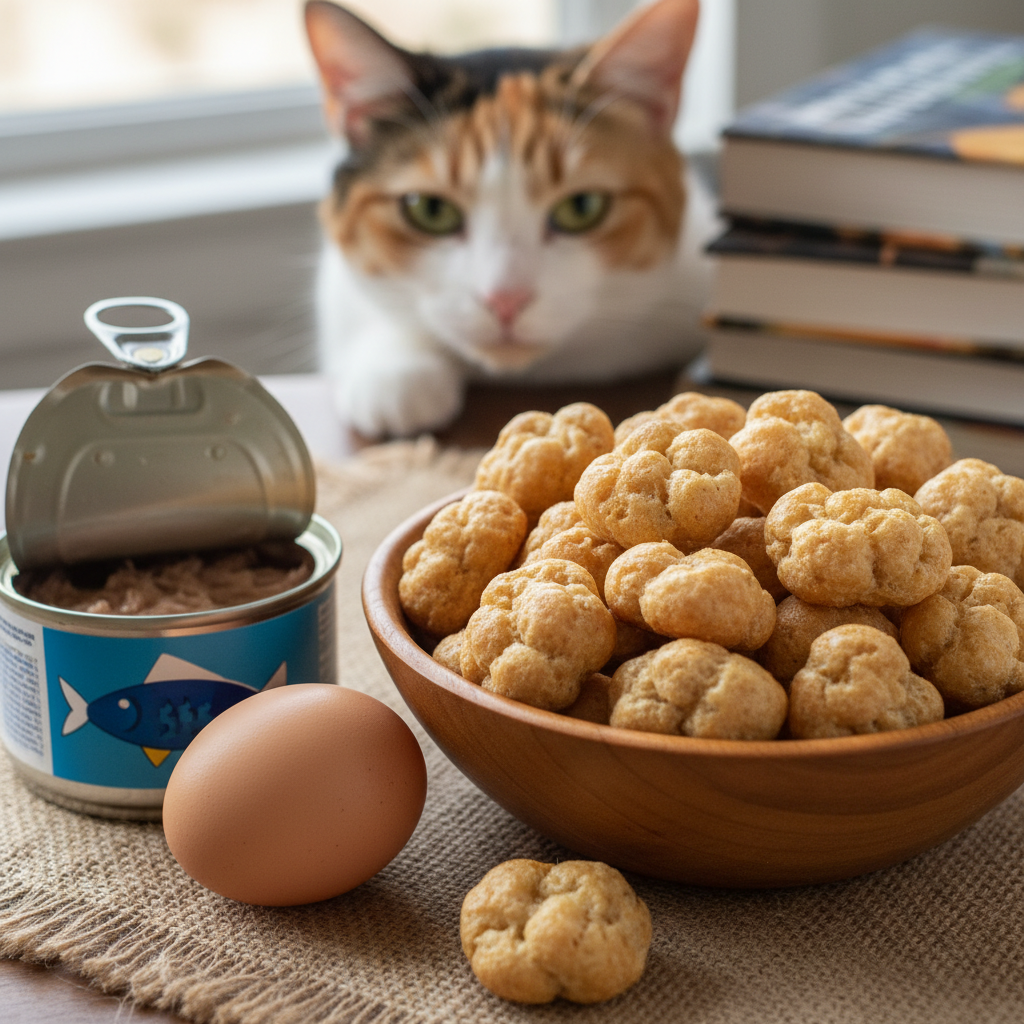
Another one for the fish lovers! Canned tuna is a pantry staple that can be transformed into a grain-free, protein-rich treat. Coconut flour keeps it light and suitable for dogs with sensitivities. They’re puffy, light, and oh-so-stinky (in a good way!).
Ingredients:
- 1 (5 oz) can of tuna in water, drained
- 1 large egg
- 1/4 cup coconut flour
Instructions:
- Preheat your oven to 350°F (175°C).
- In a food processor, combine the drained tuna, egg, and coconut flour.
- Pulse until the mixture forms a thick, paste-like dough.
- Roll the dough into tiny balls (about 1/2-inch) and place them on a parchment-lined baking sheet.
- Bake for 12-15 minutes, until they are firm and dry.
- Let cool. They will be light and almost puffy in texture.
Pros & Cons
Pros:
|
Cons:
|
Verdict:
A fantastic grain-free option for training. Their small size and powerful scent make them ideal for getting and keeping your dog’s attention without overfeeding.
12. Hearty Beef Broth & Whole Wheat Bones

For the dog that loves rich, meaty flavors, these beef broth biscuits are a surefire hit. They are simple, savory, and have a satisfying crunch that dogs love. It’s like a little cup of beef stew in a biscuit form.
Ingredients:
- 2 cups whole wheat flour
- 1/2 cup low-sodium, onion-free beef broth
- 1 large egg
Instructions:
- Preheat oven to 375°F (190°C).
- In a large bowl, whisk the egg and beef broth together.
- Gradually add the whole wheat flour, mixing until a stiff dough forms.
- Knead the dough on a lightly floured surface for 2-3 minutes.
- Roll out to 1/2-inch thickness for a chewier treat or 1/4-inch for a crunchier one.
- Cut with bone-shaped cookie cutters and place on an ungreased baking sheet.
- Bake for 20 minutes. Turn off the oven and let the biscuits cool inside for an extra hard, crunchy texture.
Pros & Cons
Pros:
|
Cons:
|
Verdict:
A perfect, crunchy, everyday biscuit for dogs who love savory, meaty flavors. The extra-hard texture can also help with teeth cleaning.
13. Sardine & Almond Flour Bites (For the Brave!)
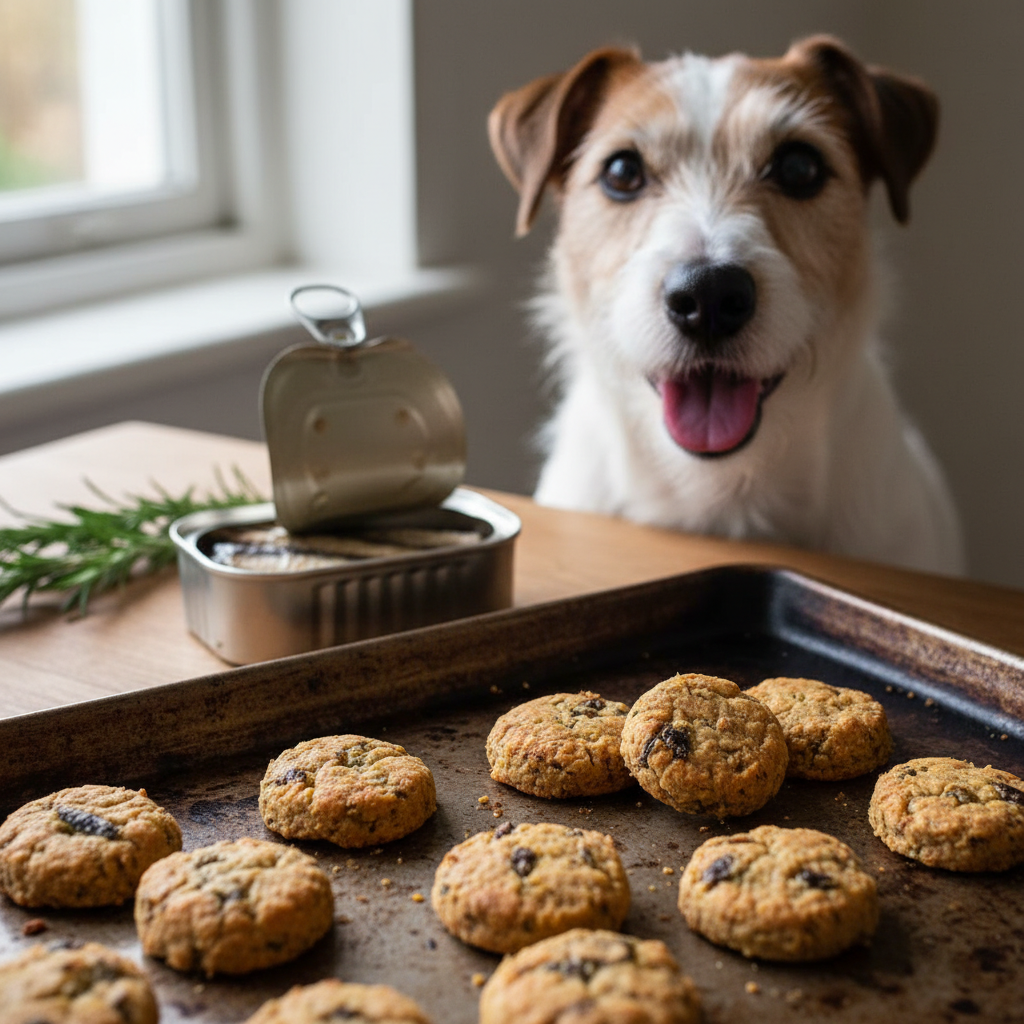
Okay, this one isn’t for the faint of heart, but your dog will thank you! Sardines are an absolute powerhouse of omega-3s, and almond flour keeps this recipe low-carb and grain-free. Embrace the smell; it’s pure gold for your dog’s health.
Ingredients:
- 1 can (3.75 oz) of sardines packed in water, undrained
- 1 cup almond flour
- 1 large egg
Instructions:
- Preheat oven to 350°F (175°C) and line a baking sheet with parchment paper.
- In a bowl, mash the entire can of sardines (liquid and all) with a fork until it’s a chunky paste.
- Add the egg and almond flour and mix until a sticky dough forms.
- Drop small teaspoonfuls of the dough onto the baking sheet.
- Bake for 15-20 minutes until they are firm and slightly browned.
- Let them cool completely. Store in an airtight container in the refrigerator.
Pros & Cons
Pros:
|
Cons:
|
Verdict:
This is the ultimate health-boosting treat. If you can handle the smell, these little bites are one of the best things you can make for your dog’s coat, joints, and overall vitality.
A Baker’s Guide: Choosing Safe & Healthy Ingredients
Baking for your dog is fun, but safety comes first! Not all human foods are safe for our canine friends. When you’re whipping up these recipes or creating your own, keep these tips in mind.
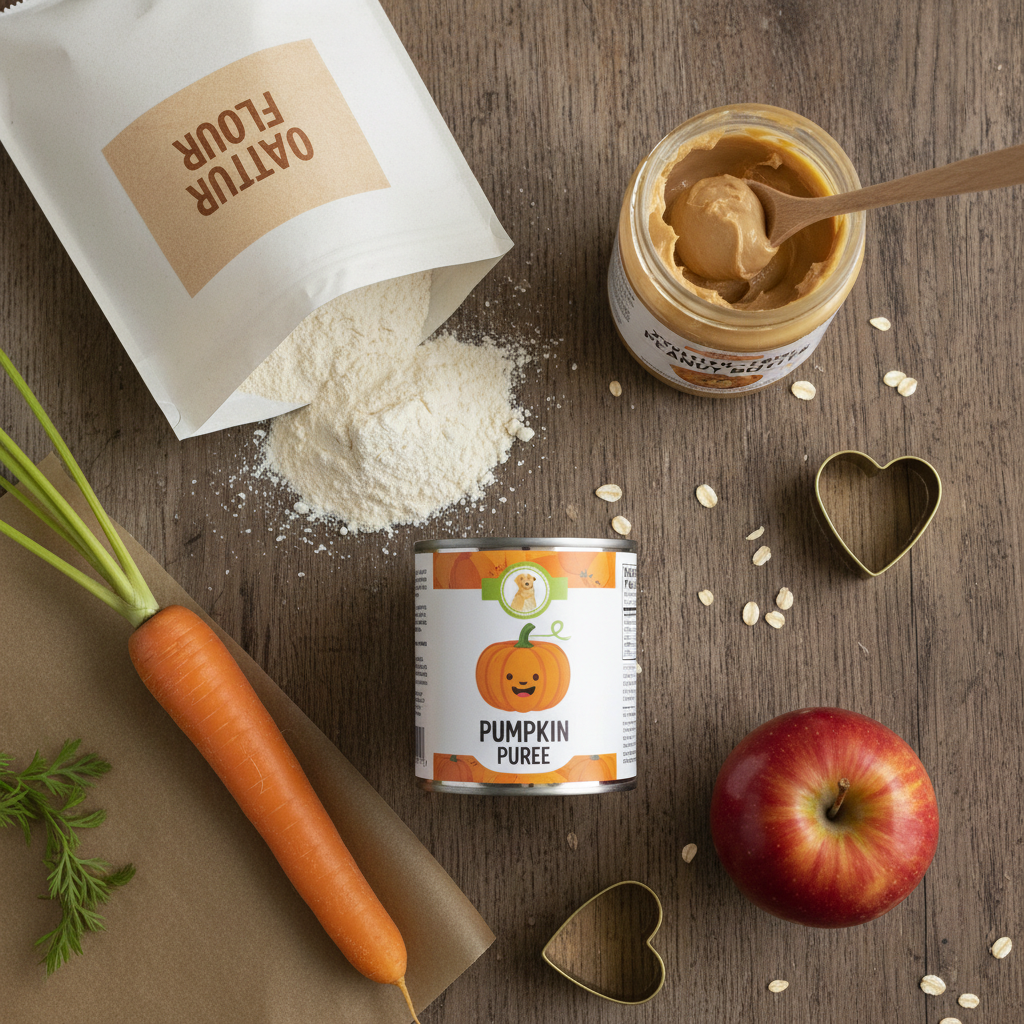
Flour Power
While many recipes use whole wheat flour, some dogs have sensitivities. Great alternatives include oat flour (just blend rolled oats!), coconut flour, almond flour, or brown rice flour. Each has different properties, so you may need to adjust liquid amounts.
The Peanut Butter Rule
This is a critical one: NEVER use peanut butter that contains xylitol. Xylitol is an artificial sweetener that is extremely toxic to dogs. Always read the label and choose a natural peanut butter where the only ingredients are peanuts and maybe salt.
Fruits & Veggies
Many fruits and vegetables are great for dogs! Pumpkin, sweet potato, carrots, apples, bananas, and blueberries are all fantastic choices. However, always avoid onions, garlic, grapes, raisins, and avocado, as these are toxic.
Broths and Meats
When using broth, always choose a low-sodium version that is free from onions and garlic. For canned fish like tuna or salmon, opt for the kind packed in water, not oil.
When in doubt, a quick search or a call to your vet can clear up any questions about an ingredient’s safety. Happy and safe baking!
Frequently Asked Questions

How should I store these homemade treats?
Because these treats are free from preservatives, they have a shorter shelf life than store-bought varieties. For crunchier biscuits, store them in an airtight container at room temperature for up to a week. For softer or meat/fish-based treats, it’s best to store them in an airtight container in the refrigerator for 7-10 days. For long-term storage, all of these treats freeze beautifully for up to 3 months!
Can I substitute ingredients in these recipes?
Absolutely! That’s part of the fun. You can easily swap whole wheat flour for oat flour or another dog-safe alternative. You can switch pumpkin puree for mashed sweet potato or banana in many recipes. Just be mindful of consistency—you may need to add more flour if a mixture is too wet, or a little water if it’s too dry. Always ensure any new ingredient you add is safe for dogs.
What ingredients should I absolutely avoid giving my dog?
Several common kitchen ingredients are toxic to dogs. The most important ones to avoid are: xylitol (an artificial sweetener), chocolate, onions, garlic, grapes, raisins, macadamia nuts, and alcohol. Always be vigilant about checking labels, especially on products like peanut butter, yogurt, and broth.
Are these treats suitable for dogs with health issues?
While these recipes use simple, whole-food ingredients, it’s always best to consult your veterinarian before introducing new foods to a dog with health conditions like diabetes, pancreatitis, kidney disease, or severe allergies. Your vet can help you choose recipes and ingredients that are best suited for your dog’s specific dietary needs.
Conclusion
And there you have it—13 simple, healthy, and delicious ways to show your dog you care. Stepping into the kitchen to bake for your furry family member is more than just making a snack; it’s an act of love. You get peace of mind knowing every single ingredient is wholesome and safe, and your dog gets a treat that’s bursting with flavor and made just for them.
Whether you started with the classic Peanut Butter & Oat biscuits or braved the aromatic Sardine & Almond Flour bites, we hope you and your pup have a blast with these recipes. Don’t be afraid to experiment with different shapes and dog-safe ingredients to find your dog’s ultimate favorite. Happy baking, and enjoy all the happy tail wags to come!