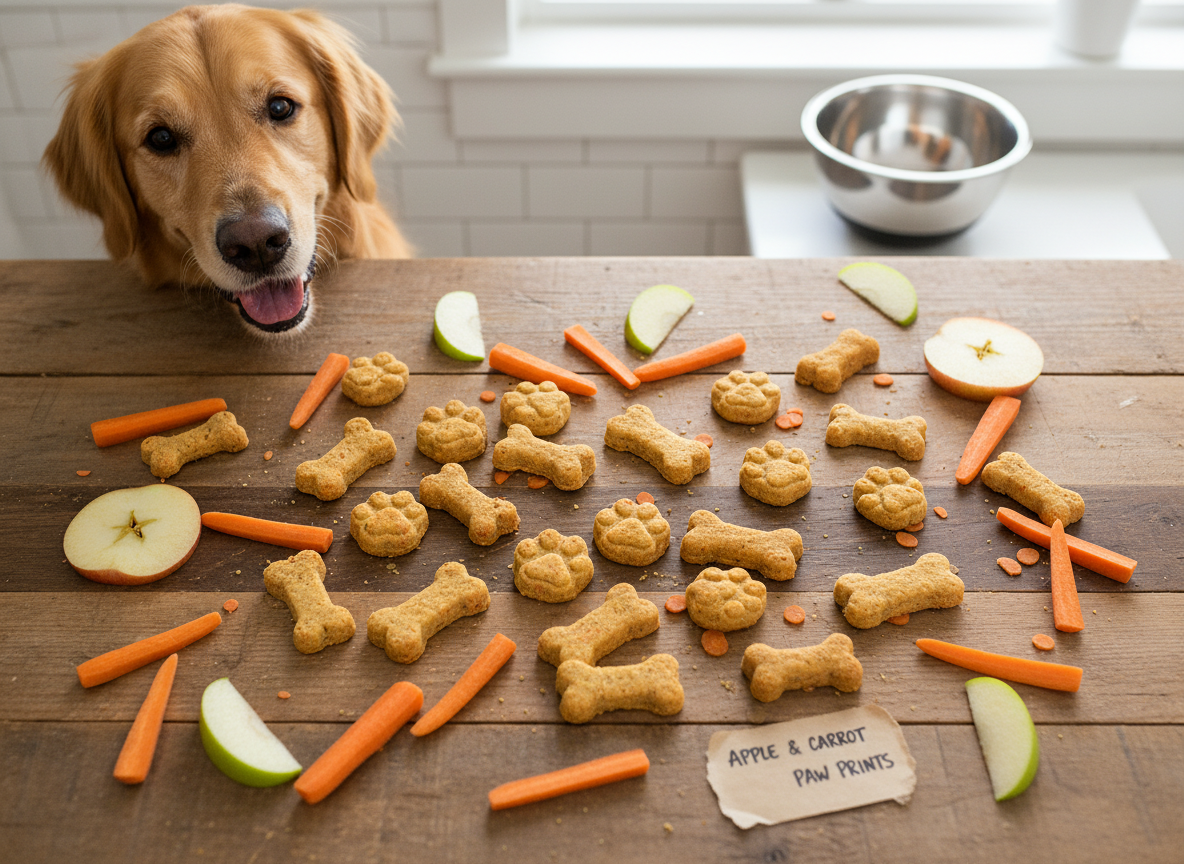
9 Crunchy Apple and Carrot Dog Biscuit Recipes
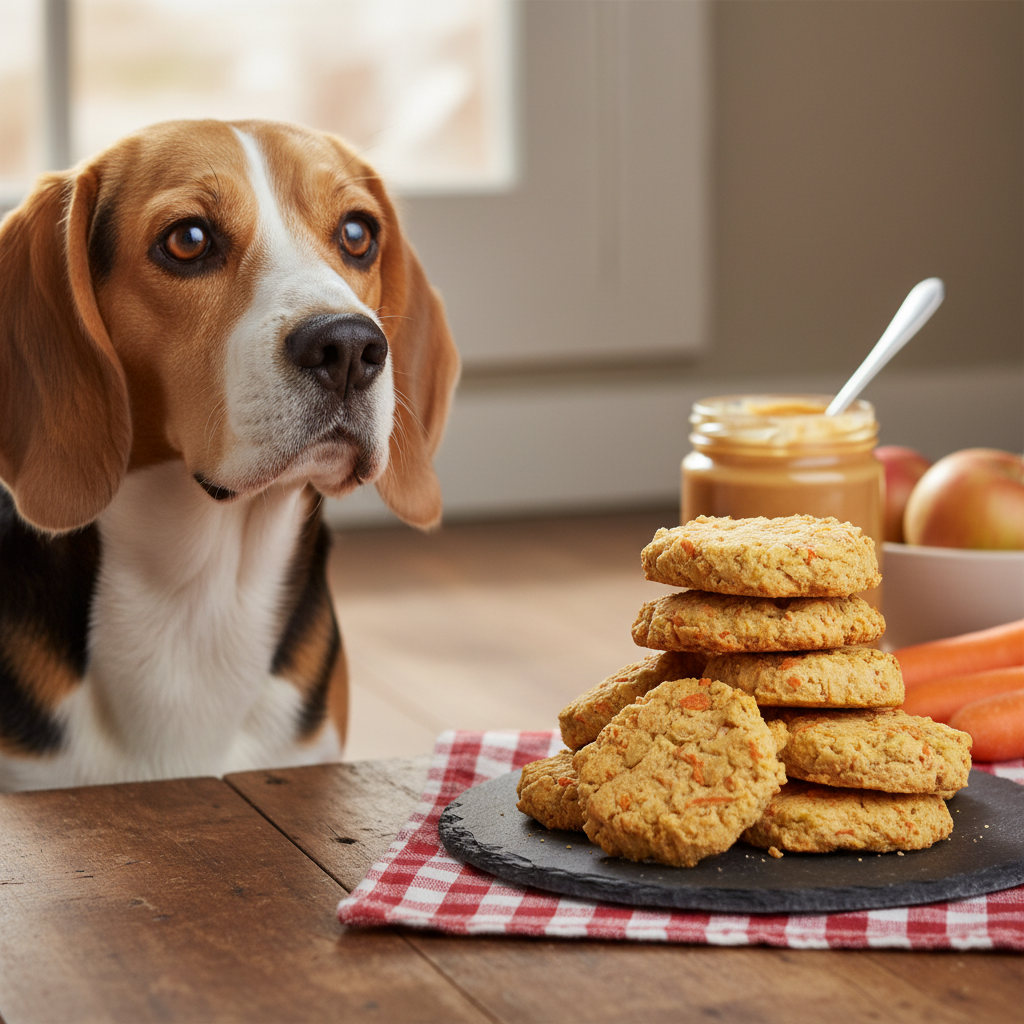
Hey there, fellow dog lovers! Is there anything better than the look on your pup’s face when you pull out the treat jar? What if those treats were not only delicious but also homemade with love and healthy ingredients? That’s right, we’re talking about rolling up our sleeves and baking for our best friends!
Making your own dog biscuits is a fantastic way to control exactly what your dog eats, avoiding nasty preservatives, fillers, and artificial flavors found in many store-bought options. Plus, the combination of sweet apples and earthy carrots is a canine culinary classic—packed with vitamins and fiber. Your kitchen will smell amazing, and your dog will be doing happy dances for these crunchy goodies.
To help you get started, we’ve compiled our favorite recipes, from super simple classics to special treats for sensitive tummies. Let’s get baking!
Recipe Quick Glance
| Recipe Name | Prep & Bake Time | Key Feature | Best For |
|---|---|---|---|
| Classic Apple & Carrot Crunchers | ~50 mins | Simple, traditional recipe | First-time bakers |
| Grain-Free Goodness Bites | ~45 mins | Uses coconut flour | Dogs with grain sensitivities |
| Oatmeal Power Pups | ~55 mins | Added fiber from oats | Active dogs needing extra energy |
| Peanut Butter & Apple-Carrot Swirls | ~60 mins | Irresistible flavor combo | Pups who love peanut butter |
| Soothing Ginger & Turmeric Treats | ~50 mins | Anti-inflammatory spices | Senior dogs or pups with joint issues |
| Cheesy Apple-Carrot Paws | ~45 mins | Savory cheddar cheese | High-value training rewards |
| Molasses & Spice Biscuits | ~60 mins | Rich flavor, added minerals | A special occasion treat |
| Minimalist 3-Ingredient Treats | ~35 mins | Ultra-simple recipe | Bakers in a hurry |
| Dehydrated Apple-Carrot Chews | 4-6 hours | Chewy, long-lasting | Dogs who enjoy a good chew |
1. Classic Apple & Carrot Crunchers
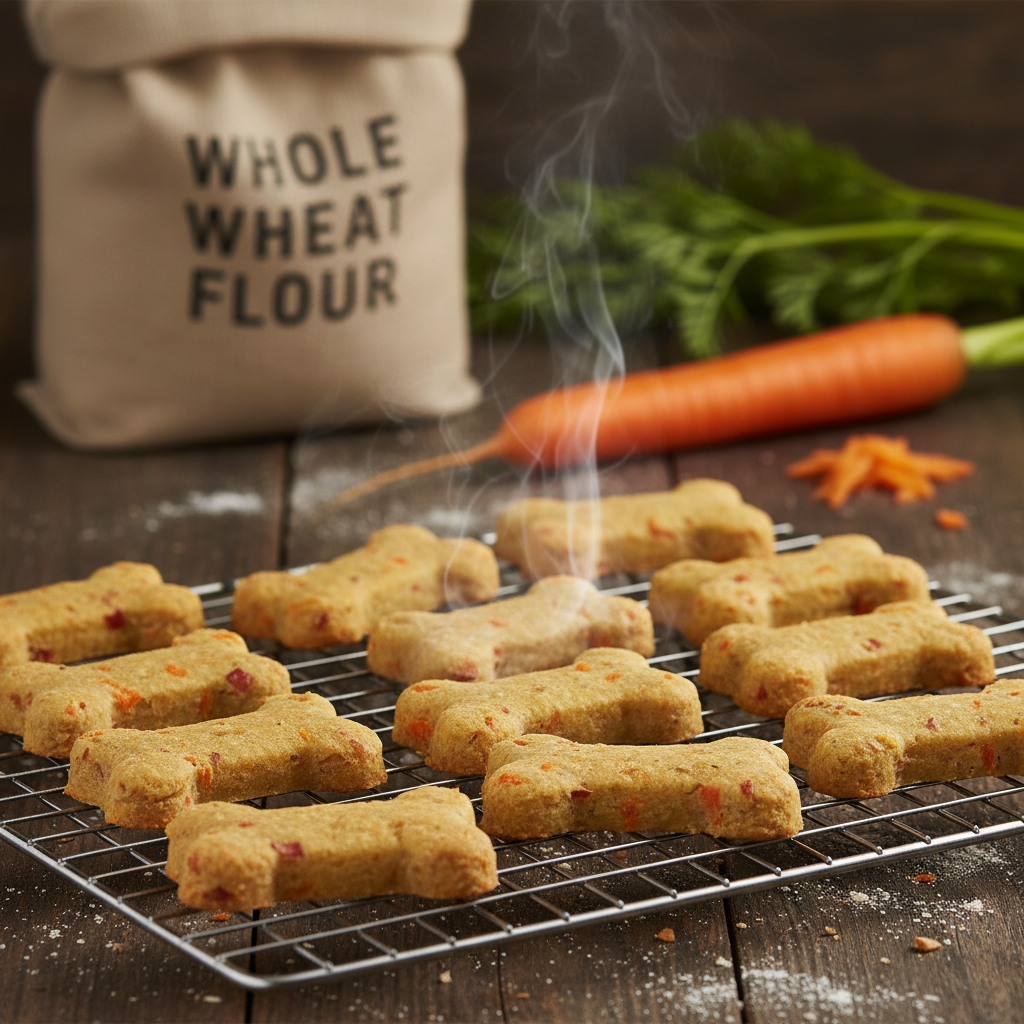
This is the quintessential homemade dog biscuit. It’s straightforward, uses common pantry staples, and bakes up into a delightfully crunchy treat that dogs go wild for. If you’re new to the world of dog baking, this is the perfect place to start.
Ingredients:
- 2 ½ cups whole wheat flour
- ½ cup shredded carrots (about 1 medium carrot)
- ½ cup unsweetened applesauce
- 1 large egg
- ¼ cup water, as needed
Instructions:
- Preheat your oven to 350°F (175°C) and line a baking sheet with parchment paper.
- In a large bowl, whisk together the whole wheat flour and shredded carrots.
- In a separate, smaller bowl, mix the unsweetened applesauce and the egg until well combined.
- Pour the wet ingredients into the dry ingredients and stir until a stiff dough forms. If it’s too crumbly, add water one tablespoon at a time until it comes together.
- On a lightly floured surface, roll the dough out to about ¼-inch thickness.
- Use your favorite cookie cutters (bone shapes are always a hit!) to cut out the biscuits and place them on the prepared baking sheet.
- Bake for 30-35 minutes, or until the edges are golden brown and the biscuits are hard to the touch.
- For extra crunch, turn off the oven and let the biscuits cool inside with the door slightly ajar.
- Let them cool completely before treating your pup!
Pros & Cons
| Pros | Cons |
|---|---|
| Very easy for beginners | Not suitable for dogs with wheat allergies |
| Simple, affordable ingredients | Can be a bit plain for picky eaters |
| Creates a very crunchy, durable treat | Dough can be stiff and require some muscle to roll |
Verdict
This recipe is the perfect entry point for any pet parent looking to start baking for their dog. It’s reliable, simple, and produces a classic crunchy biscuit that most dogs will love.
2. Grain-Free Goodness Bites
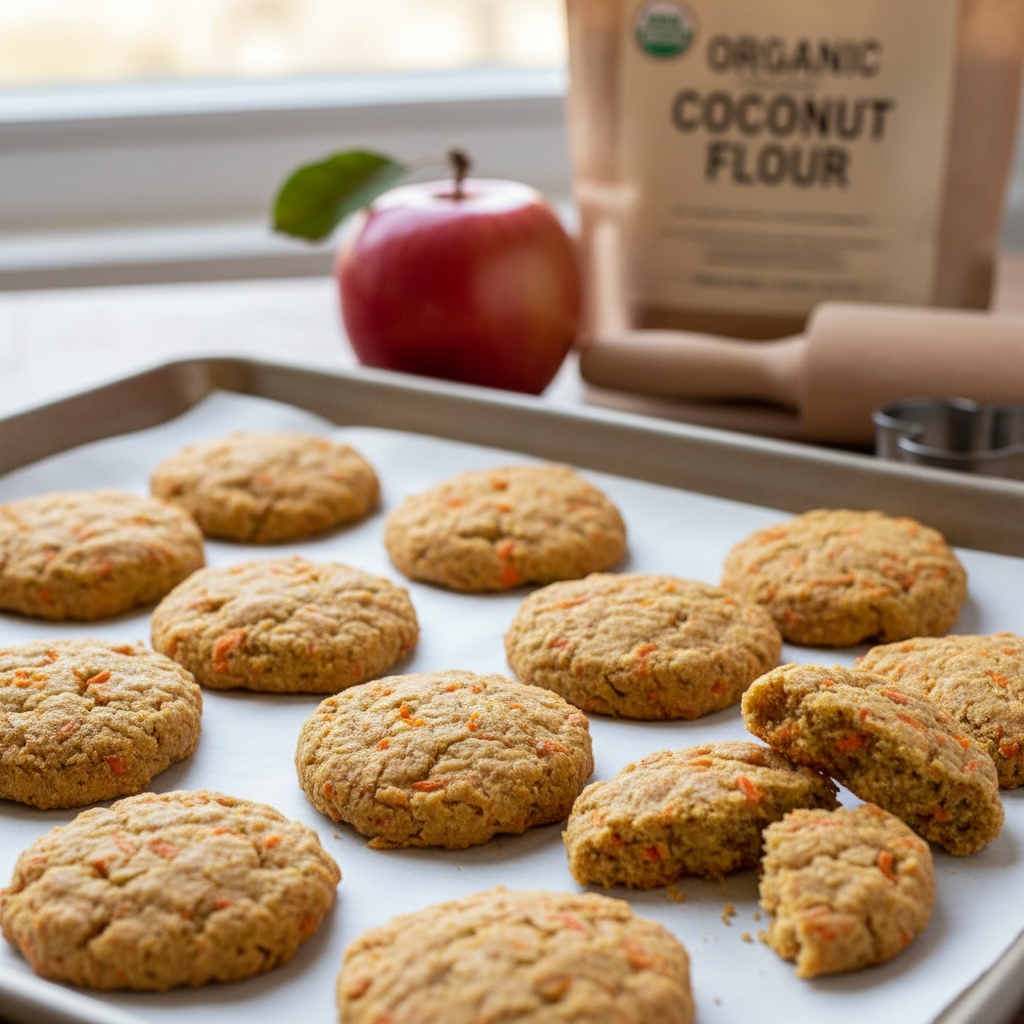
For our furry friends with sensitive stomachs or grain allergies, this recipe is a lifesaver. By swapping traditional flour for coconut flour, you get a healthy, low-carb treat that’s just as delicious. Coconut flour is very absorbent, so the texture of this dough will be different, but the end result is a firm, tasty bite.
Ingredients:
- 1 cup coconut flour
- 1 cup finely grated carrots
- ½ cup unsweetened applesauce
- 2 large eggs
- ¼ cup melted coconut oil
Instructions:
- Preheat your oven to 350°F (175°C) and line a baking sheet with parchment paper.
- In a large bowl, combine the coconut flour and grated carrots.
- In another bowl, whisk together the applesauce, eggs, and melted coconut oil.
- Pour the wet mixture into the dry ingredients and mix thoroughly. The dough will be thick and a bit crumbly. Let it sit for 5 minutes to allow the flour to absorb the moisture.
- Use your hands to press the dough together. Roll it out between two sheets of parchment paper to about ¼-inch thickness.
- Cut out your shapes and place them on the baking sheet.
- Bake for 20-25 minutes, until firm and lightly browned on the bottom.
- Cool completely on a wire rack. These will be less ‘crunchy’ than wheat-based biscuits and more of a firm, crumbly texture.
Pros & Cons
| Pros | Cons |
|---|---|
| Perfect for dogs with grain sensitivities | Coconut flour can be more expensive |
| Healthy fats from coconut oil are great for skin and coat | Dough is trickier to work with than traditional dough |
| Lower in carbs than wheat-based treats | Resulting biscuit is more crumbly than crunchy |
Verdict
An excellent choice for pet parents managing their dog’s grain intake or allergies. While the process is a little different, the healthy and delicious results are well worth it for a happy, itch-free pup.
3. Oatmeal Power Pups
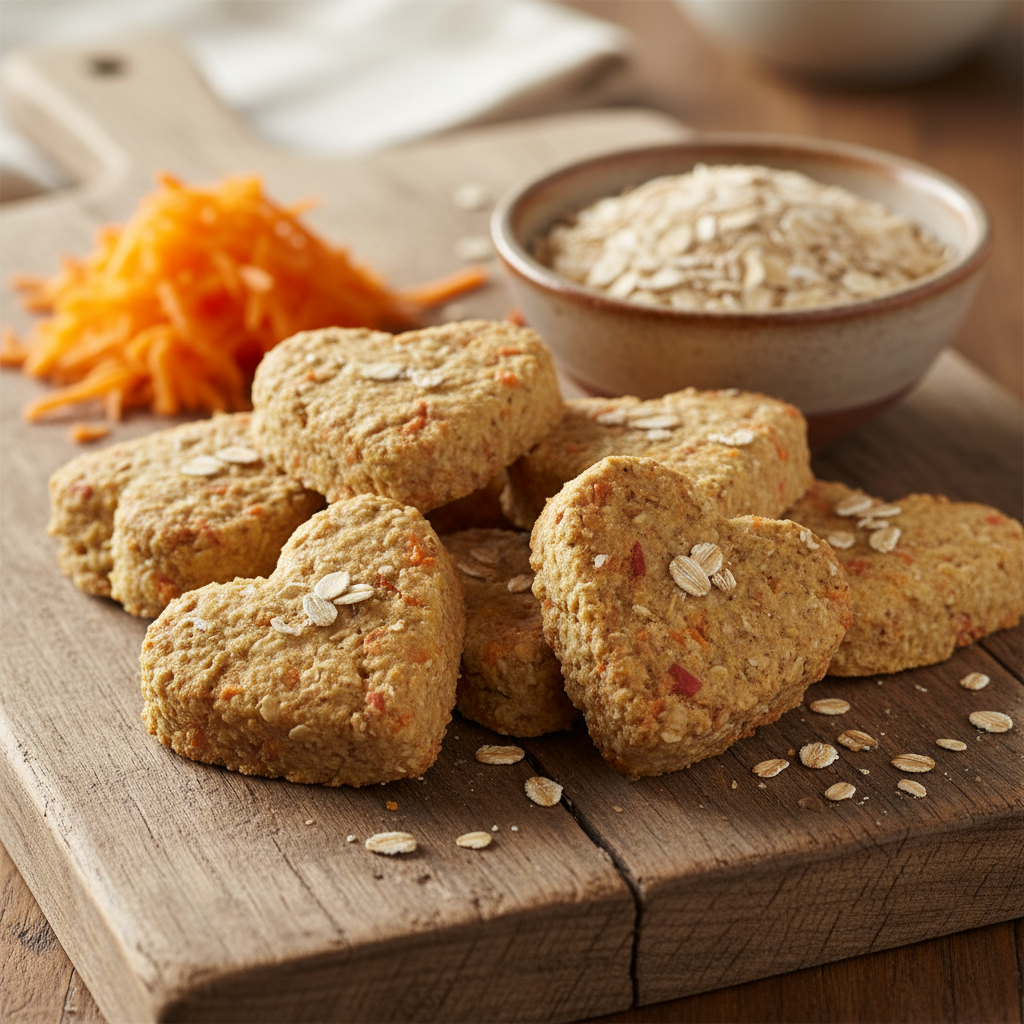
Boost your dog’s treat time with the wholesome goodness of oats! Rolled oats add fantastic texture and are a great source of soluble fiber, which is good for digestion. These biscuits are hearty, satisfying, and perfect for fueling your active companion’s adventures.
Ingredients:
- 1 ½ cups whole wheat flour
- 1 cup rolled oats (not instant)
- ½ cup shredded carrots
- ½ cup unsweetened applesauce
- 1 large egg
- 3 tablespoons of water
Instructions:
- Preheat oven to 350°F (175°C). Line a baking sheet with parchment paper.
- In a food processor, pulse the rolled oats until they have a coarse, flour-like consistency.
- In a large bowl, combine the ground oats, whole wheat flour, and shredded carrots.
- In a separate bowl, whisk the egg and applesauce together.
- Add the wet ingredients to the dry and mix until a dough forms. Add water if needed to bring it all together.
- Roll the dough out on a floured surface to ¼-inch thickness.
- Cut into shapes and place on the prepared baking sheet.
- Bake for 35-40 minutes, until hard and golden.
- Let them cool completely in the turned-off oven for maximum crunch.
Pros & Cons
| Pros | Cons |
|---|---|
| Added fiber from oats is great for digestive health | Requires a food processor to grind the oats |
| Hearty texture that dogs enjoy | Not suitable for grain-free diets |
| Provides sustained energy, great for active dogs | Takes a bit longer to bake to get fully crisp |
Verdict
Ideal for active dogs or any pup that could use a little extra fiber in their diet. The Oatmeal Power Pups are a satisfying, crunchy, and nutritionally dense treat that will keep your dog energized and happy.
4. Peanut Butter & Apple-Carrot Swirls
What dog can resist the siren call of peanut butter? This recipe combines the classic apple and carrot base with the rich, nutty flavor that drives dogs wild. The result is a high-value treat that’s perfect for training or just for being an extra-good boy or girl.
Ingredients:
- 2 cups whole wheat flour
- ½ cup shredded carrots
- ½ cup unsweetened applesauce
- ⅓ cup all-natural, xylitol-free peanut butter
- 1 large egg
- ¼ cup water
Instructions:
- Preheat oven to 350°F (175°C) and line a baking sheet with parchment paper.
- In a large bowl, mix the flour and shredded carrots.
- In a medium bowl, whisk together the applesauce, peanut butter, and egg until smooth. Make sure your peanut butter is all-natural and does NOT contain xylitol, which is toxic to dogs.
- Pour the peanut butter mixture into the flour mixture. Stir until combined, adding water as needed to form a workable dough.
- Roll out to ¼-inch thickness on a floured surface.
- Cut into desired shapes and arrange on the baking sheet.
- Bake for 25-30 minutes, until golden brown.
- Cool completely before serving to your eager pup.
Pros & Cons
| Pros | Cons |
|---|---|
| Extremely palatable for most dogs | MUST use xylitol-free peanut butter |
| Added protein and healthy fats from peanut butter | Higher in calories, so portion control is key |
| Great for getting the attention of picky eaters | Not suitable for dogs with nut allergies |
Verdict
A guaranteed crowd-pleaser! These treats are perfect for picky pups or when you need a high-value reward. Just be mindful of the calories and always double-check your peanut butter label for xylitol.
5. Soothing Ginger & Turmeric Treats
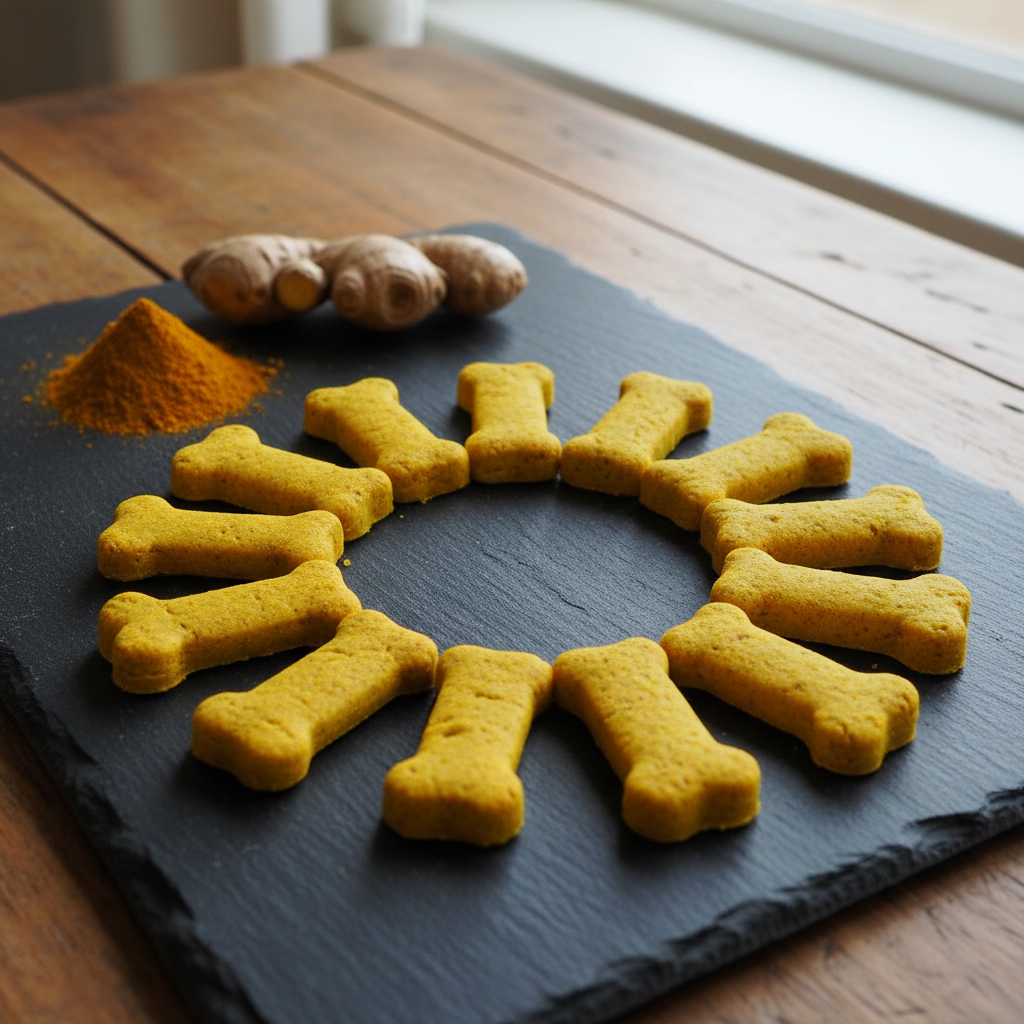
Give your dog’s treats a healthy, anti-inflammatory boost! Ginger is known to aid digestion, while turmeric is a powerful antioxidant. This recipe is particularly wonderful for senior dogs or those with a bit of joint stiffness, wrapping healthy benefits in a tasty, crunchy package.
Ingredients:
- 2 ½ cups whole wheat flour
- ½ cup shredded carrots
- ½ cup unsweetened applesauce
- 1 large egg
- 1 teaspoon ground turmeric
- ½ teaspoon ground ginger
- 2 tablespoons of water or as needed
Instructions:
- Preheat your oven to 350°F (175°C) and prepare a baking sheet with parchment paper.
- In a large bowl, whisk together the flour, carrots, turmeric, and ginger.
- In a separate bowl, mix the applesauce and egg.
- Combine the wet and dry ingredients, mixing until a dough forms. Add water if it’s too dry.
- Roll the dough out to ¼-inch thickness on a lightly floured surface.
- Cut out the biscuits and place them on your baking sheet.
- Bake for 30-35 minutes until firm and golden.
- Allow to cool completely. The spices will give these biscuits a lovely golden hue.
Pros & Cons
| Pros | Cons |
|---|---|
| Anti-inflammatory benefits from turmeric and ginger | Turmeric can stain surfaces, so be careful! |
| Great for senior dogs or dogs with joint discomfort | Some dogs may not like the taste of the spices |
| Ginger can help soothe upset stomachs | Not suitable for dogs with wheat allergies |
Verdict
This is more than just a treat; it’s a little bite of wellness. Perfect for older dogs, active breeds, or any pup who could benefit from the natural goodness of these superfood spices.
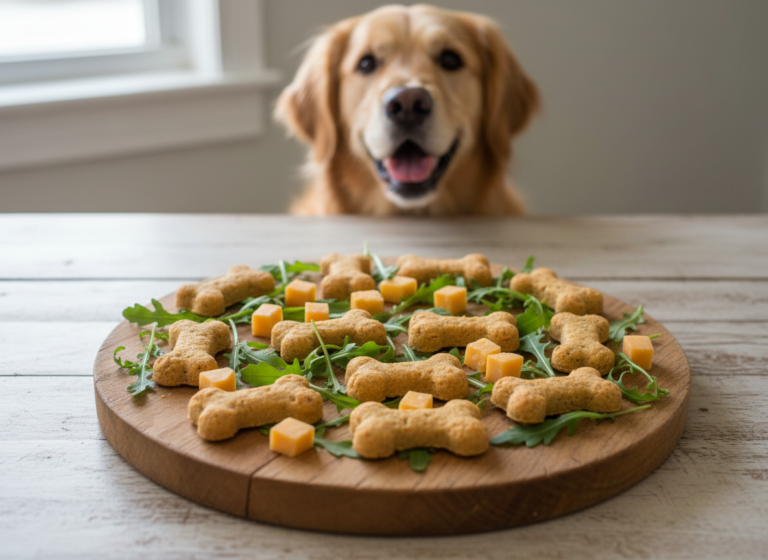
6. Cheesy Apple-Carrot Paws

Cheese, please! The savory flavor of cheddar cheese makes these treats utterly irresistible. They have a wonderful aroma while baking that will have your dog supervising you from the kitchen floor. They are fantastic for training sessions when you need to keep your pup’s focus.
Ingredients:
- 2 cups whole wheat flour
- ½ cup shredded cheddar cheese
- ½ cup finely grated carrots
- ¼ cup unsweetened applesauce
- 1 large egg
- ¼ cup water
Instructions:
- Preheat oven to 375°F (190°C). Line a baking sheet with parchment paper.
- In a large bowl, stir together the flour, shredded cheese, and grated carrots.
- In a small bowl, whisk the applesauce and egg.
- Pour the wet ingredients into the dry and mix, adding water a tablespoon at a time, until a firm dough forms.
- On a floured surface, roll the dough to ¼-inch thickness. A paw-print cookie cutter is perfect for these!
- Place the cut-out biscuits on the baking sheet.
- Bake for 20-25 minutes, until the edges are nicely browned.
- Cool completely on a wire rack before the taste-testing commences.
Pros & Cons
| Pros | Cons |
|---|---|
| Delicious savory flavor is a huge hit with dogs | Not suitable for dogs with lactose intolerance |
| Excellent as a high-value training reward | Higher in fat and calories due to the cheese |
| Amazing smell while baking! | Best served in moderation |
Verdict
For the cheese-loving canine, this recipe is pure bliss. They are the ultimate high-value reward, perfect for celebrating training milestones or just for being an exceptionally cute companion.
7. Molasses & Spice Biscuits
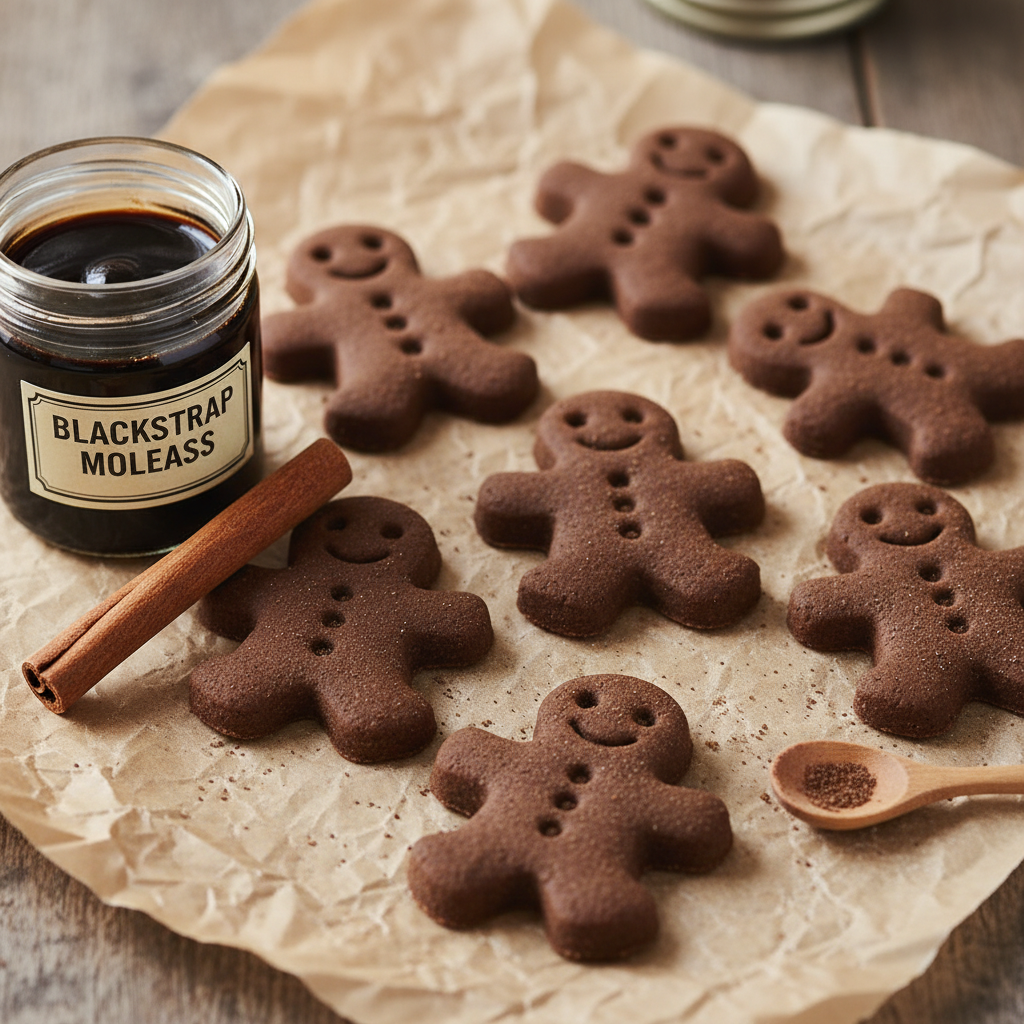
Looking for a treat with a deeper, richer flavor? Blackstrap molasses adds a touch of sweetness along with beneficial minerals like iron and calcium. Paired with a dash of cinnamon, these biscuits have a warm, comforting aroma reminiscent of gingerbread—but made just for your pup!
Ingredients:
- 2 ½ cups whole wheat flour
- ½ cup shredded carrots
- ½ cup unsweetened applesauce
- 1 large egg
- 2 tablespoons blackstrap molasses
- 1 teaspoon cinnamon
- ¼ cup water
Instructions:
- Preheat your oven to 350°F (175°C) and line a baking sheet with parchment paper.
- In a large bowl, whisk together the flour, carrots, and cinnamon.
- In another bowl, mix the applesauce, egg, and blackstrap molasses until well combined.
- Pour the wet ingredients into the dry and mix to form a dough, adding water as needed.
- Roll the dough to ¼-inch thickness and cut into shapes. These look great as little gingerbread men!
- Bake for 30-35 minutes until dark and hard.
- Let cool completely. The molasses will make them extra crunchy once cooled.
Pros & Cons
| Pros | Cons |
|---|---|
| Unique, rich flavor profile | Higher sugar content from molasses; use in moderation |
| Blackstrap molasses contains beneficial minerals | The dark color can make it hard to tell when they’re perfectly baked |
| Wonderful, spiced aroma | Not for dogs with wheat sensitivities |
Verdict
A wonderful recipe for a special occasion or holiday baking. The rich flavor and aroma make these Molasses & Spice Biscuits a unique and beloved treat for dogs who enjoy a little something different.
8. Minimalist 3-Ingredient Treats
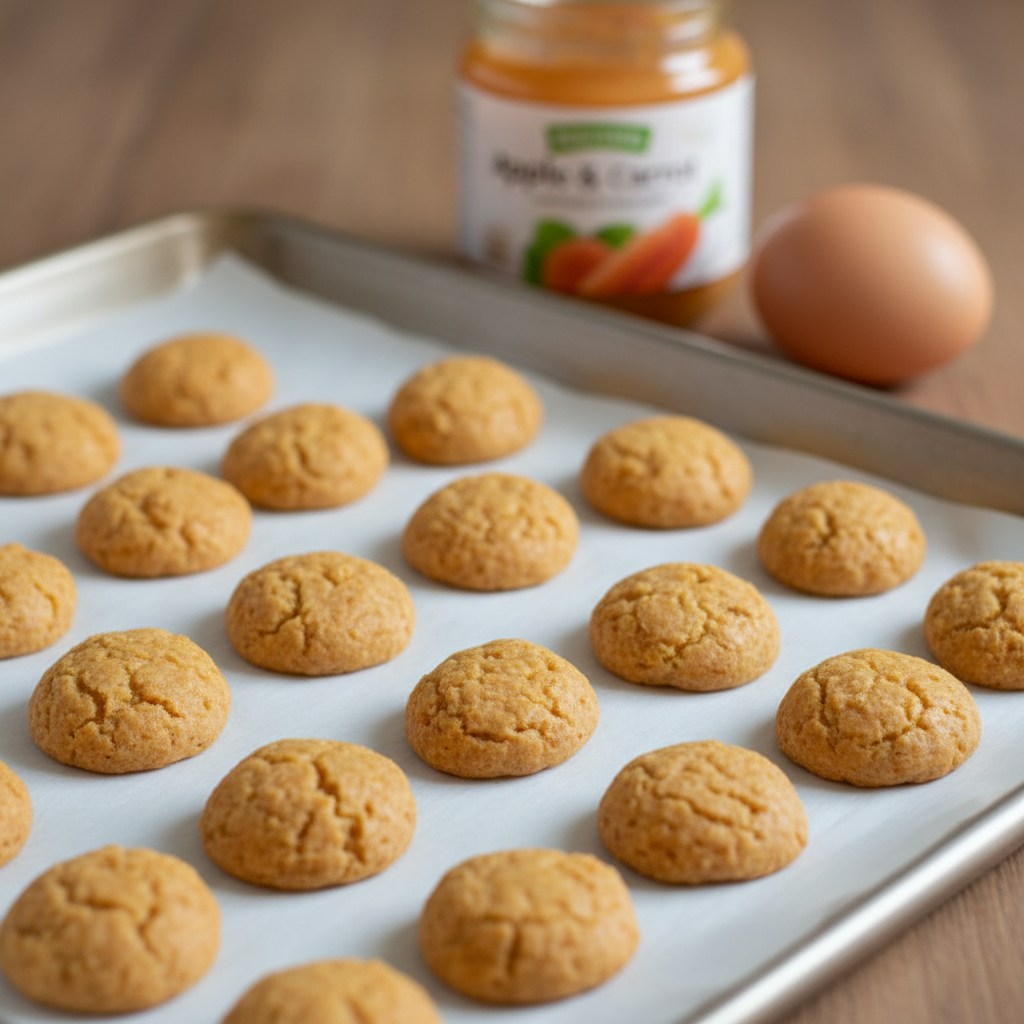
No time? No problem! This recipe strips it down to the bare essentials without sacrificing taste. When you’re in a pinch but still want to give your dog a homemade goodie, this is your go-to. It’s amazing what you can create with just three simple ingredients.
Ingredients:
- 1 cup whole wheat flour
- ½ cup puréed carrots and apples (use baby food or make your own by steaming and blending)
- 1 large egg
Instructions:
- Preheat oven to 350°F (175°C). Line a baking sheet with parchment paper.
- In a bowl, combine the flour, purée, and egg. Mix until a dough forms. It will be a bit sticky.
- You can either roll this out (use plenty of flour on your surface) or use a simpler method: drop small spoonfuls onto the baking sheet and flatten them with a fork.
- Bake for 20-25 minutes, until dry and firm.
- Flip the biscuits over and bake for another 10 minutes to ensure they are crispy all the way through.
- Cool completely before serving.
Pros & Cons
| Pros | Cons |
|---|---|
| Incredibly fast and easy to make | The sticky dough can be messy to work with |
| Perfect for when you’re low on ingredients | Not as crunchy as recipes with longer bake times |
| Great for dogs with multiple food sensitivities | Texture is more like a firm cookie than a hard biscuit |
Verdict
The ultimate recipe for busy pet parents. It proves you don’t need a long list of ingredients or a lot of time to bake a healthy, delicious treat that will make your dog’s day.
9. Dehydrated Apple-Carrot Chews
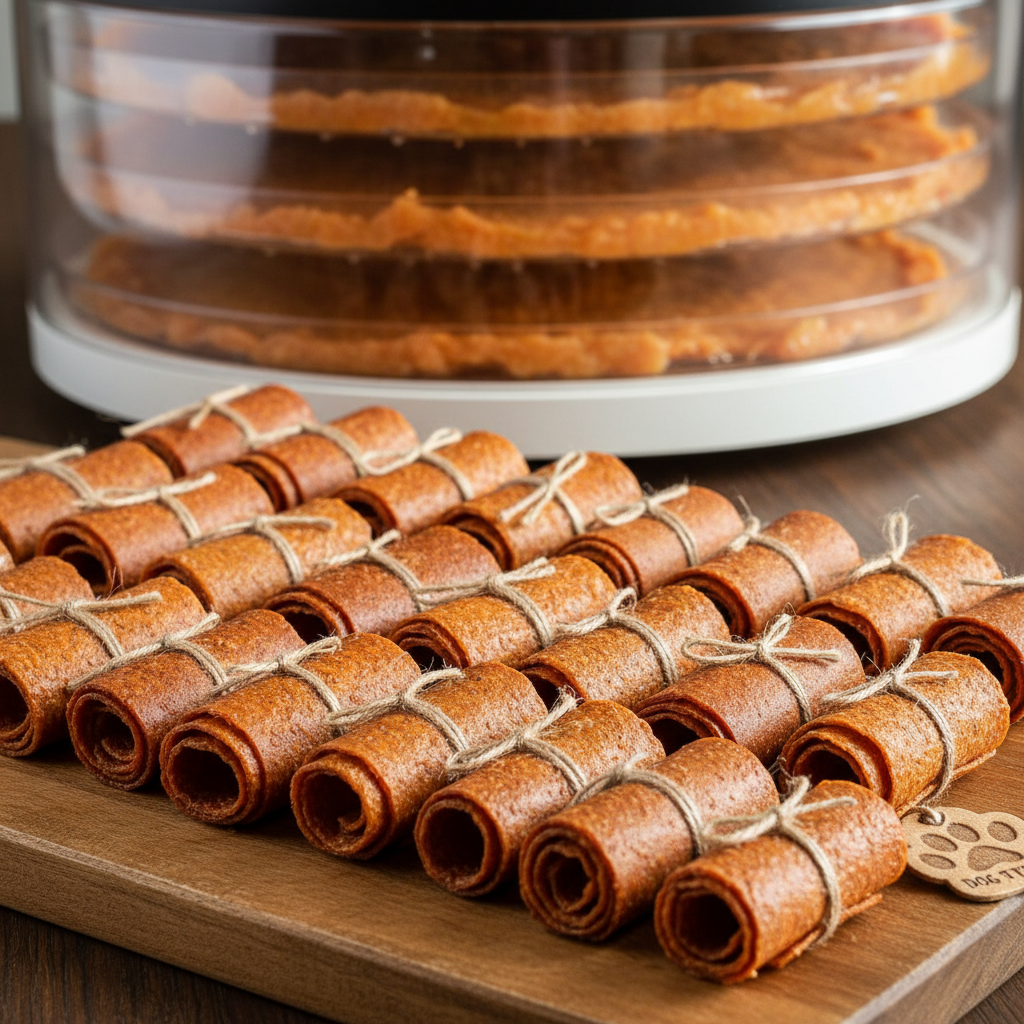
Let’s switch things up from baking to dehydrating! This method creates a chewy, long-lasting treat that’s fantastic for dental health. It’s less of a ‘biscuit’ and more of a fruit-and-veggie leather for dogs. The low, slow drying process preserves the nutrients and creates a texture that will keep your pup busy.
Ingredients:
- 2 large apples, cored
- 2 large carrots, peeled
- 1 cup of water
- Optional: 1 tablespoon of finely chopped parsley for fresh breath
Instructions:
- In a blender, combine the apples, carrots, and water. Blend until you have a completely smooth purée. If using, add the parsley and pulse to combine.
- Line your dehydrator trays with parchment paper or fruit leather sheets.
- Pour the purée onto the trays and spread it evenly to about ⅛-inch thickness.
- Dehydrate at 135°F (57°C) for 4-6 hours, or until the leather is no longer sticky and has a pliable, chewy texture.
- Once done, you can use a pizza cutter or scissors to cut the sheets into strips or bite-sized squares.
- Store in an airtight container.
Pros & Cons
| Pros | Cons |
|---|---|
| Creates a long-lasting, chewy treat | Requires a food dehydrator |
| Excellent for dental health as it encourages chewing | Takes a very long time to prepare (4-6 hours) |
| No added flours or grains | The final yield can seem small for the amount of produce used |
Verdict
For the dedicated DIY pet parent with a dehydrator, these chews are a fantastic, healthy, and engaging treat. They are perfect for keeping your dog occupied and are a great grain-free option that’s pure fruit and veggie goodness.
Conclusion
A Baker’s Guide to Perfect Pup Treats
Whipping up any of these recipes is a fantastic start, but here are a few extra tips to make your dog-baking adventures a complete success.
Choosing the Right Ingredients
- Flour: Whole wheat is a great base, but if your dog has sensitivities, try oat flour, brown rice flour, or grain-free options like coconut or chickpea flour. Avoid all-purpose white flour as it has little nutritional value.
- Apples & Carrots: Fresh is best! You can shred, grate, or purée them. Always use unsweetened applesauce, and be sure to remove all apple seeds, which are toxic to dogs.
- Add-ins: Feel free to get creative! A little bit of parsley can freshen breath, while a pinch of cinnamon adds flavor. Just be sure to research any new ingredient to ensure it’s safe for canine consumption.
- What to Avoid: Never use xylitol (an artificial sweetener), chocolate, grapes, raisins, onions, or macadamia nuts in your dog treats. When in doubt, leave it out!
Proper Storage for Homemade Treats
Since these treats have no preservatives, they won’t last as long as store-bought ones. For maximum crunchiness, store them in an airtight container at room temperature for up to a week. For longer storage, you can refrigerate them for up to three weeks or freeze them for several months.
Frequently Asked Questions
- How long do homemade apple and carrot dog biscuits last?
- Typically, they will stay fresh in an airtight container at room temperature for about one week. To extend their shelf life, you can store them in the refrigerator for 2-3 weeks or in the freezer for up to 3 months.
- Can I substitute whole wheat flour with something else?
- Absolutely! You can use other dog-safe flours like oat flour, brown rice flour, or chickpea flour. If you need a grain-free option, coconut flour or almond flour are great choices, but be aware they absorb liquid differently, so you may need to adjust the wet ingredients in the recipe.
- Are apples and carrots really good for dogs?
- Yes, in moderation! Carrots are a fantastic source of Vitamin A and are great for your dog’s dental health. Apples provide Vitamin C and fiber. Just be sure to remove the core and seeds from the apple, as the seeds contain small amounts of cyanide.
Happy Baking!
There you have it—nine delicious ways to show your dog some love through the joy of baking. Picking a recipe, mixing the dough, and watching your pup’s tail wag with anticipation is a rewarding experience like no other. So, tie on that apron, preheat that oven, and get ready to earn the official title of ‘Best Dog Chef Ever’. Your furry friend will thank you for it!